About Identity Broker
The Ivanti Identity Broker is a web application that acts as a “broker” for authentication between Ivanti Automation Management Portal, Ivanti Identity Director Web Portal and Management Portal, and their own Identity Provider: it can process authentication requests by means of external authentication endpoints.
Identity Broker concepts
Identity Consumer
An Identity Consumer is a web application (for example a Management Portal or User Portal) for which the Identity Broker handles authentication. Consumers redirected to the Identity Broker using the HTTPS protocol.
To secure communication, a Consumer identifies itself to the Identity Broker by providing an ID and shared secret. A shared secret, such as a password or a private key, is a piece of data known only to the entities involved.
Identity Providers
An Identity Provider is an endpoint that the Identity Broker uses to authenticate a user. Supported providers are:
- Identity Broker Windows Authentication Provider (part of the Identity Broker installer, also available as a separate installer)
- ADFS (Active Directory Federation Service), using your own ADFS endpoint.
- Azure AD Provider, using your Azure Active Directory
- OKTA, using your own OKTA Identity solution
- Active Directory, using your own internal Active Directory
Identity Broker Authentication sequence
When Identity Broker is used to authenticate users, the following authentication sequence is followed:
- A user browses to an Ivanti Automation or Identity Director Portal or Management Portal that is configured as an Identity Consumer.
- The portal (the Identity Consumer) redirects to browser to the Identity Broker for authentication.
- The Identity Broker redirects the browser to the Identity Provider. In this document to the OKTA Service.
- The Identity Provider (OKTA Service) authenticates the user, issues an Authentication Token, and redirects the browser back to the Identity Broker.
- Based on the Authentication Token issued by the Identity Provider, the Identity Broker issues a unified Identity Token and redirects the browser back to the portal.
- Once the portal validates the Identity Token, the requested resource (i.e. a page on the Portal) is returned to the browser.
What is OKTA?
OKTA connects any person with any application on any device.
It’s an enterprise-grade, identity management service, built for the cloud, but compatible with many on- premises applications. With OKTA, IT can manage any employee’s access to any application or device. OKTA runs in the cloud, on a secure, reliable, extensively audited platform, which integrates deeply with on-premises applications, directories, and identity management systems.
OKTA features include Provisioning, Single-Sign-On (SSO), Active Directory (AD) and LDAP integration, the centralized deprovisioning of users, multifactor authentication (MFA), mobile identity management, and flexible policies for organization security and control.
Prerequisites
- Ivanti Broker needs to be available on the internet to connect OKTA to the Ivanti Identity Broker server
- External and Internal DNS configured
- Port 443 enabled on the firewall to the Ivanti Identity Broker server
- Connection enabled to the OKTA development environment (https://dev-<number>.okta.com/)
Enabling and configuring OKTA
Link to developer OKTA website to create a test account. https://developer.okta.com/
Click on the option Create Free Account.
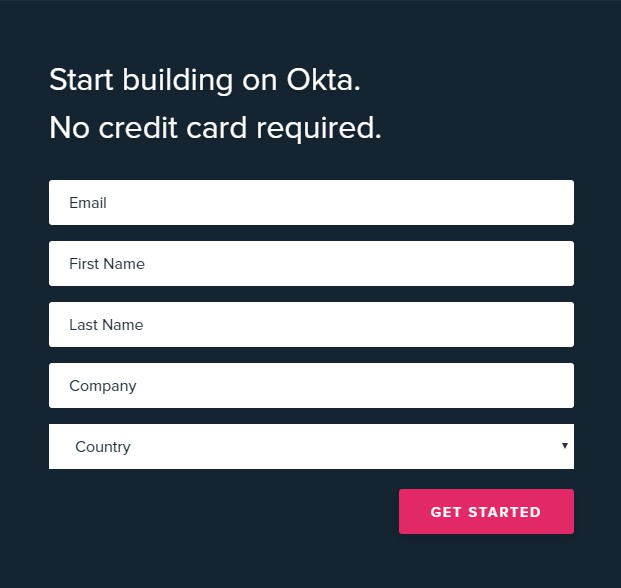
Enter your information in the field and enter Get Started. After a while you receive a mail with the information like below screenshot.
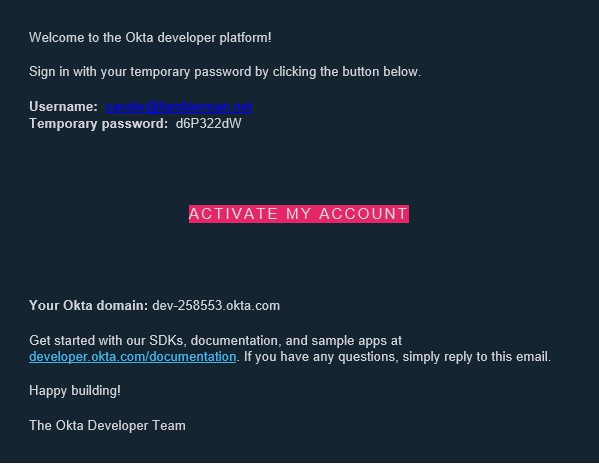
In the mail the following information is shown: Username / Temporary Password / Your OKTA domain.
Click Activate My Account to continue.
Login with the temporary password and the free OKTA account is operational.
Configuring OKTA
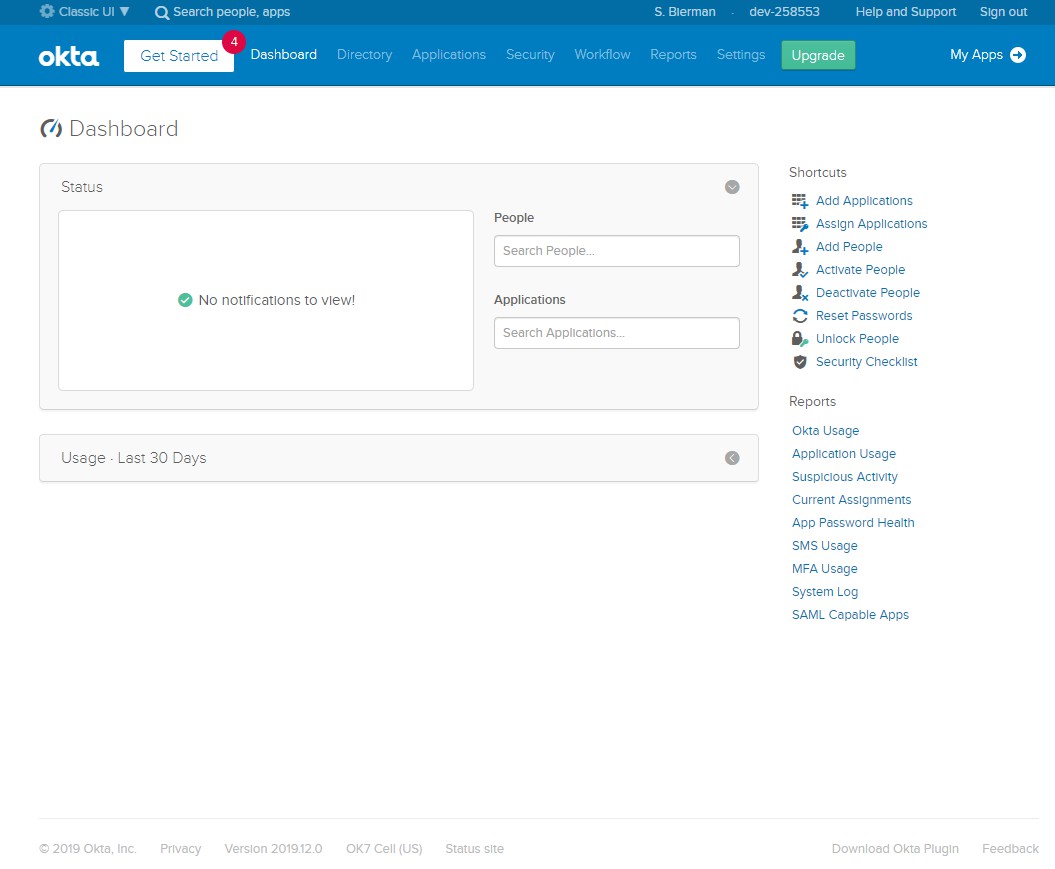
After successful activation of the OKTA development account the OKTA Development Dashboard is shown as in the screenshot below.
There are 2 options of GUI – Classic UI and Developer Console. It’s important when creating a new
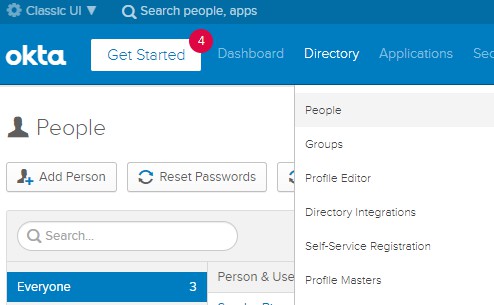
Application to use the Classic UI (see the arrow in the screenshot above). Click on Directory in the top menu and select the option People.
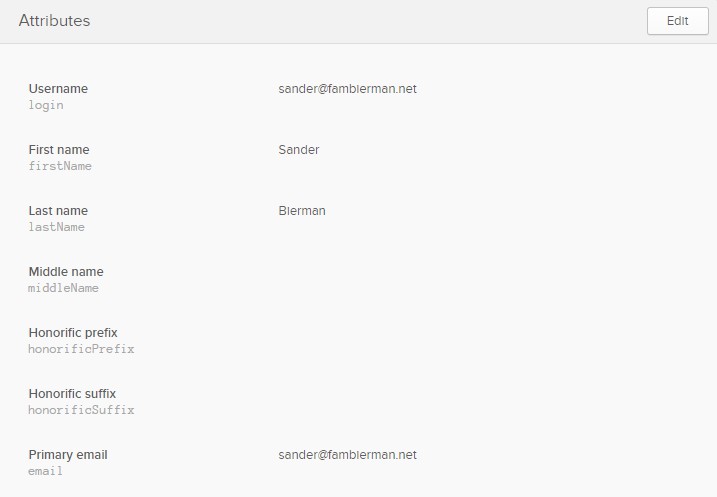
Here you can find the users added to OKTA. Currently only one user is in the list. The user in the list is the user created during the account creation.
Select the user and click on Profile tab.
Check if the Username is the mail address as entered during the OKTA account creation. The mail address is important for further use and during the logon process.

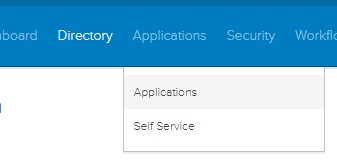
Click on the Applications tab in the top menu and Applications from the list.
Click on the button Add Application.

A list with pre created applications is shown. Because the Ivanti Identity Broker isn’t available in the list a
new application needs to be created.
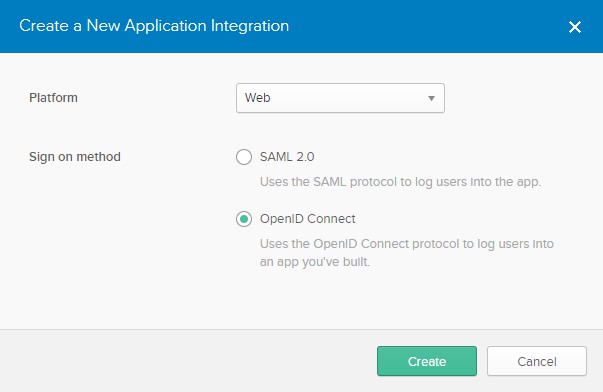
Click the Create New App button (see arrow in the screenshot below).

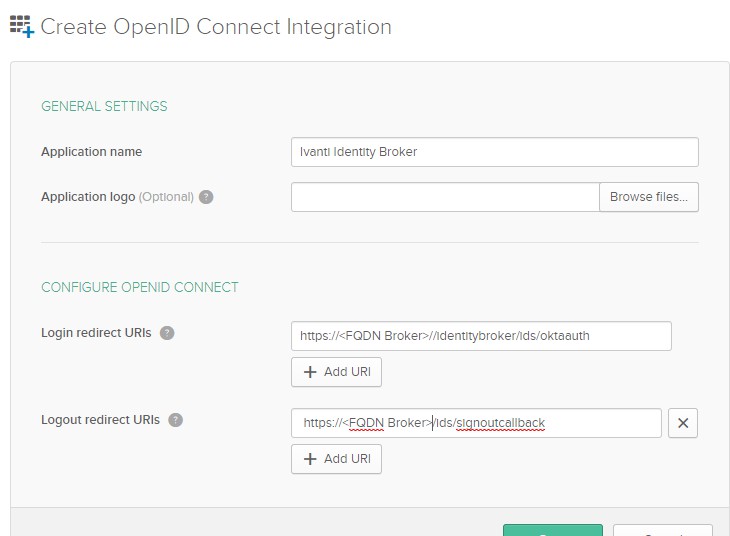
In the next window select Web as platform and OpenID as Sign on method and select Create to continue.
In the next screen click on the + Add URI behind the Logout redirect URIs and configure the settings as below.

Where FQDN Broker is the external DNS hostname of the Ivanti Broker Server and oktaauth is a unique value and used on the Ivanti Identity Broker side.
After selecting Save the application is created and the application settings are shown as in below screenshot.
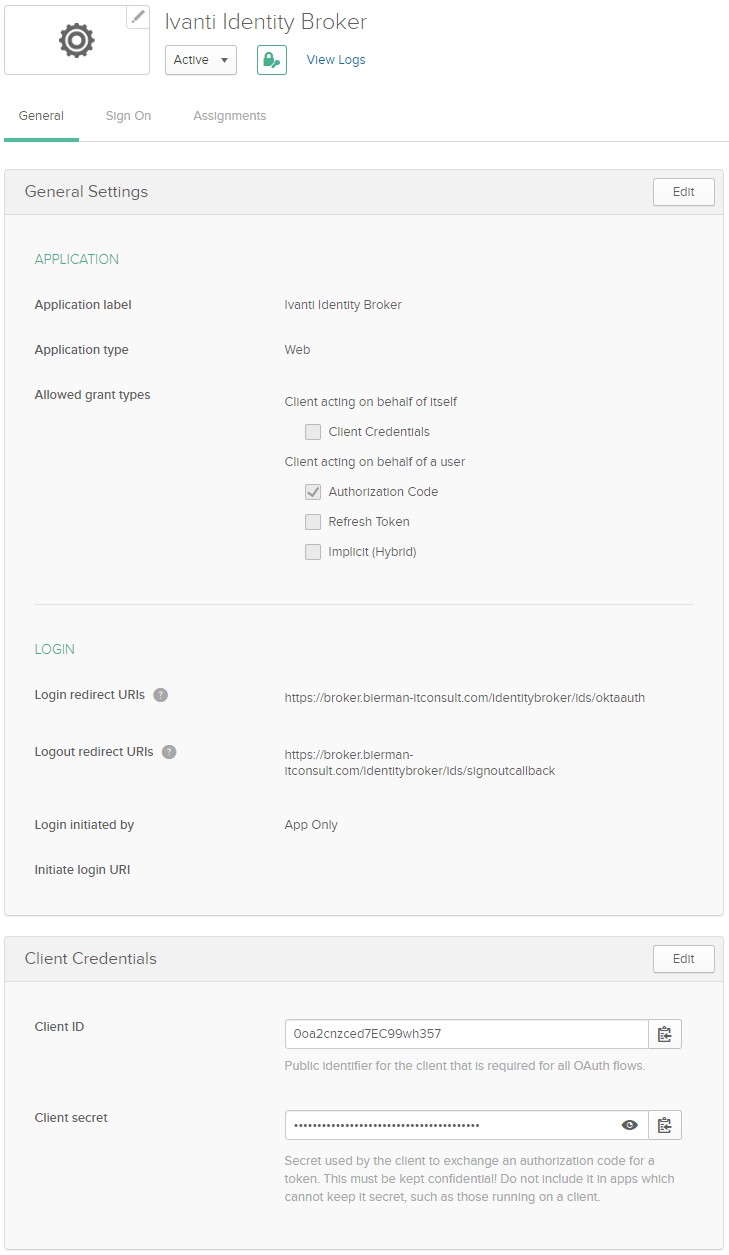
Select the options Refresh Token and Implicit (Hybrid). The Client Credentials are used when configuring the Ivanti Identity Broker Identity Provider.
Next step is installing and configuring Ivanti Identity Broker.
Install Ivanti Identity Broker
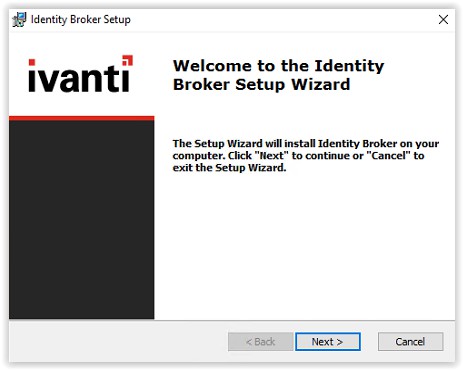
Start the installation file Identity Broker 2021.1.msi. The file can be extracted during the Ivanti Identity Director Installation.
Select Next to continue
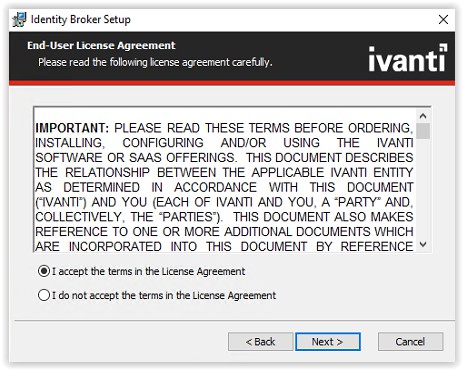
Accept the License Agreement terms and select Next to continue.
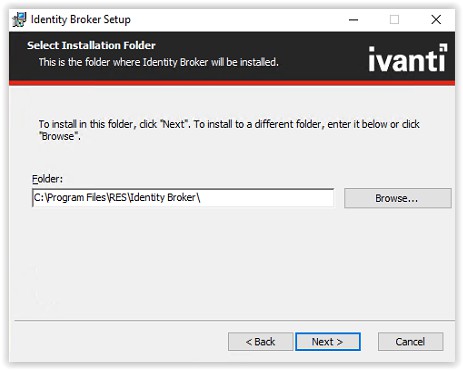
Select the installation folder and select Next to continue.
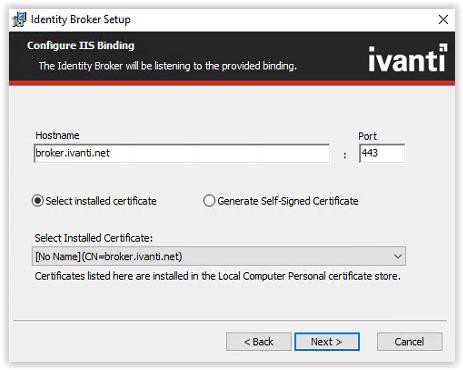
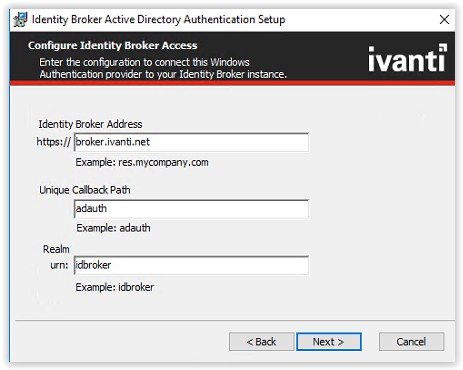
Enter the hostname used in the ADFS configuration (i.e. broker.ivanti.net). Leave the port default 443 and if a certificate is installed select the certificate from the Select Installed Certificate drop-down list.
When a certificate isn’t available and it’s not a production environment the option to use the Generate
Self-Signed Certificate is possible. Select Next to continue.
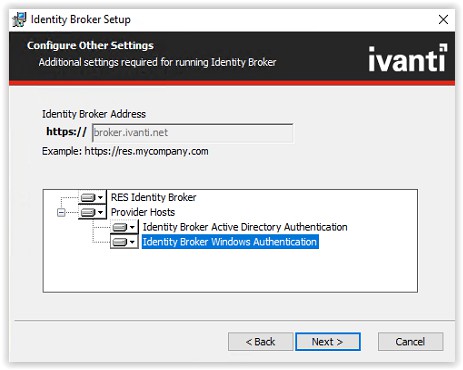
Select all the Provider Hosts to install. Click Next to continue.
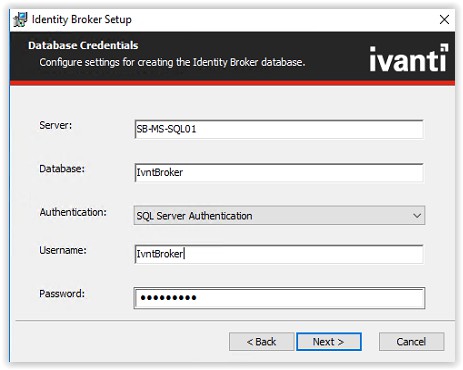
Fill the SQL Servername, Databasename, SQL Server Authentication. When a login is created in the
Microsoft SQL Management Studio for the Ivanti Identity Broker use this login. In this document a SQL account IvntBroker is created.
When finished filling the required field click Next to continue.
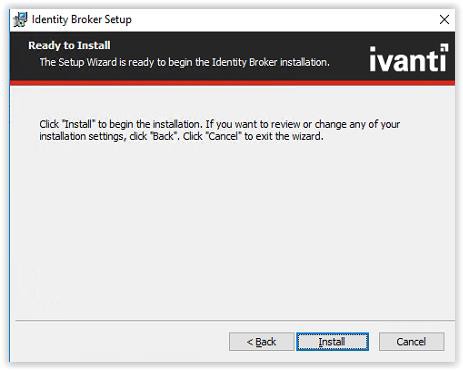
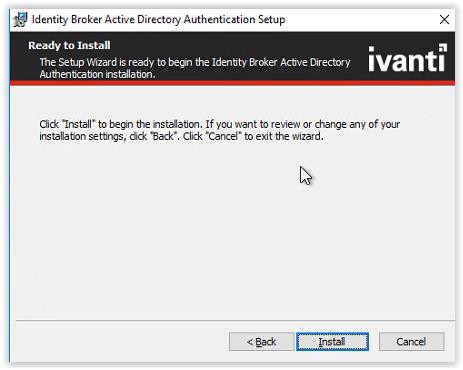
Click Install to start the installation.
After Ivanti Identity Broker installation the Ivanti Identity Broker Active Directory Authentication must be installed. Due the selection of the components the installations start automatically.
Click Next to continue.

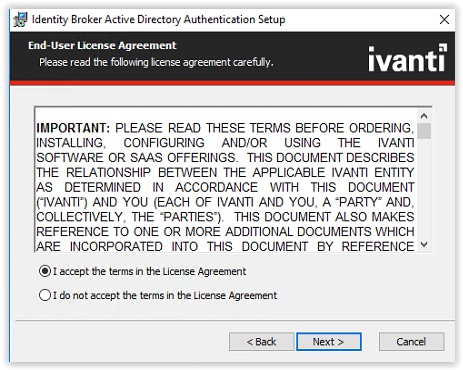
Accept the License Agreement and click Next to continue.
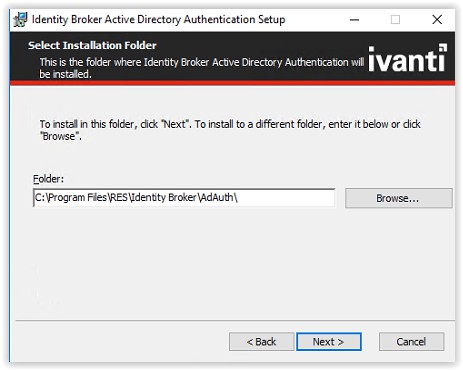
Select a folder to install the software or leave default. Click Next to continue.
In the next screen leave the settings default and click Next to continue.
And final click Install to continue.
When the installation is finished click Finish to continue.
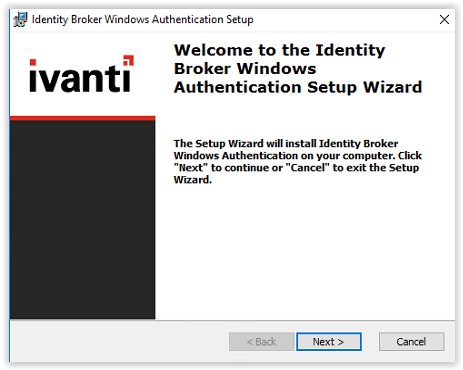
The last installation is the Ivanti Identity Broker Windows Authentication installation. Click Next to continue.
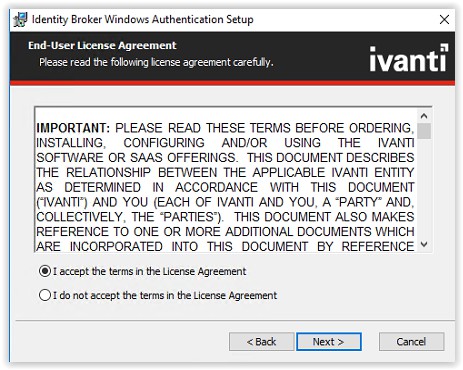
Accept the License Agreement and click Next to continue.
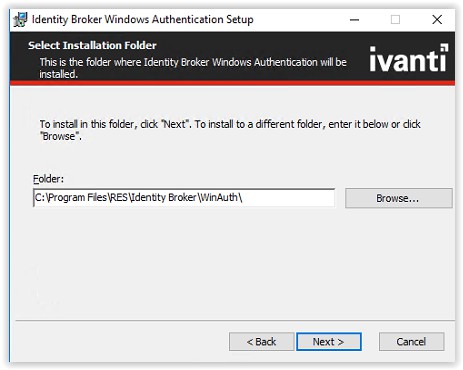
Select a folder to install the software or leave default. Click Next to continue.
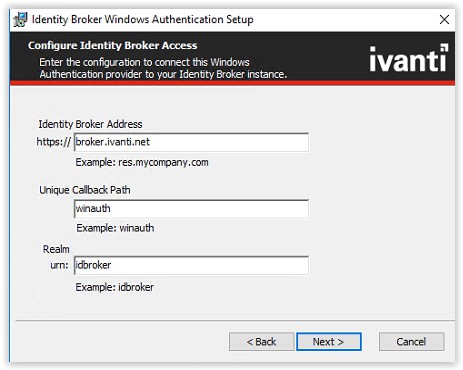
In the next screen leave the settings default and click Next to continue.
And final click Install to continue.

When the installation is finished click Finish to continue.
Click Finish again to finish the full installation of Ivanti Identity Broker.

Installation of the Ivanti Identity Broker is installed.
Configuration of Ivanti Identity Broker
Start the Ivanti Identity Broker with the shortcut on the desktop or type the FQDN in a web browser. (i.e. https://broker.ivanti.net/identitybroker)
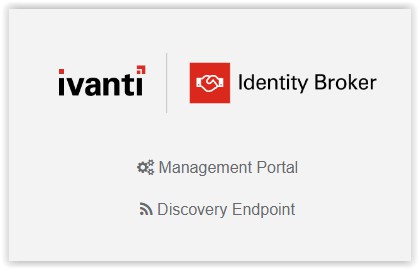
When the page is loaded the screenshot below shows two options. Select the option Management
Portal.
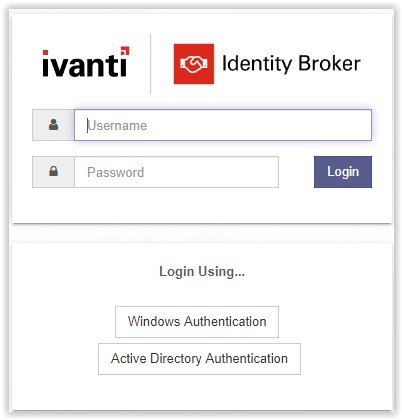
The next screenshot shows a logon screen and available Identity Providers. The default local administrator account is admin with a hard-coded password unsecured. It’s recommended to disable
the local account after adding at least one group with Management Portal Access and a Identity Provider is configured and tested.
Login with the local administrator account and click Login to continue.
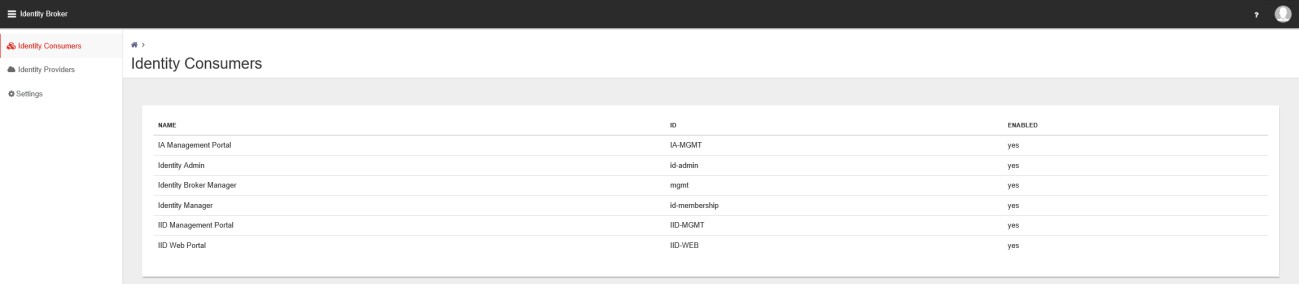
In the Management Portal 3 main menu items available.
- Identity Consumers
- Identity Providers
- Settings
An Identity Consumer is a web application (for example a Management Portal or User Portal) for which the Identity Broker handles authentication. Consumers redirect tot the Identity Broker using the HTTPS protocol.
An Identity Provider is an endpoint that the Identity Broker uses to authenticate a user. Supported
Providers are:
- Identity Broker Windows Authentication Provider (part of the Identity Broker installer, also available as separate installer)
- Active Directory Authentication (part of the Identity Broker installer, also available as separate installer)
- OKTA
- Azure Active Directory
- Active Directory Federation Service (ADFS)
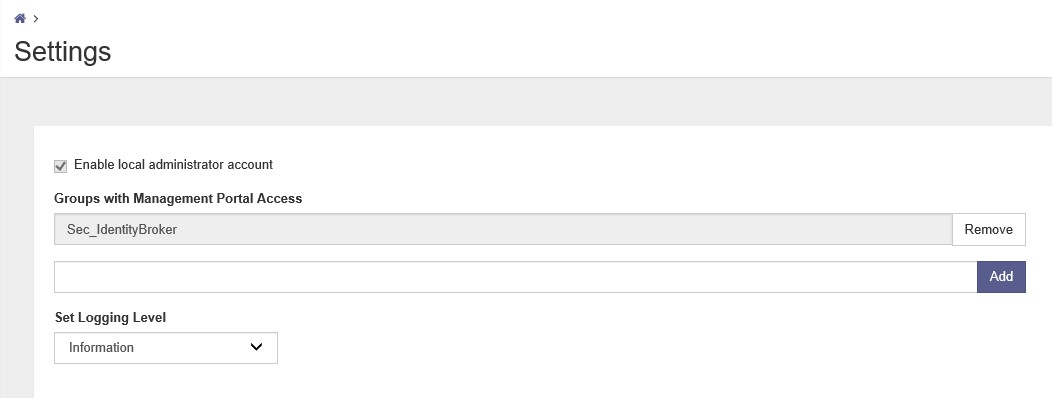
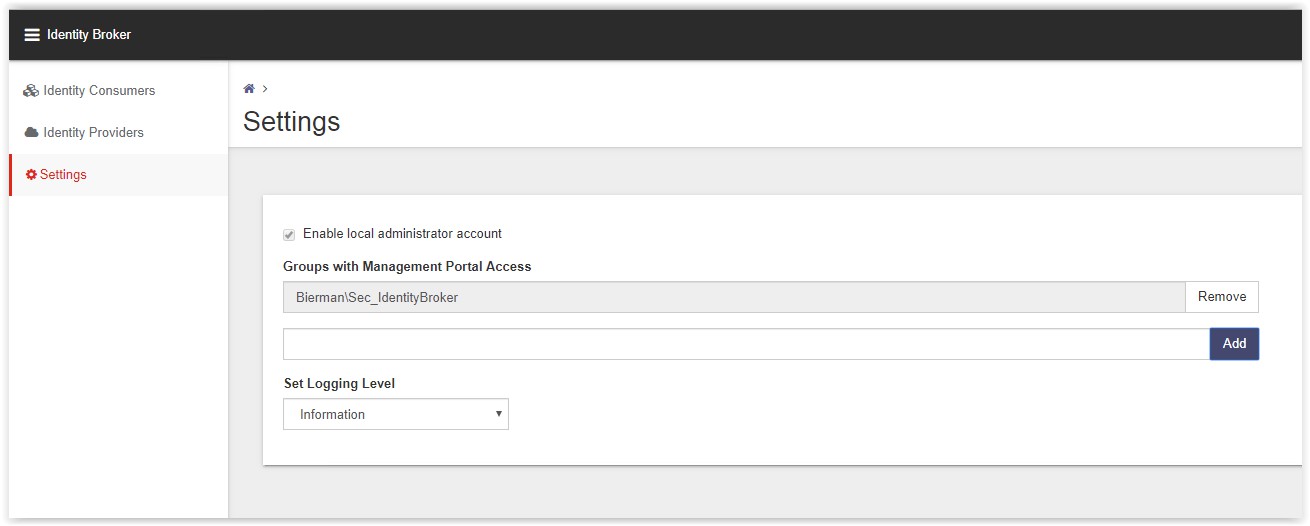
Create a Domain Group with users allowed access to the Ivanti Identity Broker Management Portal. (i.e. Sec_IdentityBroker).
Go to the Settings option and add the new created Domain Group to the field Groups with
Management Portal Access.
Note: Because Identity Broker has no direct connection to Active Directory, groups cannot be validated when adding them.
Click Add to add the Domain Group and Save in the bottom to store the changed configuration.
Note: don’t add the domainname in front of the Security Group.
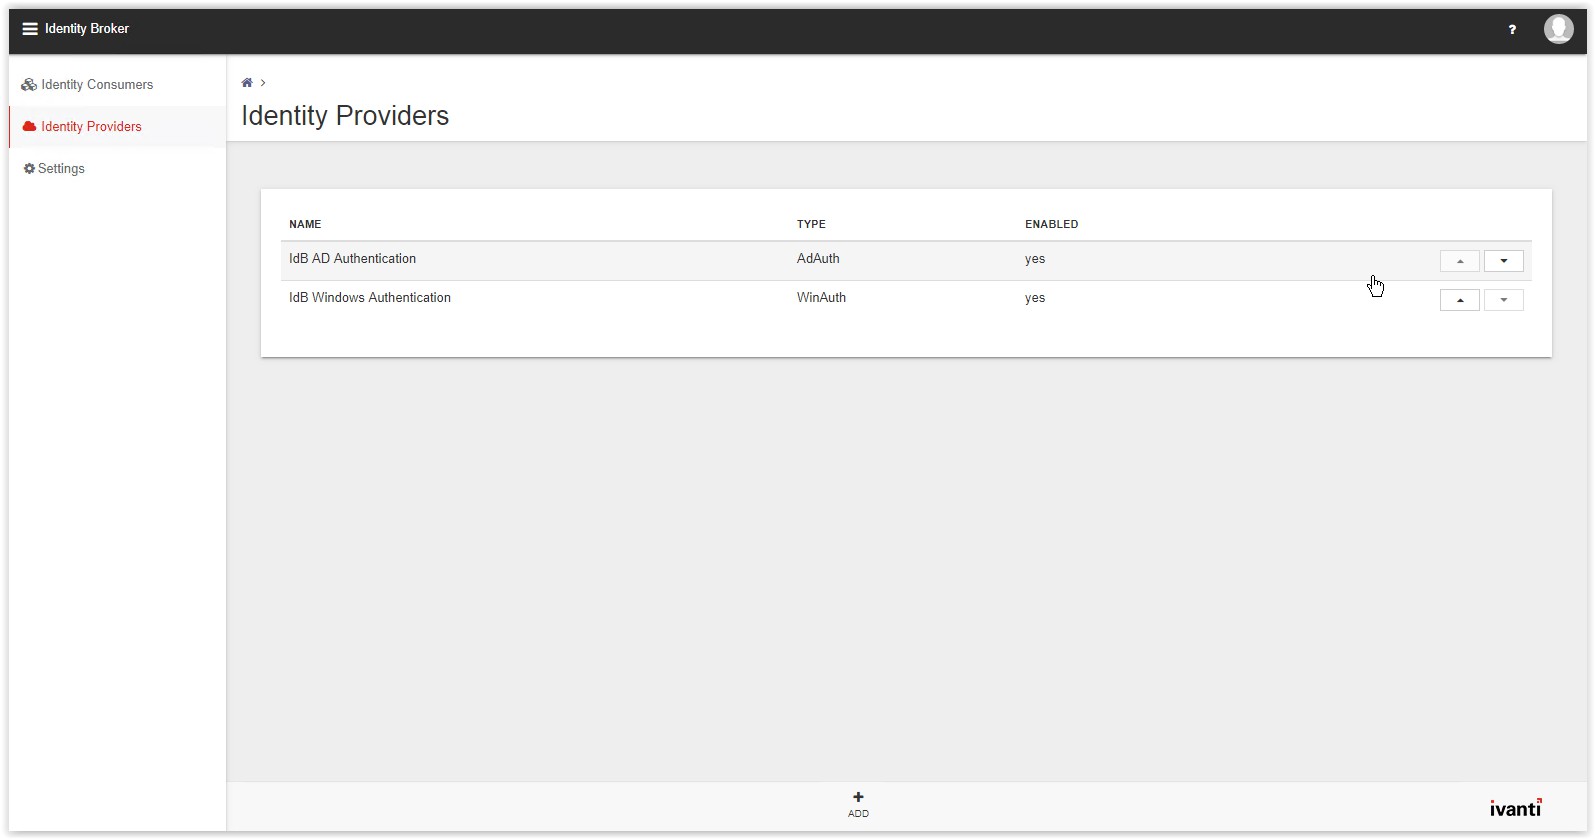
Go to the Identity Providers to create the OKTA Provider. In the list the AD Authentication and Windows
Authentication are already created by the installers during the installation. Click Add on the bottom of the page (see arrow).
The New Provider page appears. Select the option Active Directory Federation Services from the Type
drop-down list.
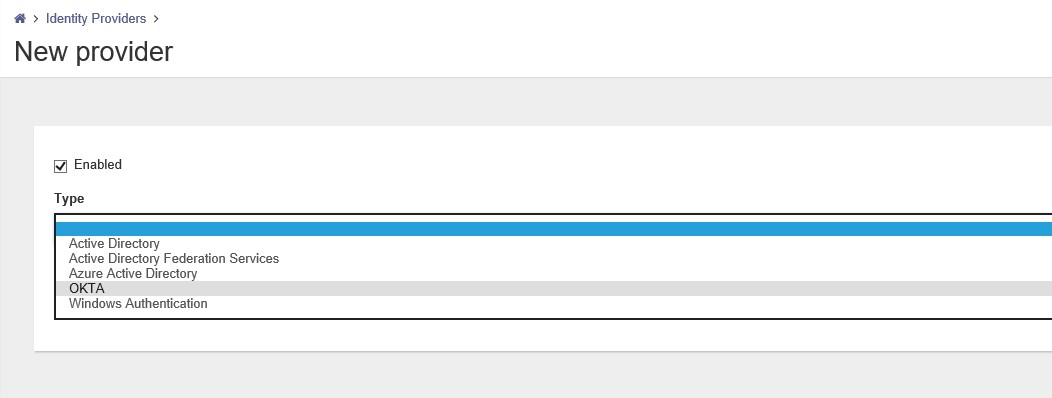
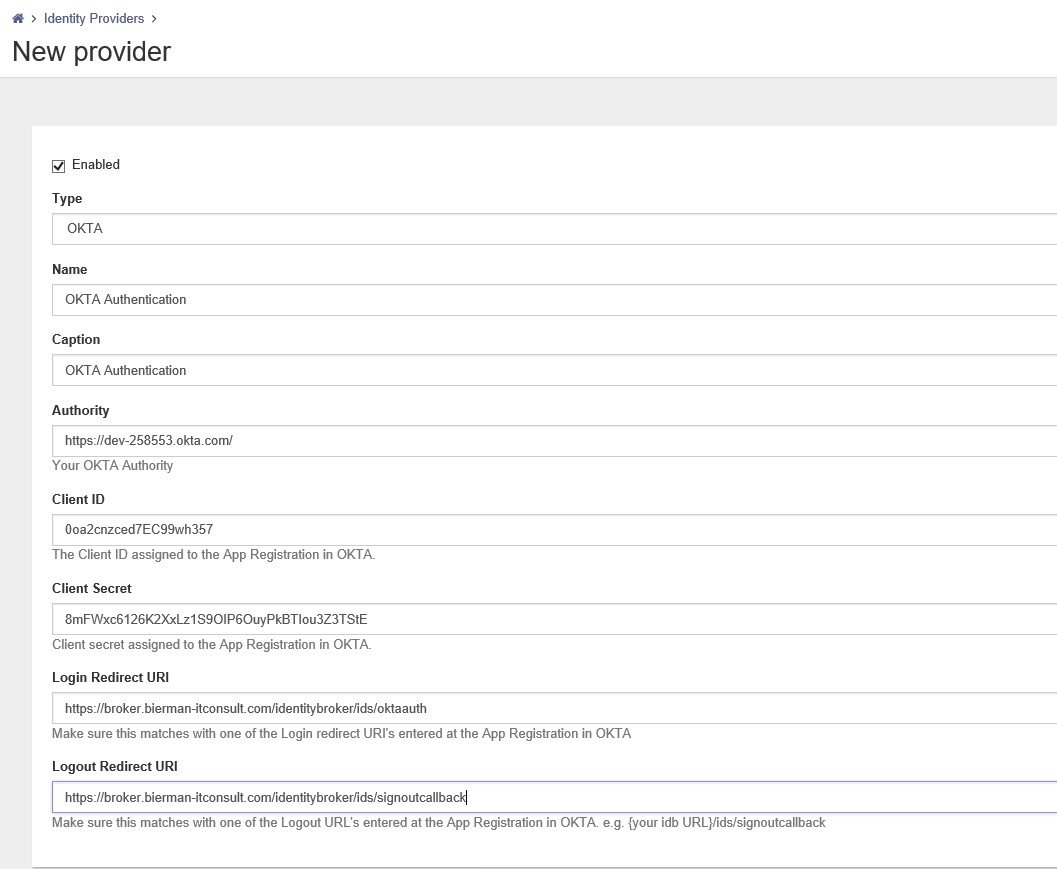
After the template is loaded the page shows a lot of fields to fill.
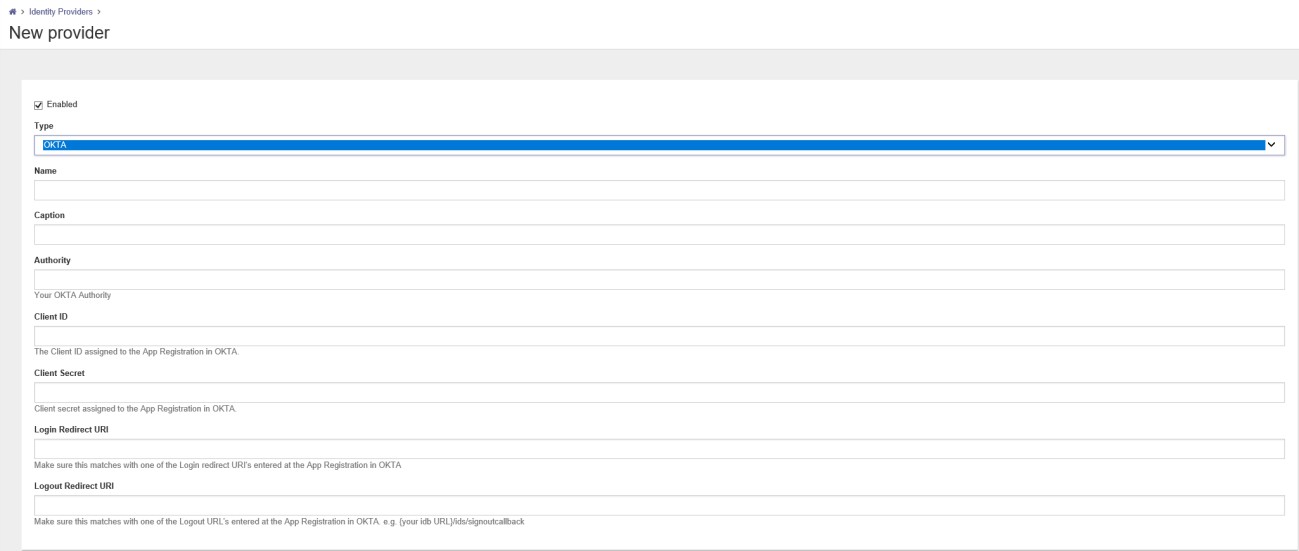
In the Name field type a name (i.e. OKTA Authentication). In the Caption field enter a name which is shown on the logon screen. Copy/paste the Name field to use the Name also in the Caption field.
In the Authority field we copy/paste the OKTA domain from the mail received from OKTA when creating a development account (i.e. https://dev-258553.okta.com/).
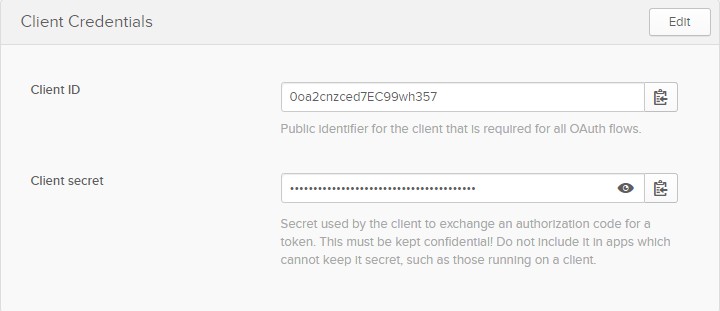
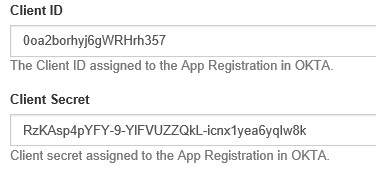
After creating the OKTA application a Client ID and Client Secret were created. Copy/Paste the information from the OKTA application in the correct fields.
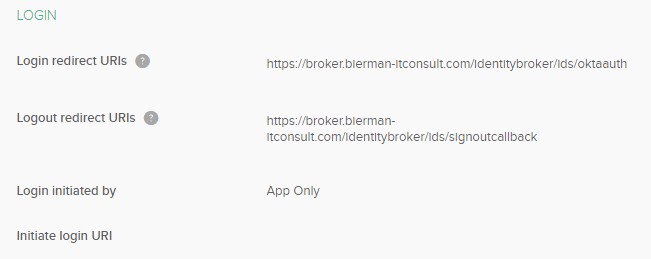
Copy and Paste the Login Redirect URI and Logout Redirect URI from the OKTA application in the last two fields.
After configuring all fields in the New Provider configuration the settings look like next screenshot.

Click on Save to store the settings.
Next step is going back to the OKTA Application created and click Edit on the General window. Select all the options in the Allow grant types as shown in screenshot below.
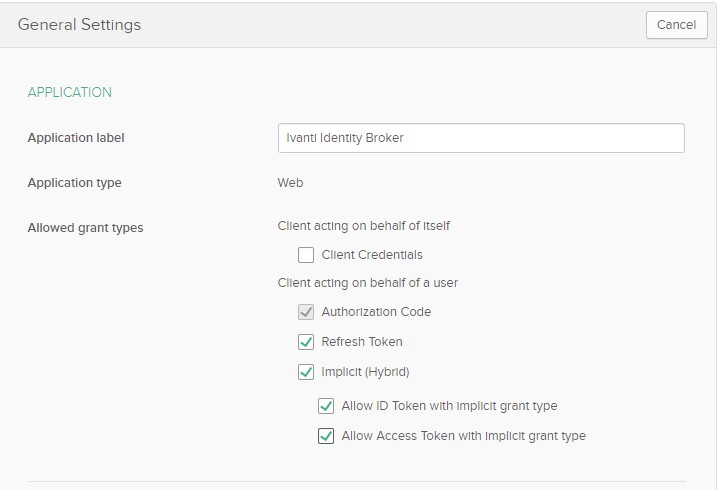
And click on the Save button to store the settings.
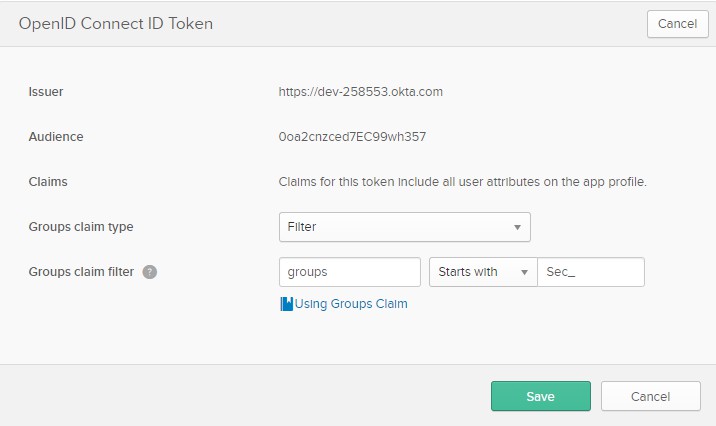
Click on the tab Sign On and click the Edit button in the OpenID Connect ID Token. The group name added to the Ivanti Identity Broker Management starts in my example with Sec_. Add this value to last field in the Groups claim filter. And click Save to store the settings.
Click on the Assignment tab to assign users to the application. Because only one user exists add this user to the Application. When creating more users, you can create a group and add the users to the group
and assign the group to the Application.
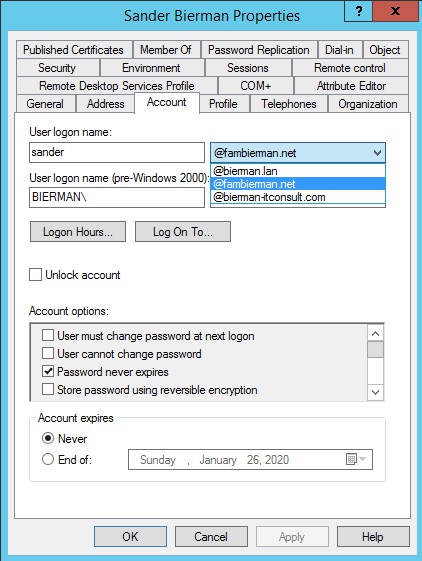
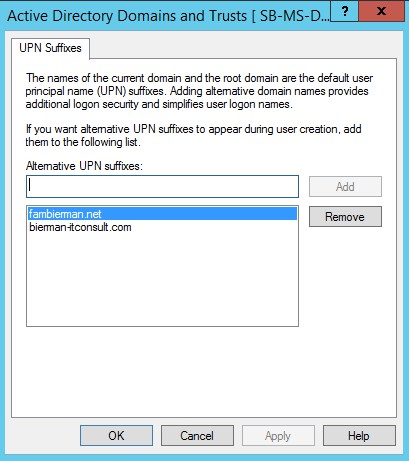
Last step in this process is to make sure the user in OKTA and in Active Directory have the same User Logon Name. If the hostname doesn’t exist as UPN in Active Directory Account tab the UPN suffix needs to be added.
On a server with the Active Directory tools installed open Active Directory Domains and Trusts. Right mouse click on Active Directory Domains and Trusts and select the option Properties from the menu. Add the UPN suffix to the list with suffixes and click OK.
Go to the specific user in Active Directory Users and Computers and open the user settings for the user also used in OKTA.
Click on the Account tab and select the correct UPN suffix from the list.

Click OK to store the settings.
Testing the OKTA – Ivanti Identity Broker integration
Log out of the Ivanti Identity Broker Management Portal. Leave the Local Admin setting enabled.
In the logon window of the Ivanti Identity Broker we can use the local admin account but also the OKTA Identity Provider is added.

Click on the OKTA Authentication link and you’re forwarded to the OKTA logon screen.
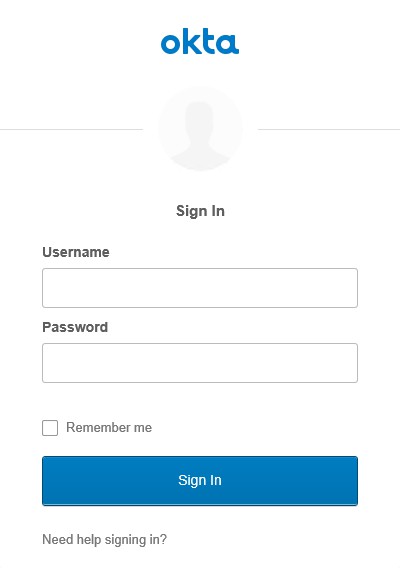
Login with the credentials and click on Sign In. When the credentials are correct the Ivanti Management Portal is shown.
The OKTA integration with the Ivanti Identity Broker Management Portal is succeeded.