
About a year and a half ago I bought the Unifi UDM-PRO (also known as DreamMachine Pro) and I like the hardware. I’m fully aware the UDM-PRO can have a lot of improvements but with VLANs, Remote User VPN, Site-to-Site VPN, Firewall, DPI and Threat Management the UDM-PRO delivers a lot of functionality out-of-the-box.
With a nice lab in the basement I started with building VLANs connected to a VMware environment and a site-to-site VPN to a datacenter in Amsterdam for remote backup.
But with both my daughters on college my next step was providing a Remote User VPN which they can use to upload data or connect to (virtual) servers when needed.
After building and configuring a Citrix Desktop with Duo Security MFA my plan was to use the Duo Security MFA also for the Unifi UDM-PRO Remote User VPN. This blog describes all the settings/configurations and needs to create a Remote User VPN which uses the Duo Security VPN.
Steps needed for building the MFA Remote VPN connection:”
- External DNS A or CNAME value (i.e. vpn.automatedvision.info);
- Create a Duo Application on the Duo Security website;
- Install and configure Duo Authentication Proxy;
- Configure Radius Server on UDM(-PRO);
- Configure Remote User VPN on UDM9-PRO);
- Install and configure Windows Network Policy Server (later in the blog I will explain why I used NPS);
- Configuration VPN client on a Windows desktop and Mac/Apple desktop.
Requirements and prerequisites:
- A domain registration;
- An Duo Security account (only MFA, Access and Beyond editions (paid));
- (Virtual) hardware for Duo Authentication Proxy and Windows servers (AD and NPS);
- Unifi DreamMachine (UDM) or DreamMachine Pro (UDM-PRO);
- Free IP Addresses for the servers;
- Security Keys/Shared Keys for Radius and VPN;
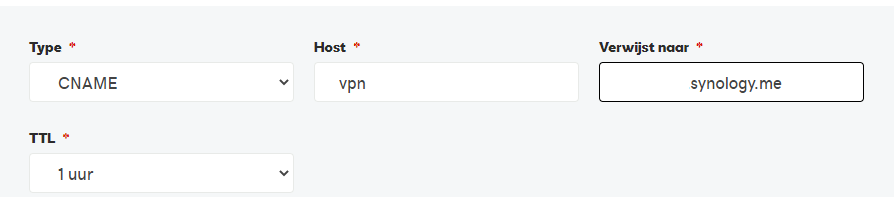
Step 1 – External DNS entry
Configure a DNS A or CNAME value in the external DNS. I use a Synology dynamic DNS as CNAME entry.
Step 2 – Create a Duo Security Radius application
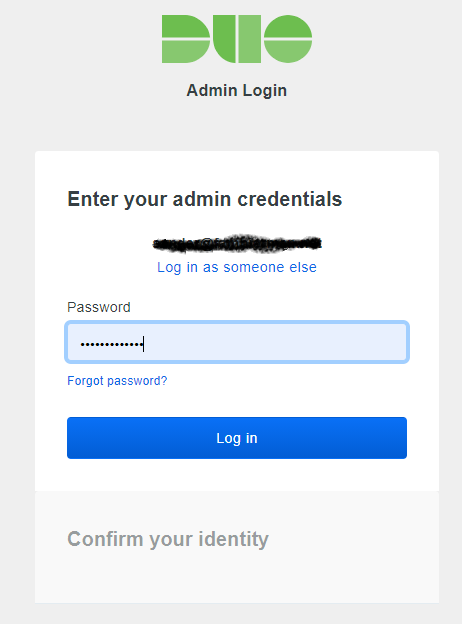
Login to the Admin Portal by selecting the Admin Login on the top of the duo.com page.
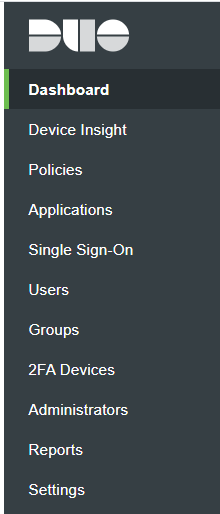
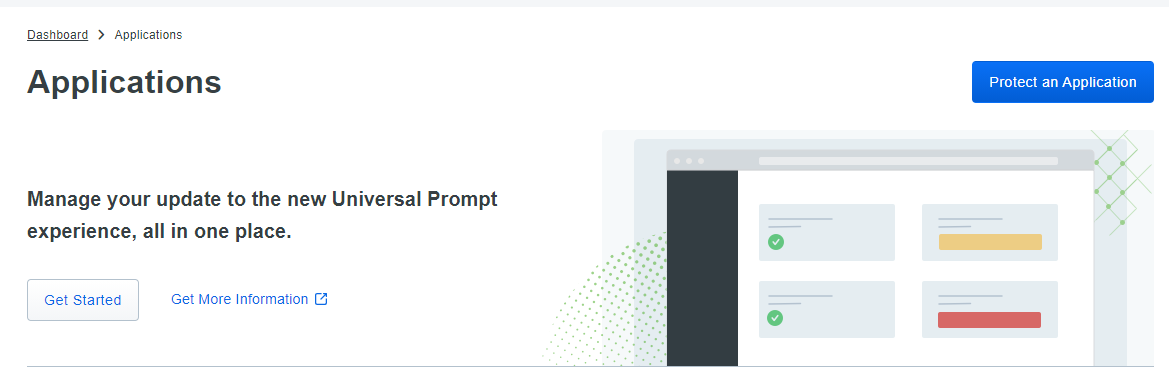
After login select the option Applications from the menu.
Select the option Protect an Application.
Enter Radius in the search field and select the option Radius by selecting Protect (see arrow in below screenshot).
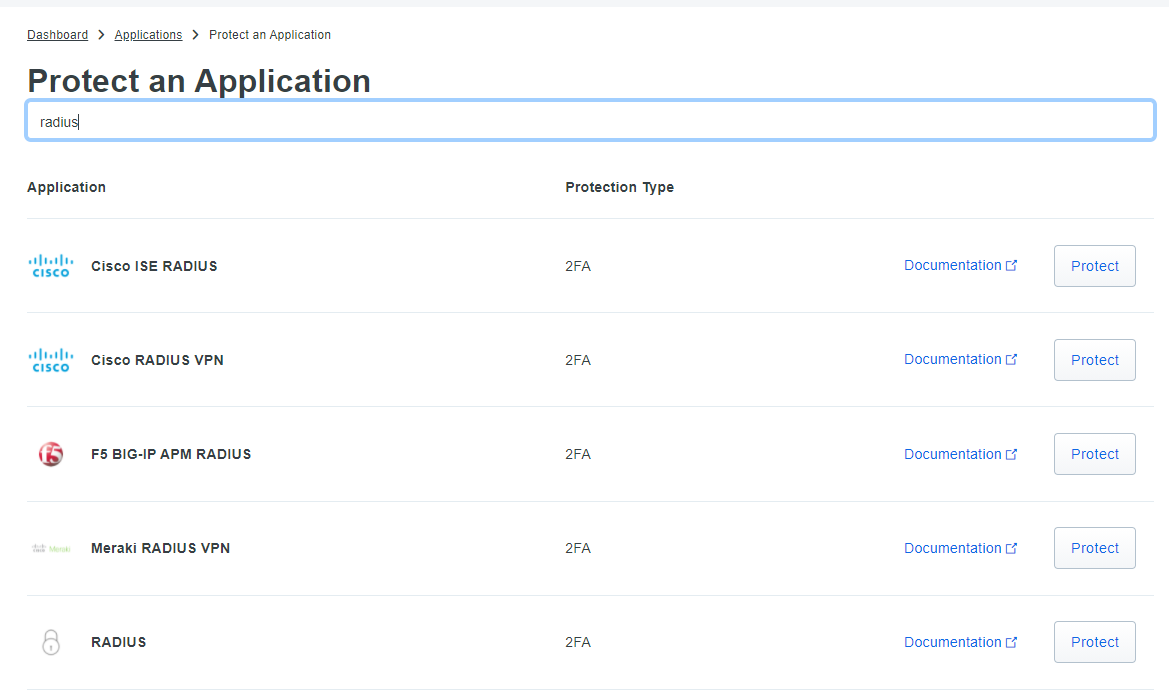
The options Integration, Security Key and API Hostname are used later when creating the Duo Authentication Proxy configuration file.
Scroll down till Settings and give the Application a Name. Be aware this name will be shown when a user receives a push message. Leave all other settings default and scroll down to the bottom and select Save.
The Radius application is created and ready for use.
Step 3 – Install and configure Duo Authentication Proxy
How to install the Duo Authentication Proxy for Windows or Linux can be found here. In this blog I installed 2 Duo Authentication Proxy servers on 2 Ubuntu Linx servers. For more information how to configure the Duo Authentication Proxy server on Windows use this link.
When installing the Duo Authentication Proxy on a Linux server the authentication proxy configuration file can be found in /opt/duoauthproxy/conf/ with filename authproxy.cfg.
Editing the config file needs sudo. Enter the following command to edit the config file.
sudo nano ./opt/duoauthproxy/conf/authproxy.cfg
Below an example how to build the configuration file:
; Complete documentation about the Duo Auth Proxy can be found here:
; https://duo.com/docs/authproxy_reference
; NOTE: After any changes are made to this file the Duo Authentication Proxy
; must be restarted for those changes to take effect.
; MAIN: Include this section to specify global configuration options.

[main]
debug=true
log_max_files=10
log_max_size=20971520
test_connectivity_on_startup=true

[duo_only_client]
; SERVERS: Include one or more of the following configuration sections.
; To configure more than one server configuration of the same type, append a
; number to the section name (e.g. radius_server_auto1, radius_server_auto2)

[ad_client]
host=192.168.100.2
host_2=192.168.100.3
service_account_username=srv_duo
service_account_password=<AD Service Account Password>
search_dn=DC=demokit,DC=lan
security_group_dn=CN=VPN_Users,OU=Groups,DC=demokit,DC=lan

[radius_client]
host=192.168.100.1
host_2=192.168.100.2
secret=<Security-Key>
port=1812

[radius_server_auto]
ikey=<Duo Radius Application Integration Key>
skey=<Duo Radius Application Security Key>
api_host=<Duo Radius Application API hostname>
radius_ip_1=192.168.100.1
radius_secret_1=<Security-Key>
radius_ip_2=171.16.18.21
radius_secret_2=<Security-Key>
client=radius_client
port=1812
failmode=safe
exempt_username_1=mon_duo
Main section
The [main] section is optional. It can be used to specify some global options. In this example the configuration for debugging is added.
For more information about the main section check this page.
AD_Client section
Add an [ad_client] section if you’d like to use an Active Directory domain controller (DC) or LDAP-based directory server to perform primary authentication.
In this blog I configured two AD Controllers, AD Service Account and Password, Search DN and Security Group DN. This option is not used based on the security. The Duo Authentication Proxy with section AD Client can’t use MSCHAP-v2 security.
To prevent this I installed the Network Policy Server on a Windows Server and used the section [radius_client] which connects to the Network Policy Server(s). The installation and configuration of Network Policy Server (NPS) is discussed later in the blog.
This is the primary authentication for LDAP Authentication.
For more information about the AD Client section check this page.
Radius_client section
Use [radius_client] when the Authentication Proxy contacts another RADIUS server (like Microsoft NPS or Cisco ACS) to perform primary authentication.
In this section two NPS servers are added. The configuration is described later in the blog.
For more information about the Radius Client section check this page.
Radius_server_auto section
The user’s device and factor is automatically selected for each login. This mode is compatible with almost all systems that support RADIUS authentication, including mechanisms like EAP. MSCHAP-v2 is supported when the client mechanism is radius_client (for automatic push or call only).
- If the password is encrypted with PAP: users may append a factor name or passcode after their existing passwords.
- If there is no Duo factor appended or the password is encrypted with EAP: the factor is selected based on Duo’s recommendation or the administrator’s preferences.
- If the password was encrypted with PAP and the administrator enables passcodes: the user may be prompted for a passcode with a RADIUS challenge. Otherwise, no RADIUS challenges are issued and only out-of-band factors (as opposed to token or passcode based authentication) are supported.
In this blog I added two radius clients:
- Gateway IP of the Unifi UDM(-PRO). Because the Duo Authentication Proxy is in a VLAN I used the VLAN Gateway IP.
- SNIP Address of the Citrix NetScaler (ADC). SNIP Address is only used when Citrix NetScaler is in HA mode. When not in HA Mode the NetScaler IP Address is used.
The client used is the section radius_client. In the configuration an account mon_duo is created in Active Directory. This account (option exempt_username) is used for the Citrix NetScaler (ADC) monitor used for the Radius Load Balancer server. This will be discussed in another blog.
For more information about the Radius Server Auto section check this page.
When the configuration file is created save the file and start the service.
sudo /opt/duoauthproxy/bin/authproxyctl start
When changing the config file restart the service
sudo /opt/duoauthproxy/bin/authproxyctl restart
Check the status of the service
sudo /opt/duoauthproxy/bin/authproxyctl status
During an authentication process it’s possible to monitor the logging. Use the command below.
sudo tail -f /opt/duoauthproxy/log/authproxy.log
Step 4 – Configuration of Radius Server on Unifi UDM(-PRO)
Login to the UDM(-PRO). There are currently 2 User Interfaces and I will describe both in this blog.
Old User Interface
After login select Network and from the Dashboard select Settings (wheel) and select the option Profiles.
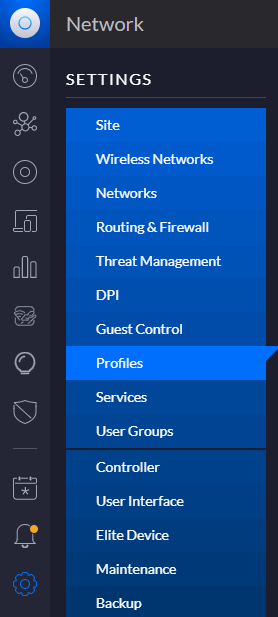
Select the option + Create new radius profile and enter a name at the Profile Name. In the Radius Auth Server enter the IP address of the Duo Authentication Proxy. Leave the port default 1812 if this is not changed in the Radius_Server_Auto section of the Duo Authentication Proxy configuration file.
And enter the Security Key added in the Radius_Server_Auto section.
In the example below I added 2 Duo Authentication Proxy servers for HA.

Save the setting and the Radius Profile is created.
New User Interface
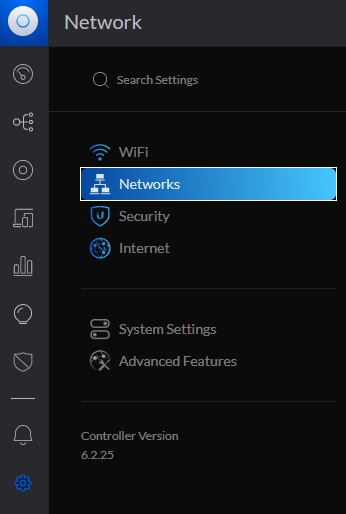
After login select Network and from the Dashboard select Settings (wheel) and select the option Advanced Features.
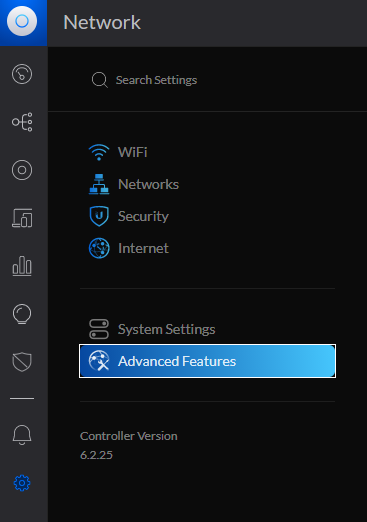
Scroll down till RADIUS and select Add RADIUS Profile
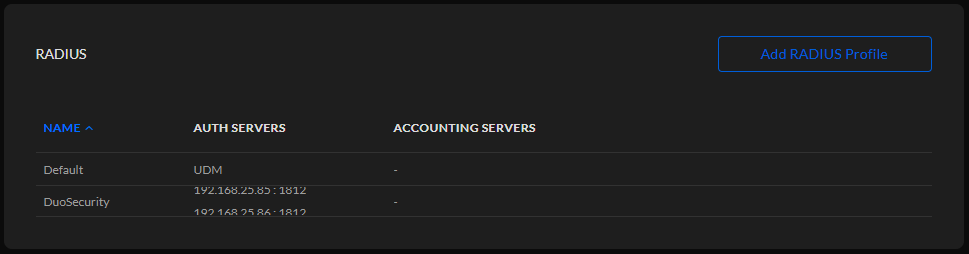
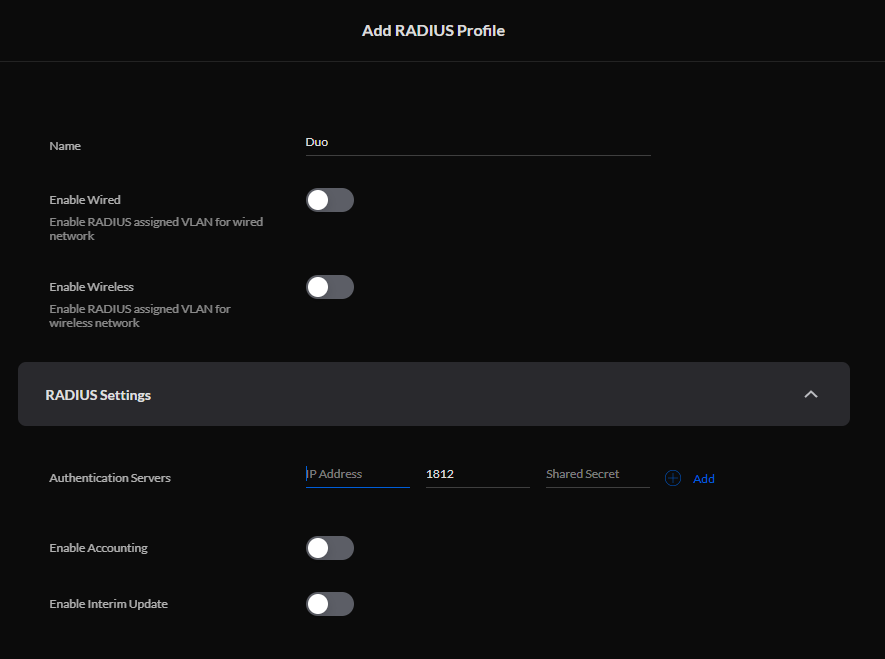
Enter a name for the RADIUS Profile and expand the RADIUS Settings and add the Duo Authentication Proxy servers. Leave all other settings default.
Select Apply Changes to store the RADIUS Profile.
Step 5 – Configure the Remote User VPN
Old User Interface
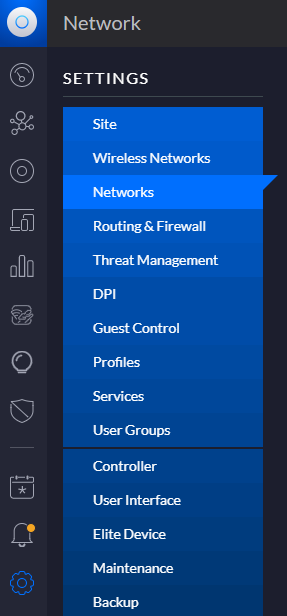
After login select Network and from the Dashboard select Settings (wheel) and select the option Networks.
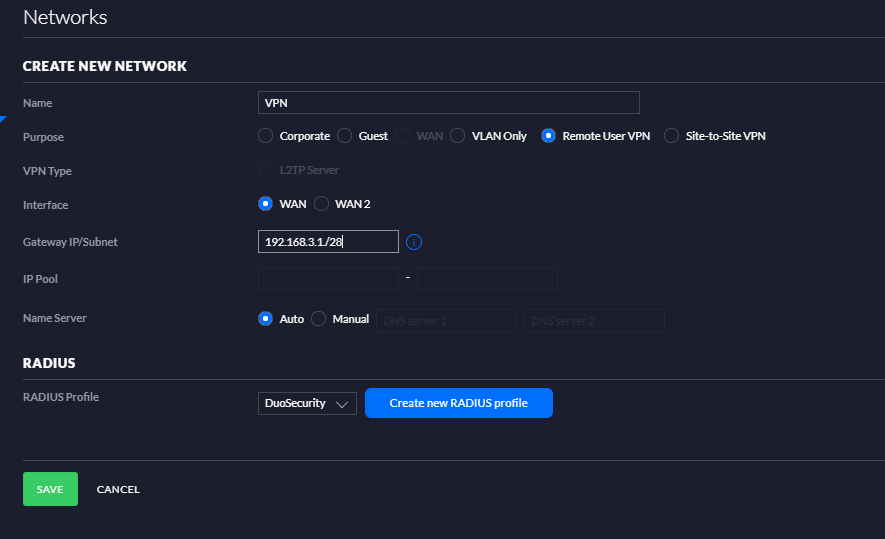
Select the option + Create New Network and enter a name at the Name field. Select Remote User VPN as purpose.
Select the WAN interface and enter a Gateway IP and a subnet depending on the amount of IP addresses delivered (use https://www.subnet-calculator.com/ to calculate the subnet). In this example I defined 28 for 14 hosts in the subnet.
Example – 192.168.3.1/28
Select Auto in the Name Server and select the Duo Security Radius profile from the dropdown list.
Select Save to store the new network.
When the Network is store open the new created network and check if the MS-CHAPv2 is selected.

New User Interface
Unfortunately it’s not possible to create a Remote User VPN through the new User Interface.
After login select Network and from the Dashboard select Settings (wheel) and select the option Networks.
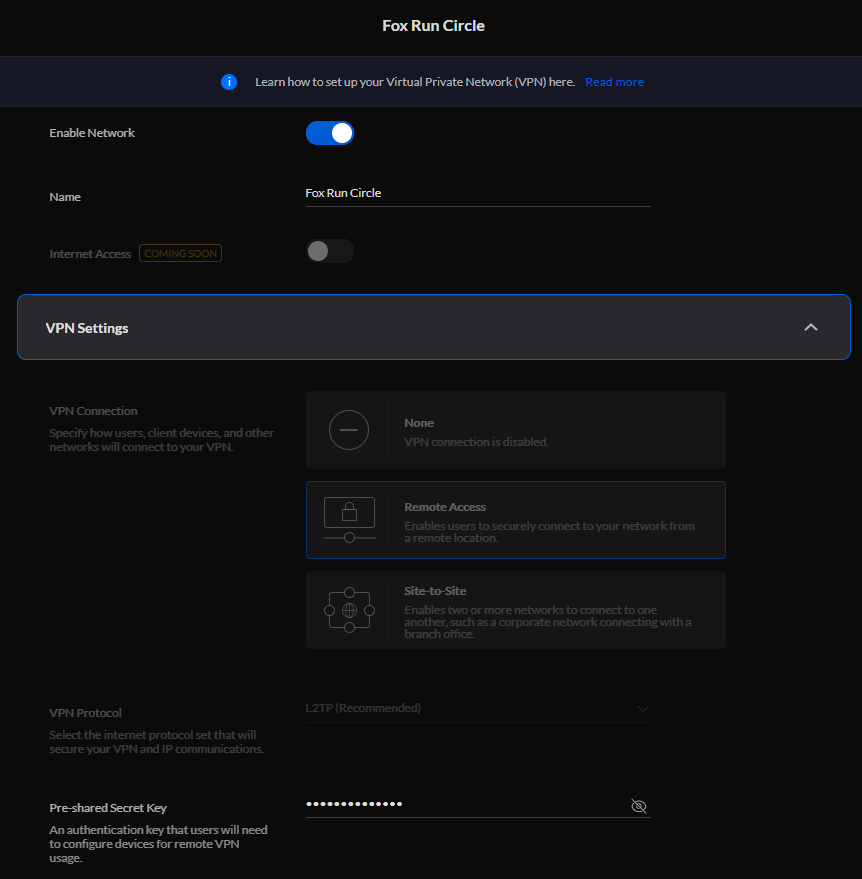
Select the option Add New Network.

In the VPN Settings the option Remote Access is not available. But when you open the Remote User VPN created in the Old Interface you see an additional Remote Access option in the VPN Settings.
I created a case at Unifi for more information.

The settings on the Unifi UDM(-PRO) are configured and ready.
Step 5 – Installation and configuration of Network Policy Server (NPS) on Windows Server
In this blog I installed 2 NPS servers on 2 domain controllers. This option is not required when MS-CHAPv2 is not prohibit. But I think unsecured passwords (PAP) are not preferred.
Installation of Network Policy Server (NPS)
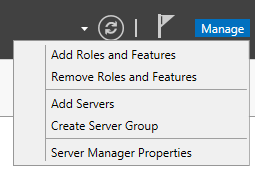
On the server open the Server Manager and select Manage and Add Roles and Features.
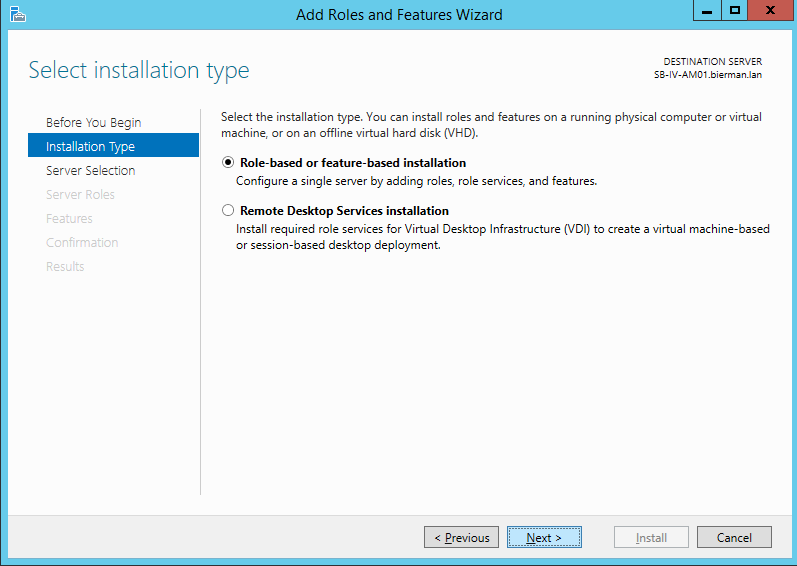
Select Next in the Welcome screen.

In the next screen make sure the option Role-based or feature-based installation is selected and select Next to continue.
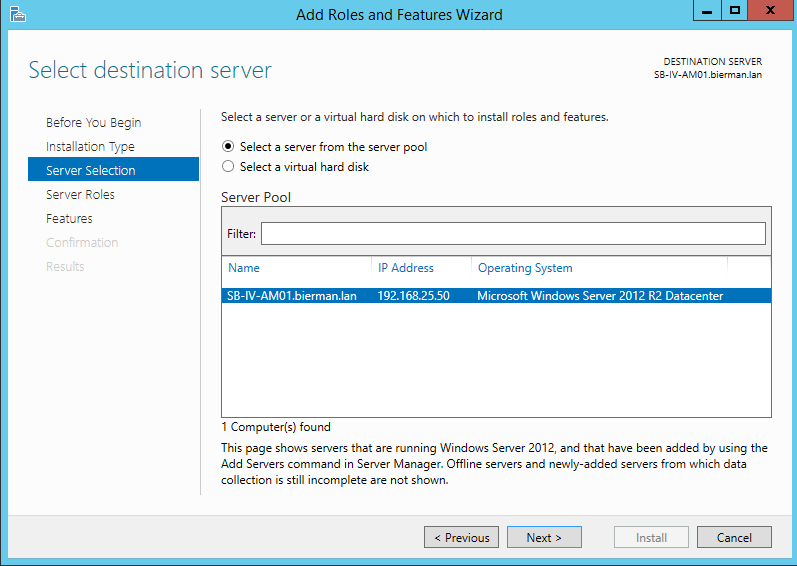
In the next window make sure the local server is selected and select Next to continue.
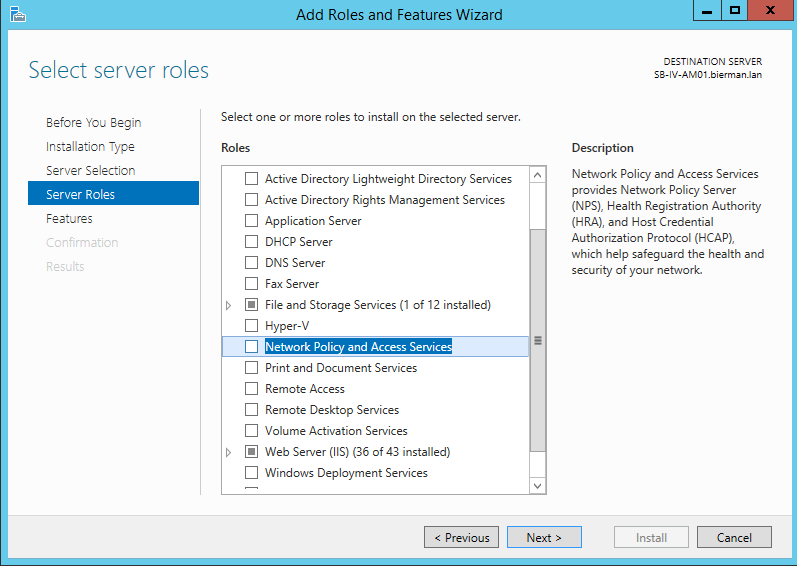
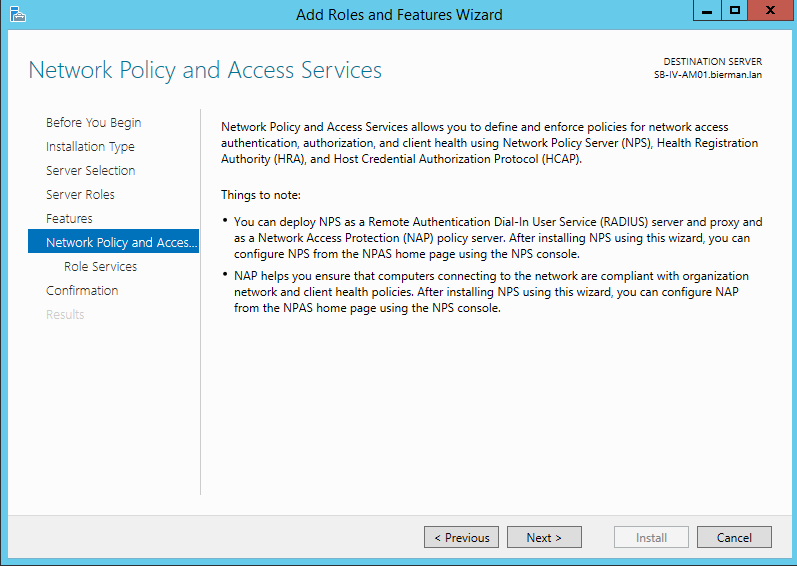
In the next windows scroll down and select the option Network Policy and Access Services. Select Next to continue.
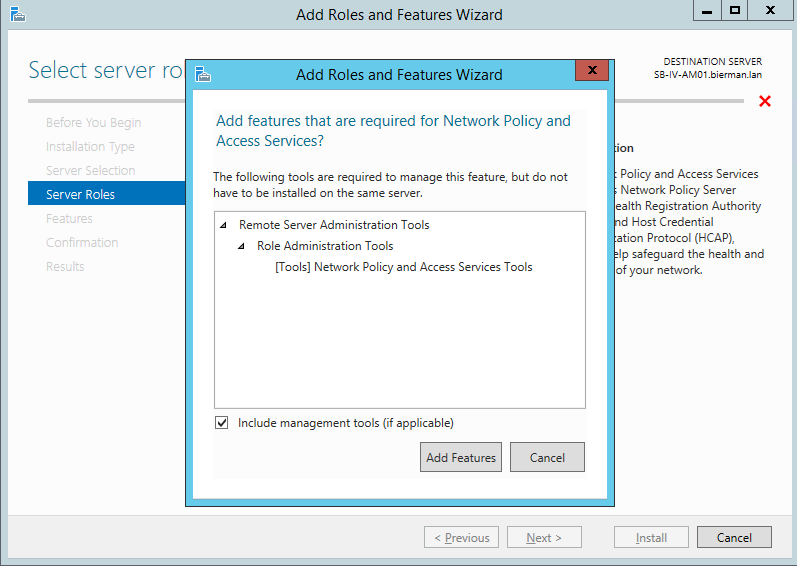
In the next window select the option Add Features and select Next to continue.
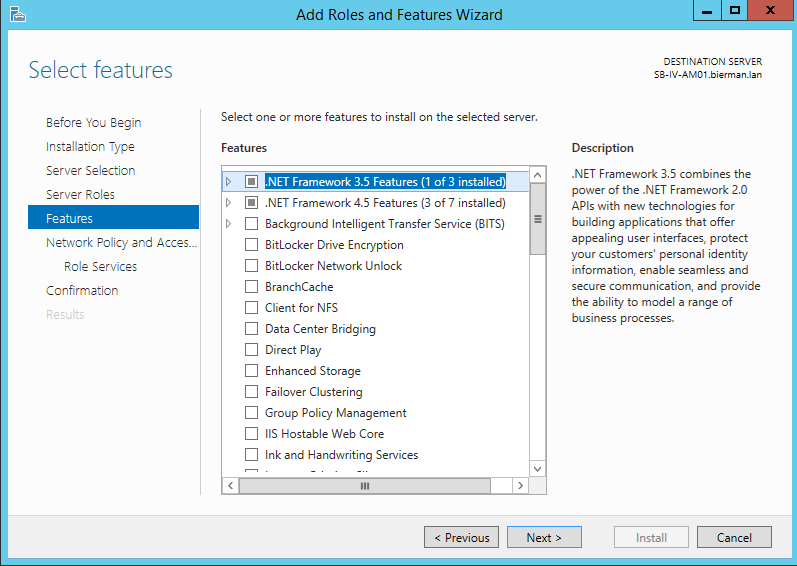
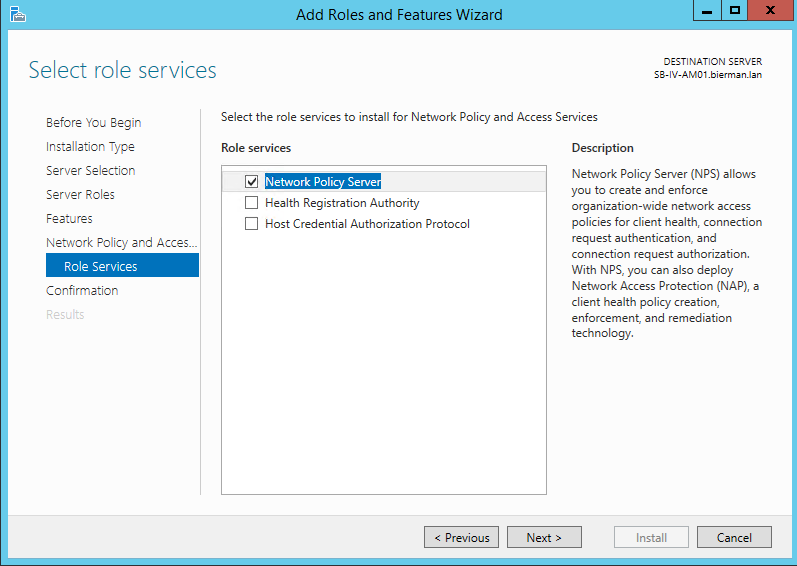
There is no need to add additional features from the list. Continue by selecting Next.
Select Next in the next window to continue.
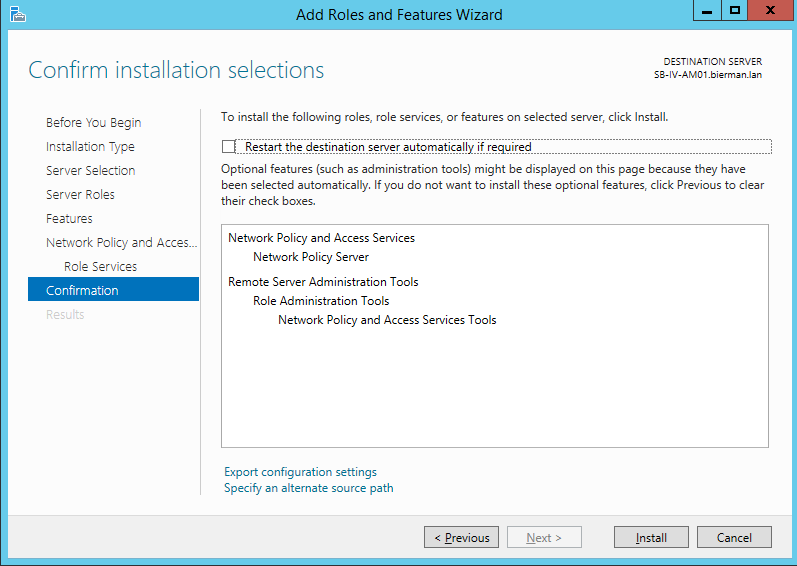
Leave the settings default in the next window and select Next to continue.
Last step in the installation process in selecting Install in the next window.
The installation starts and you can close the window. When the installation is finished Network Policy Server is added to the Administrative Tools.
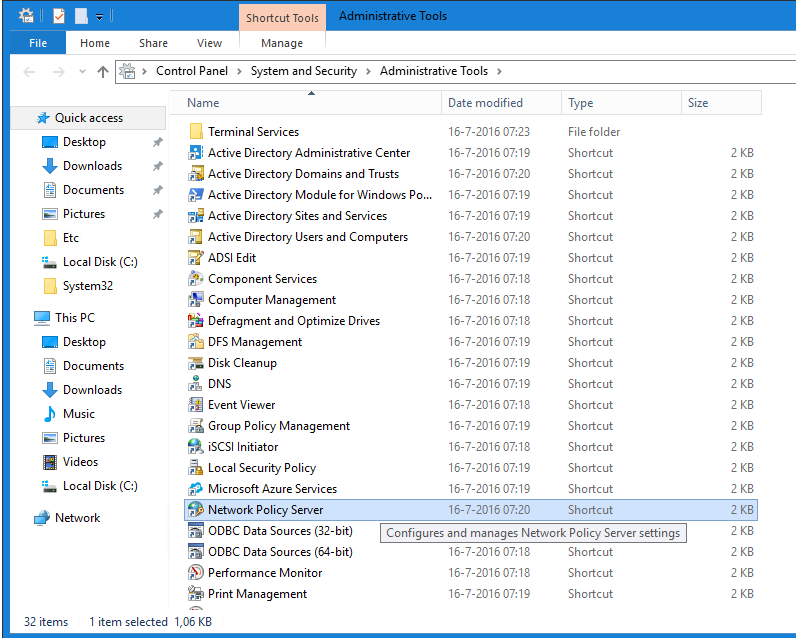
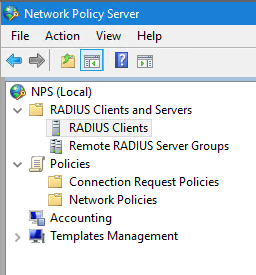
Open the Network Policy Server for the configuration.
Configuration Network Policy Server
After starting Network Policy Server application the menu look likes below.
Before starting the NPS configuration create a VPN group in Active Directory Users and Computers and add users to the group (i.e. VPN Users).
First step is creating a RADIUS Client. Right click on the option RADIUS Clients and select New. Enter a Friendly Name (i.e. Duo Authentication Proxy). Enter the IP Address of the Duo Authentication Proxy server and enter a Shared secret key.
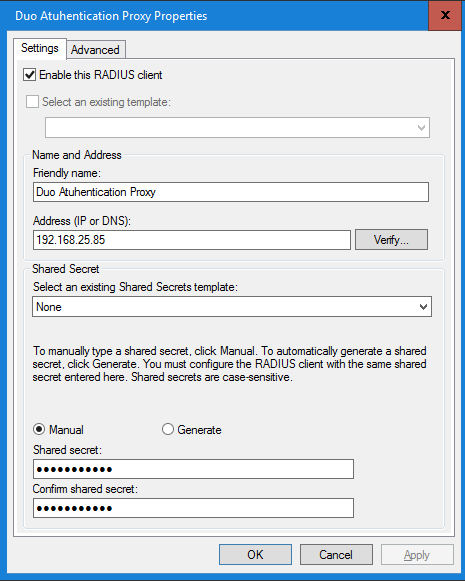
Select OK to finish and save the new RADIUS client.
Next step is creating a Connection Request Policy. Right click the option Connection Request Polices and select New.
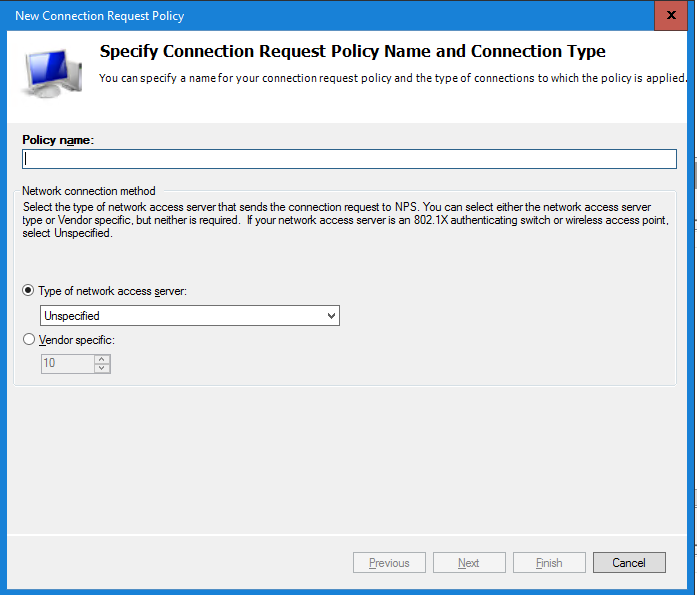
Enter a Policy Name (i.e. Duo Authentication) and select Next. Leave other settings default.
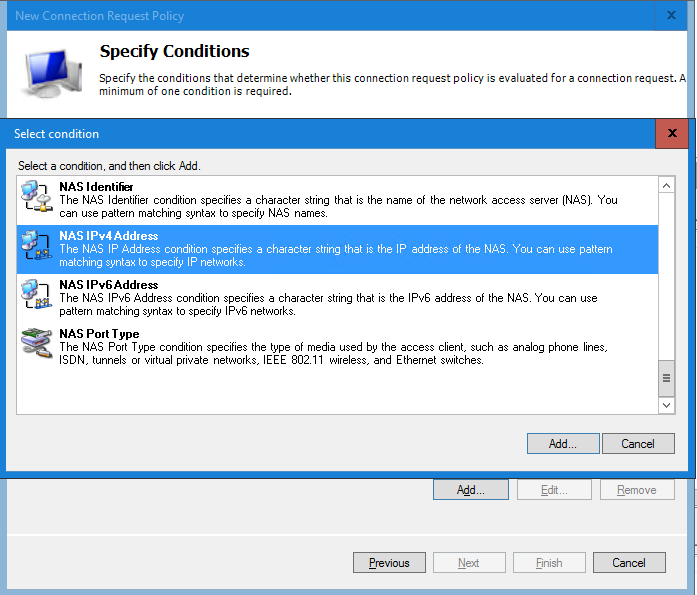
Select Add in the Specify Conditions.
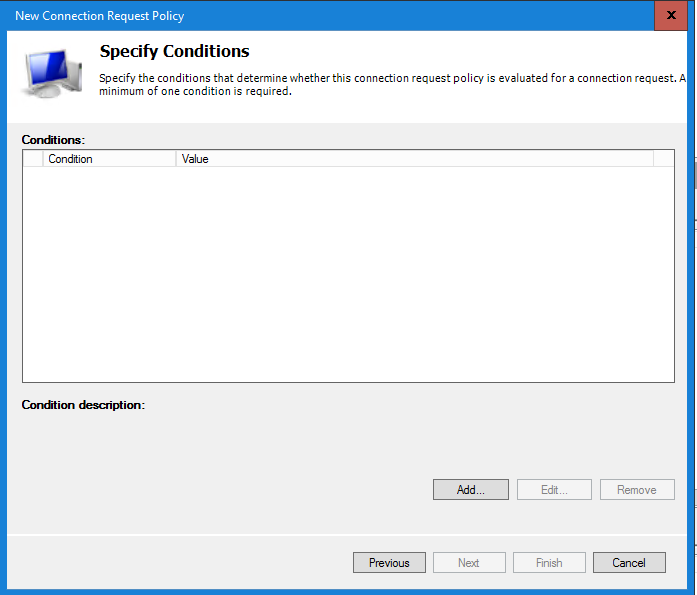
Scroll down and select the NAS IPv4 Address condition.
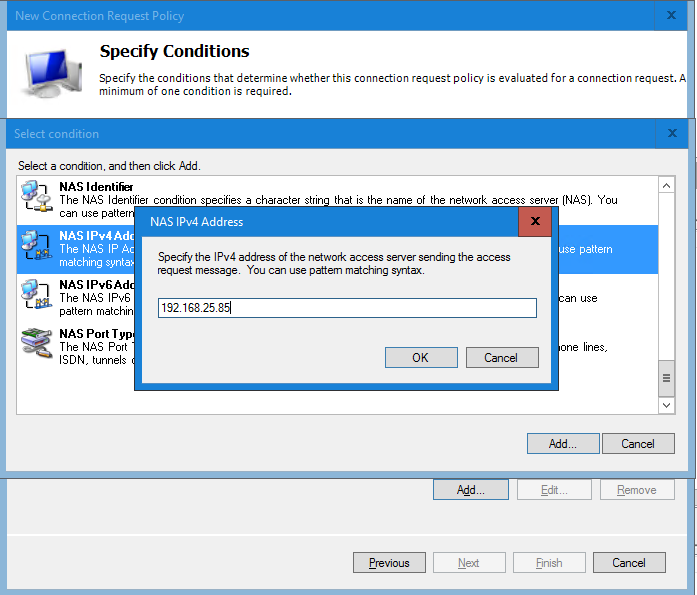
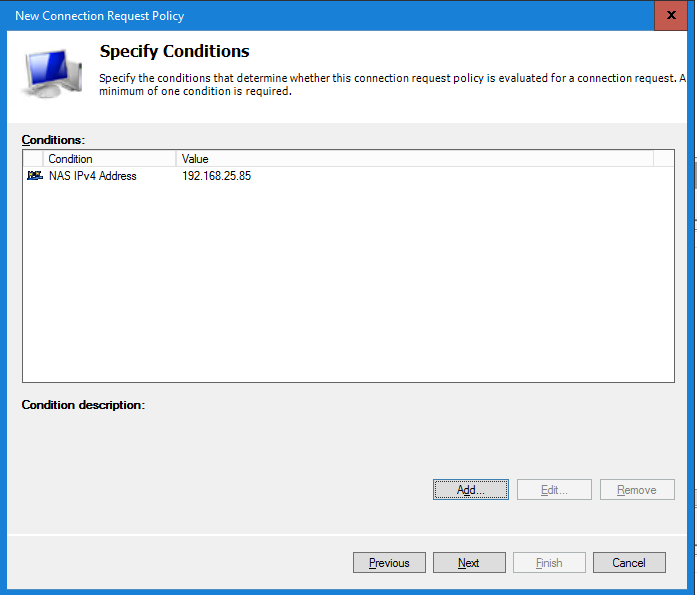
In the next window enter the IP Address of the Duo Authentication Proxy server and select OK to continue.
After adding the condition select Next to continue.
 .
.
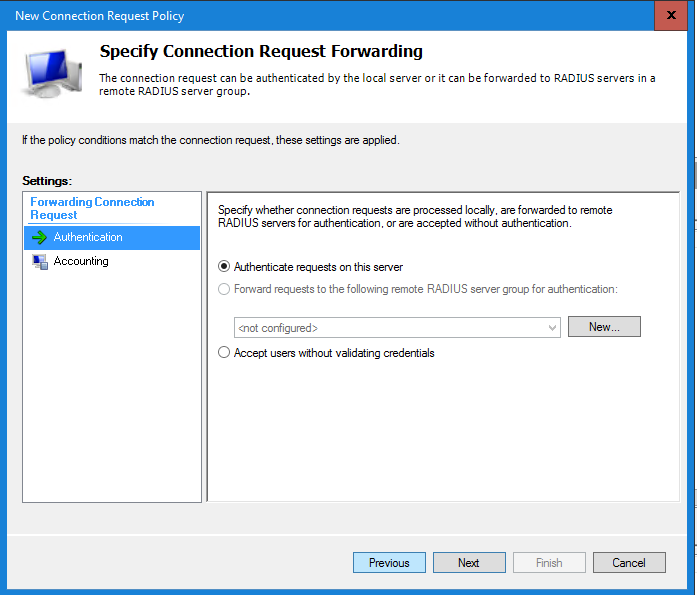
In the Connection Request Forwarding window leave all settings default and select Next to continue.
In the Specify Authentication Methods select the option Override network policy authentication settings and select the Microsoft Encrypted Authentication version 2 (MS-CHAPv2) option in the Less secure authentication options. I’m still testing if the EAP Types can work with Duo Authentication Policy. If this works I will update this blog.
Additional you can select the option User can change password when expired.
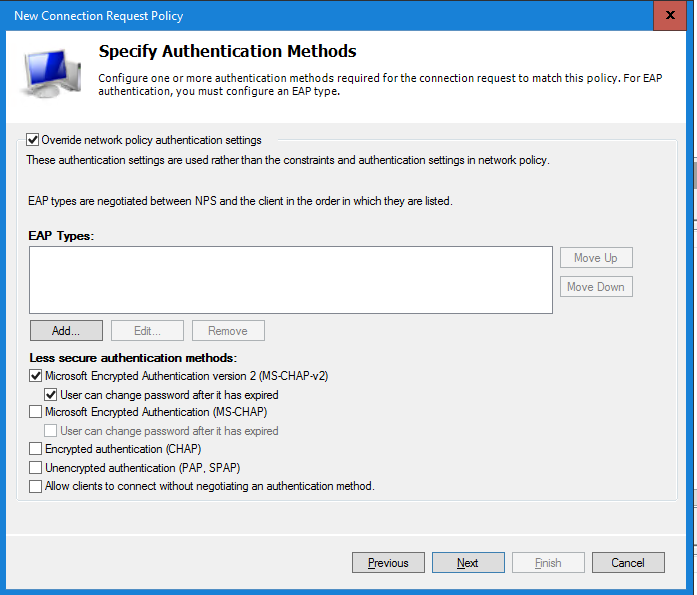
Select Next to continue. Leave all settings default in the Settings window and select Next to continue.
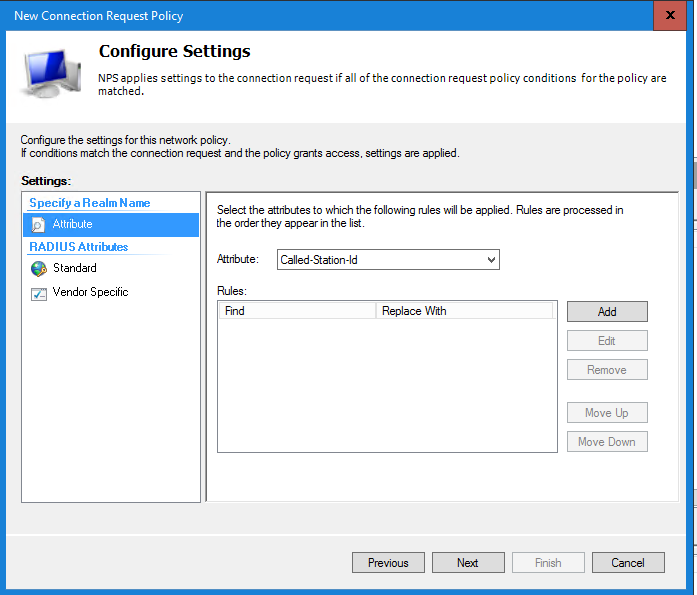
In the next window check all settings and select Finish to save the Connection Request Policy.

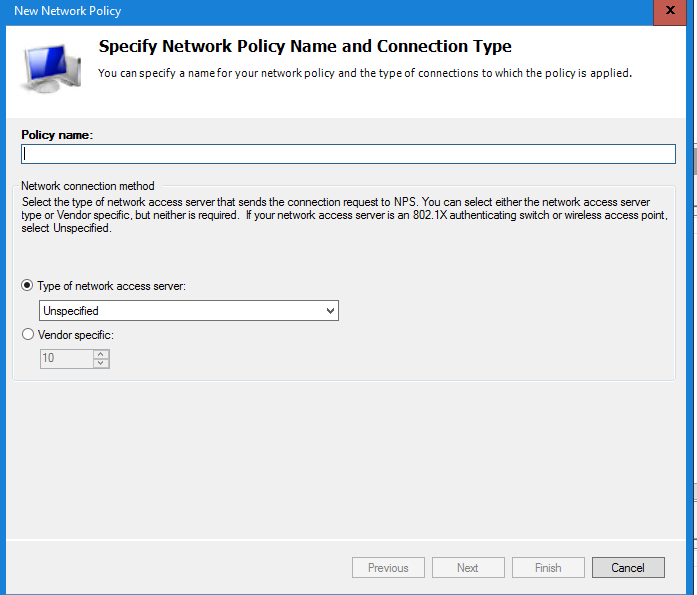
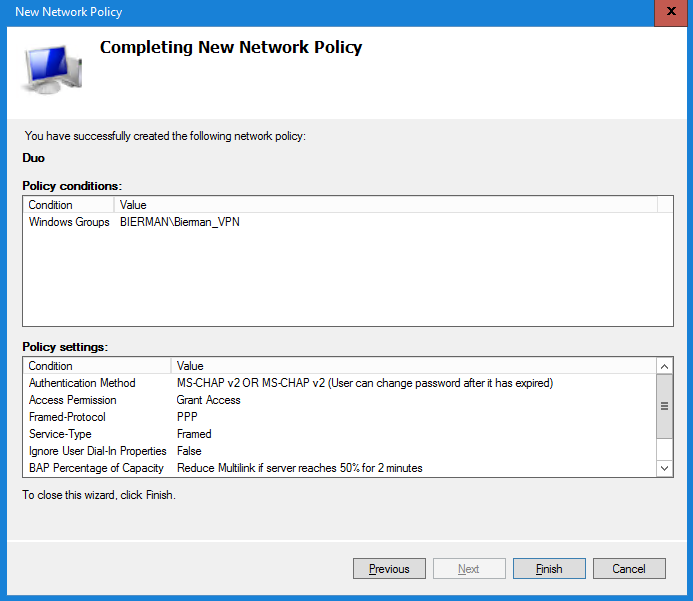
Last step is creating a Network Policy. Right click Network Policies and select New. Enter a Policy Name and leave all other settings default. Continue by selecting Next.
In the next window select Add to create a condition. Select Windows Groups in the Condition list and select Add.
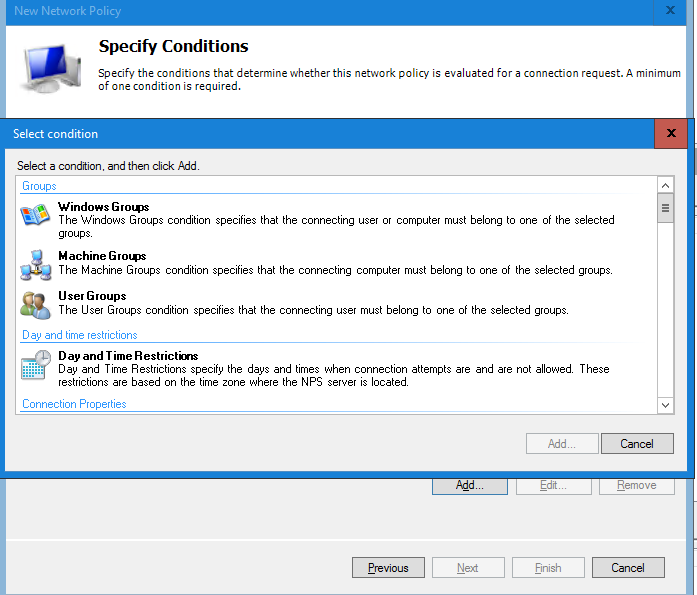
In the Windows Groups window select Add and select/add the VPN group created earlier in the blog.
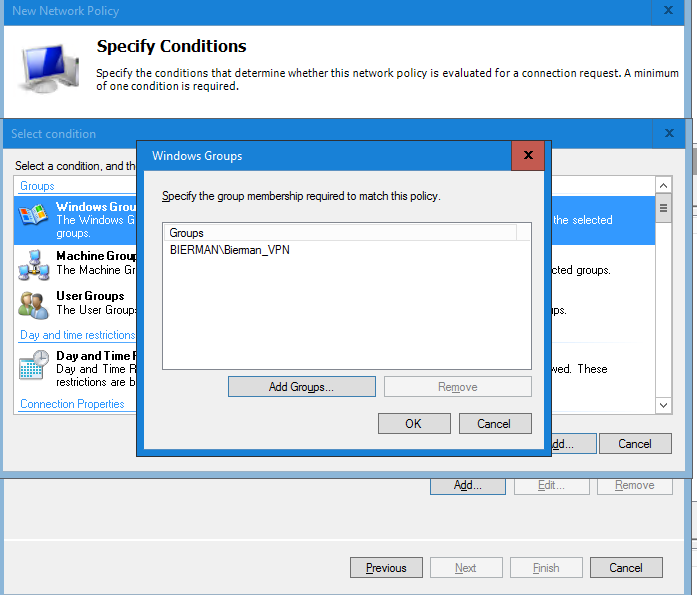
Select OK and Next to continue.
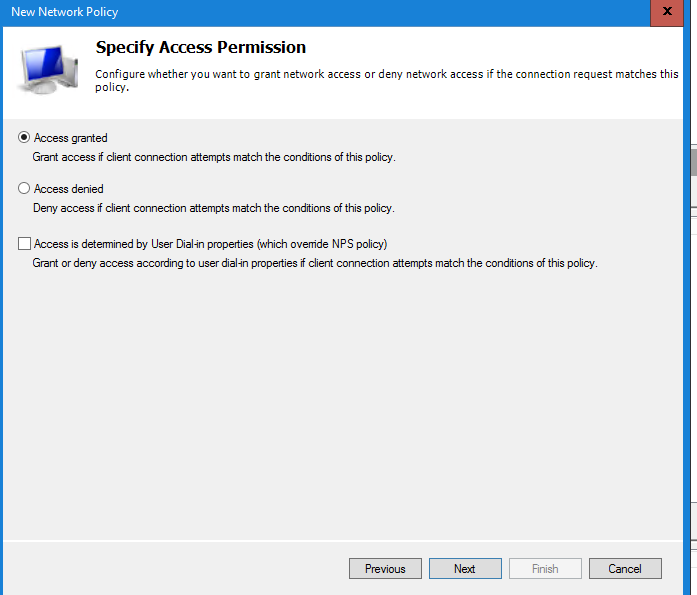
In the next window make sure the option Access Granted is selected and select Next to continue.
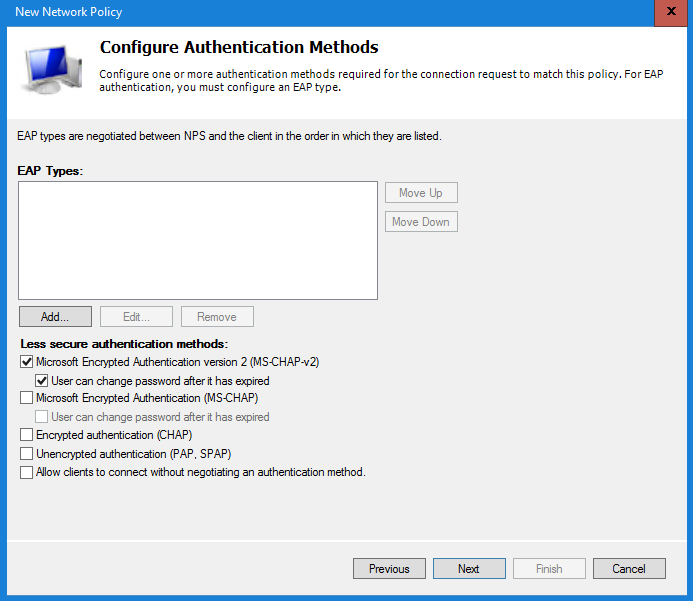
In the next window de-select the Microsoft Encrypted Authentication (MS-CHAP) and make sure only the Microsoft Encrypted Authentication version 2 (MS-CHAPv2) is enabled. Additional the option User can change password after it is expired can selected.
Select Next to continue.
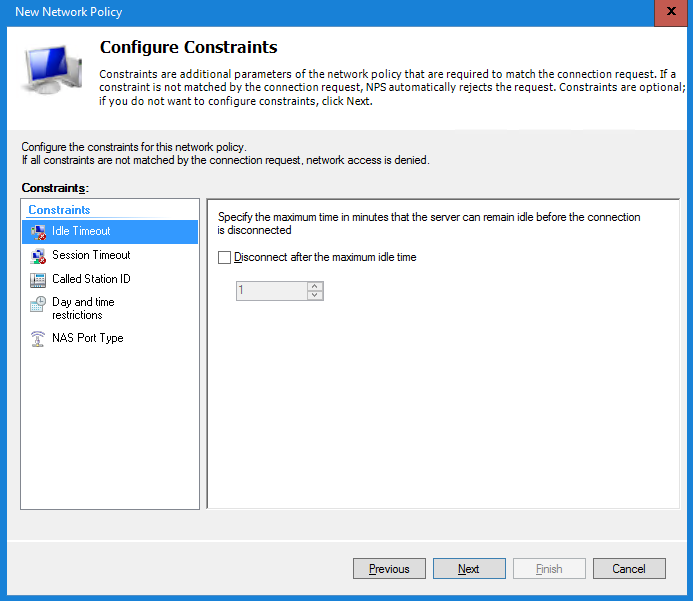
In the Constraints window leave everything default and select Next to continue.
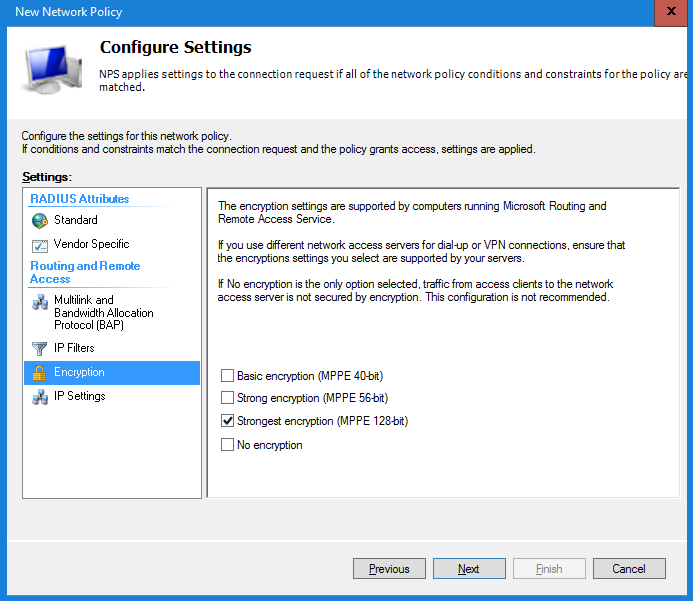
Last step is configuring the Settings window. Select the option Encryption and disable the Basic encryption/Strong encryption/No encryption.
Only the option Strongest encryption (MPPE 128-bit) must be enabled.
Select Next to continue. In the next window check all settings and select Finish to save the policy.
When finished the Network Policy Server (NPS) settings are all configured.
Make sure the IP Address, Security Key and port (i.e. 1812) of the NPS Server are added to the Radius_Client section in the Duo Authentication Proxy.
[radius_client]
host=192.168.100.2
host_2=192.168.100.3 (only needed when using multiple NPS Servers for HA)
secret=<SharedKey>
port=1812
Step 6 – Configure VPN on Windows and Mac
Configuration on Windows 10
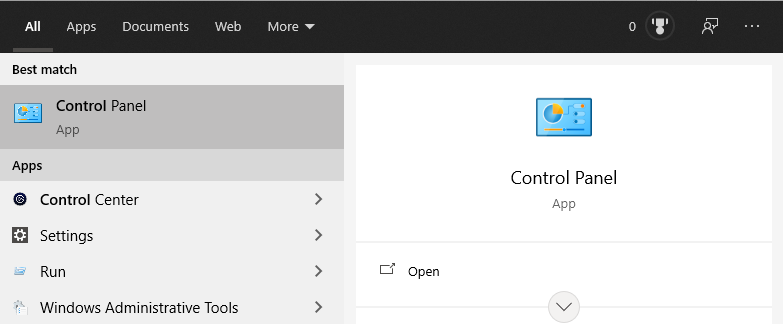
Select Start and enter Control Panel. Open the Control Panel.
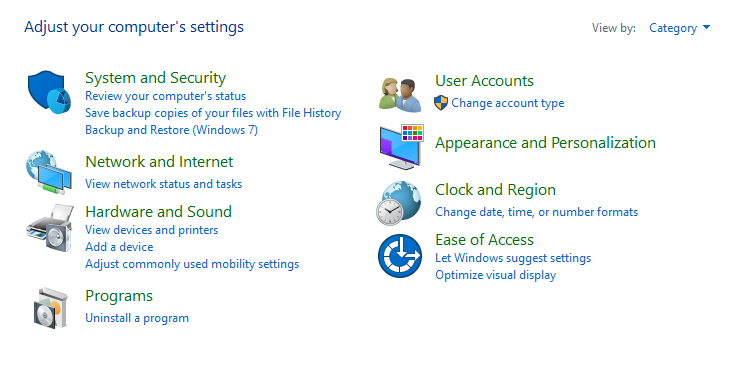
Select the option Network and Internet.
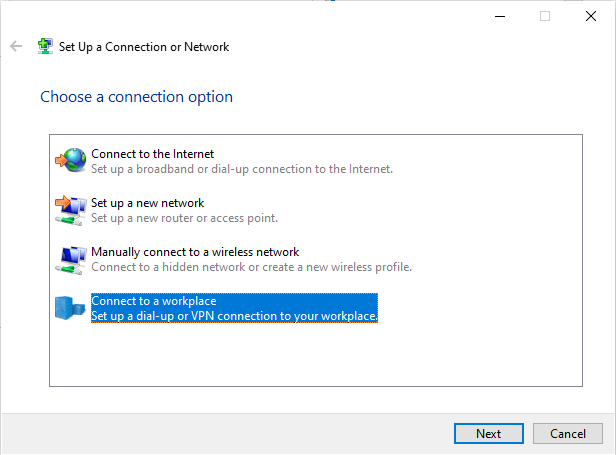
Select the option Set up a new connection or network.

Select the option Connect to a workplace and select Next to continue.
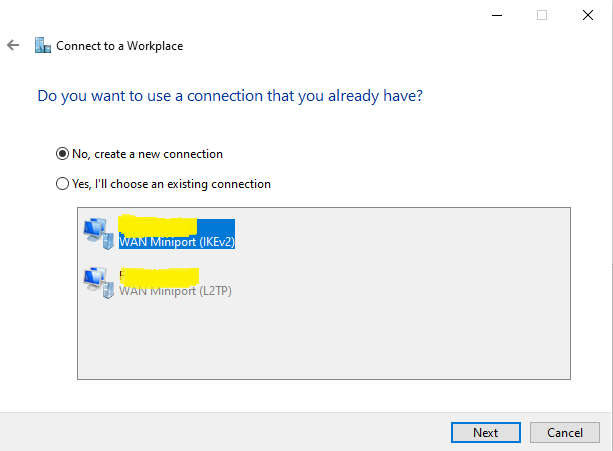
When there are other VPN connections configured you see these in the next window. Select the option No, create a new connection and select Next to continue.
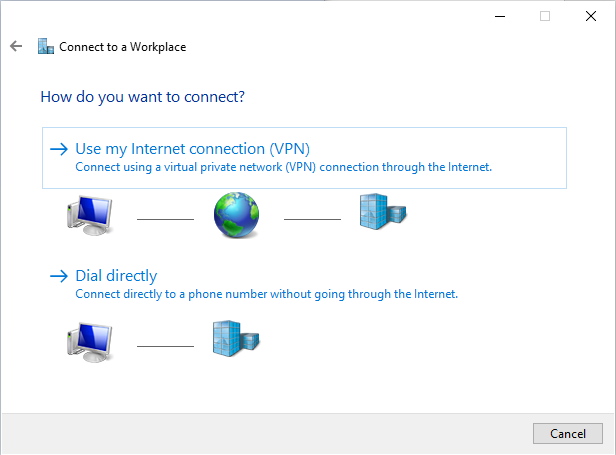
In the next window select the option Use my internet connection (VPN).
Enter the DNS hostname created in step 1 and give the connection a name. Un-select also the option Remember my credentials (security issue when device is stolen).
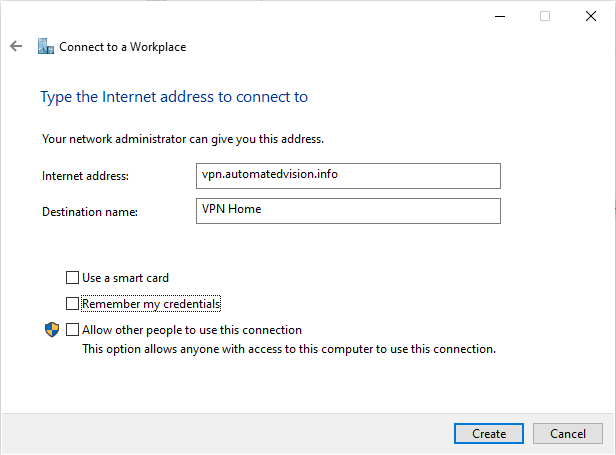
Select Create to continue.
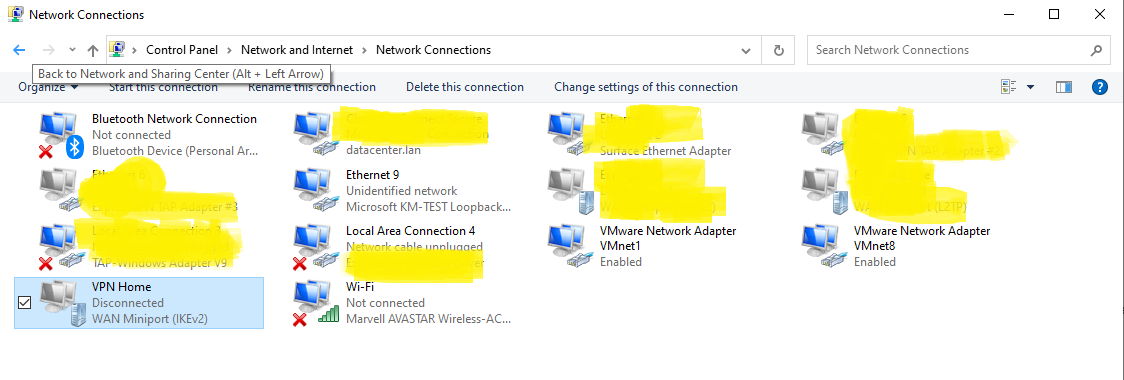
In the window below select the option Change adapter settings.
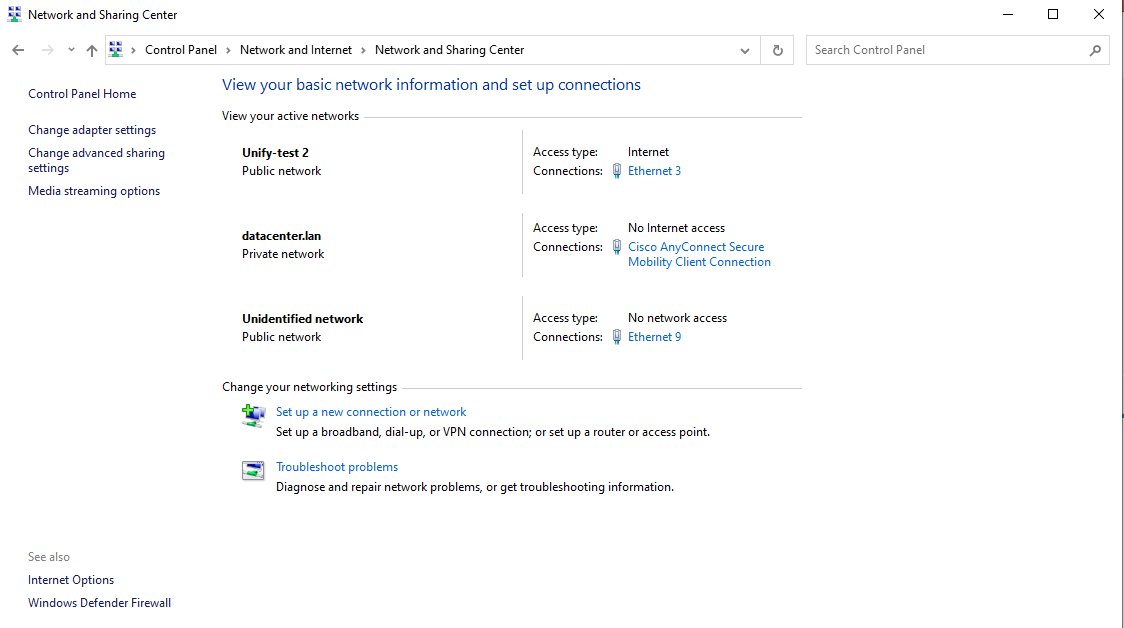
Right click the new created connection and select Properties from the menu.
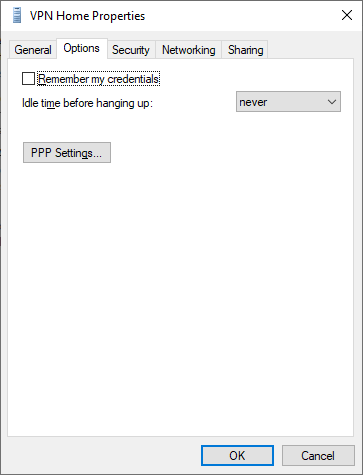
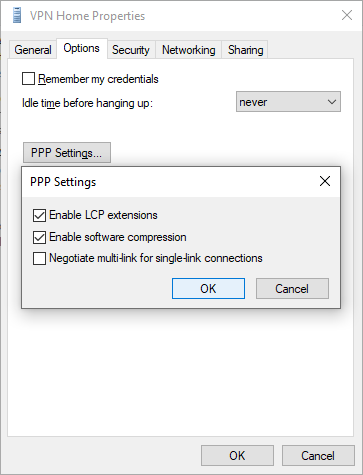
Select the tab Options and select the PPP Settings.
Enable the Software Expression and select OK to continue.
Select the tab Security and select Require encryption (disconnect if server declines) from the Data Encryption dropdown list.
Select the option Allow these protocols and select the Microsoft CHAP version 2 (MS-CHAP v2). If the device is member of a domain or the local account is identical as the remote user account you could select the option Automatically use my Windows logon name and password.
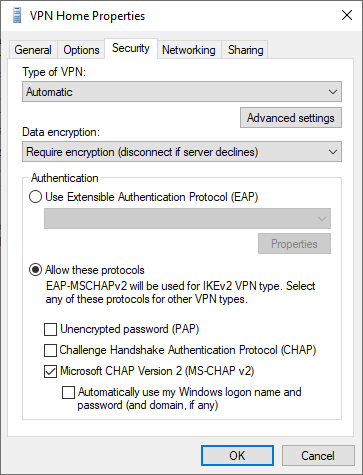
Select the option Advance settings and enter the Unifi Security Key defined in the Remote Access network.
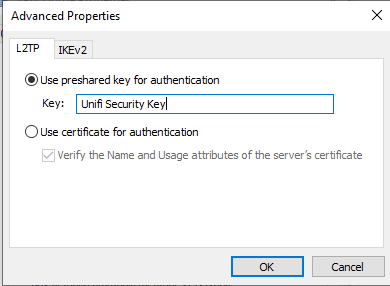
Select OK to store the Shared Security Key and select the tab Networking.
When IPv6 is not used un-select the option in the item list.
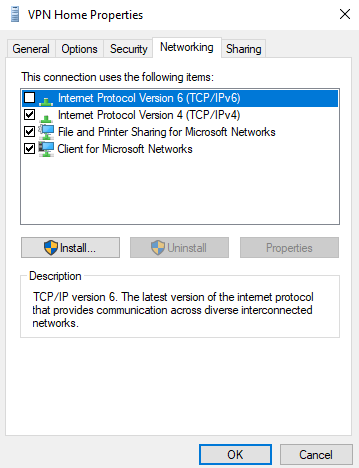
Double click on the TCP/IPv4 item and select Advanced. Unselect the option Use default gateway on remote gateway. This prevent all traffic (internet) using the remote gateway.
Select OK 3 times to save all configuration changes.

To test the connection select the Network icon in the system tray menu ![]() .
.
Select the VPN Home from the list and select the Connect button.

In the Sign In window enter your Active Directory username and password and select OK to continue the logon process.

After a couple of seconds a push message is send to your phone for the DUO MFA authentication. Approve the Login request and the VPN connection is established.

Configuration on Mac
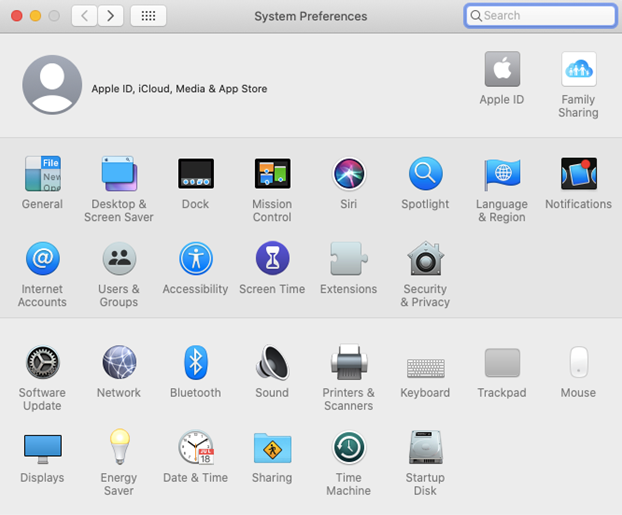
Select the Apple icon in the left top and select System Preferences.
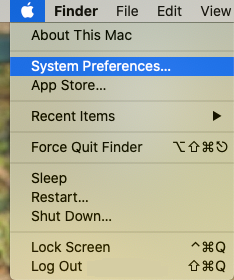
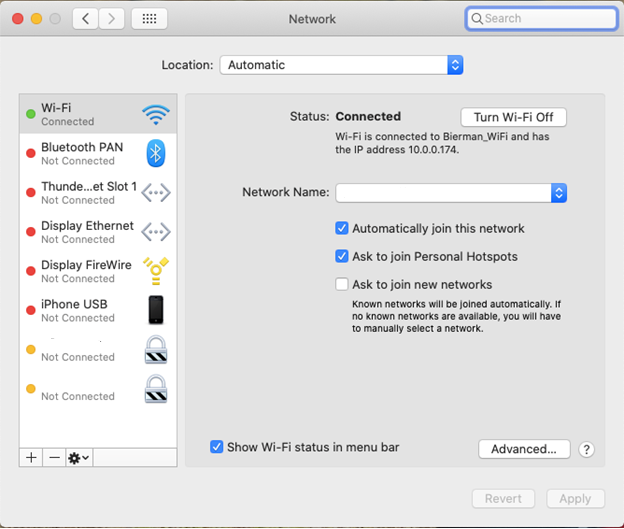
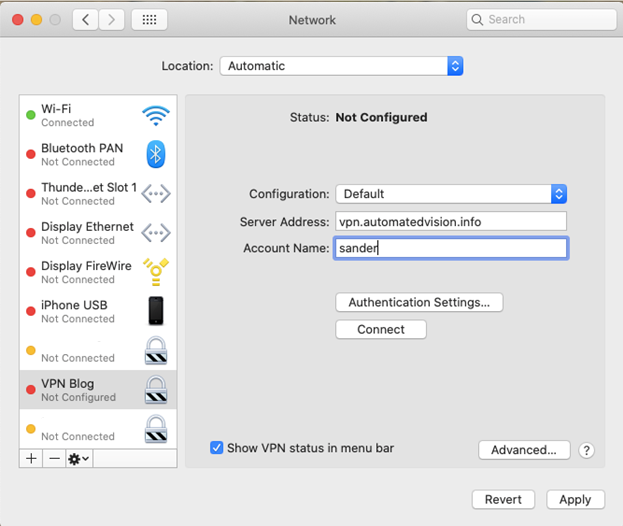
Select the option Network.
Select the + sign on the left to create a new connection.
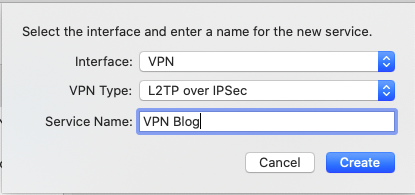
In the new window select VPN from the Interface dropdown list and L2TP over IPSec from the VPN Type dropdown list.
Enter a friendly name in the Service Name field and select Create to continue.
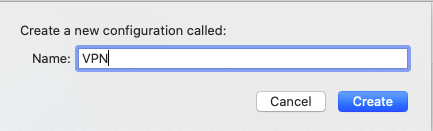
You leave the Configuration default or add a new configuration. When creating a new configuration enter a name and select Create.
Enter the server address (DNS entry) created in step 1 and a username which is used. When not used the username needs to be entered when starting the VPN connection.
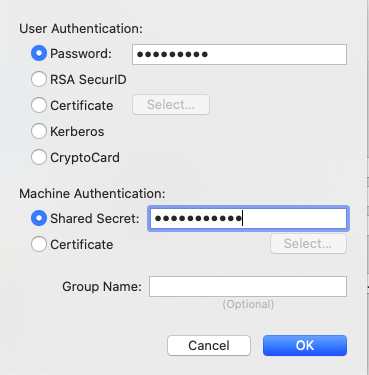
Select the option Authentication Settings and enter Shared Secret (Unifi Secret Key created in the Remote Access VPN). The Password option is optional. I suggest to leave it empty and enter the password when starting the VPN connection.
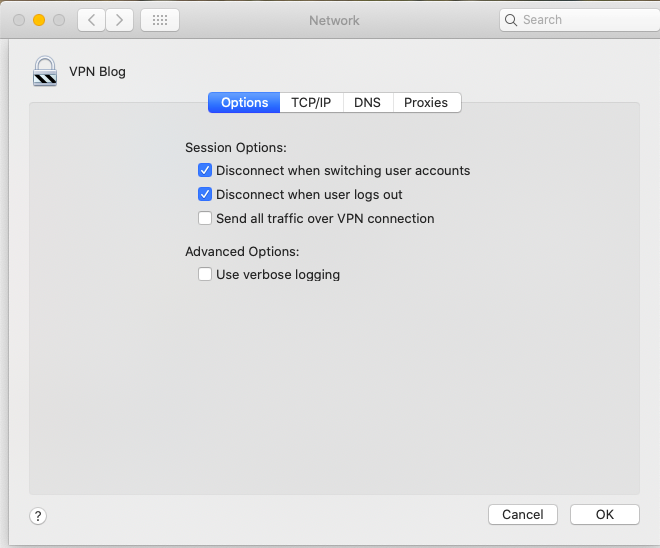
Select the Advanced button and make sure the option Send all traffic over VPN connection is NOT selected.
Select OK to continue.
When all settings are configured select Connect and a popup window appears (only when or Account Name or Password are not entered during the configuration.
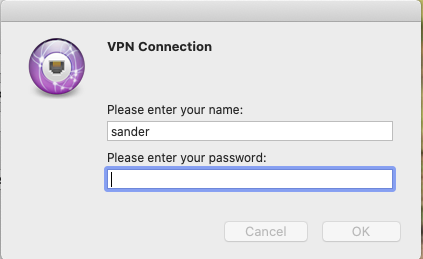
After entering the credentials a push message is send by Duo Security. After approving the connection is established.
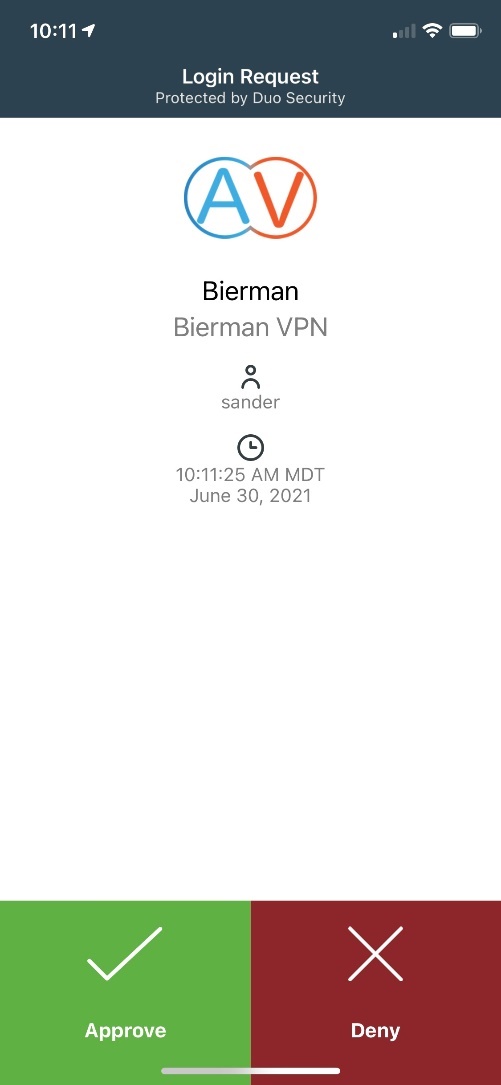
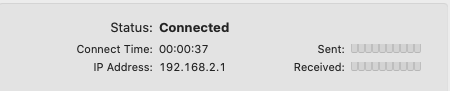
Connection established.
Monitoring VPN connection and Duo authentication
Download and/or start Putty to open SSH connections to the Duo Authentication server (when using Linux) and Unifi UDM(-PRO).
When using the Windows application for Duo Authentication Proxy the log file is located in
C:\Program Files\Duo Security Authentication Proxy\log
When using Linux enter the following command to start real-time logging.
sudo tail -f /opt/duoauthproxy/log/authproxy.log
The output with a successful login is shown below.
2021-06-30T19:58:14.809178+0000 [duoauthproxy.lib.log#info] Packet dump - received from 192.168.25.1:
2021-06-30T19:58:14.810063+0000 [duoauthproxy.lib.log#info] b"\x01\xdd\x00\x86\xfd=\x1f\x1c\xd9y\x1a\xef\xad\x0c\x00g\x937\xe0\x82\x06\x06\x00\x00\x00\x02\x07\x06\x00\x00\x00\x01\x01\x08sander\x1a\x18\x00\x00\x017\x0b\x12\xc7L(\xdc\xbe-\x9a\xab\xa3\xfc\xa4\x93\xd9T\xd6d\x1a:\x00\x00\x017\x194\xfa\x004M\x02\xd4jM\xe4^1\x84H\xf5\x16\x12\xb5a\x00\x00\x00\x00\x00\x00\x00\x00\x18\x87\xb2vB\xa5'X\xb1\xb2\xcf\xb8\xa0\xab\xbbuS\xa9\xc8\xa6\xd9\x81\x82\xbb\x04\x06\x7f\x00\x01\x01\x05\x06\x00\x01\x86\xa0"
2021-06-30T19:58:14.811740+0000 [duoauthproxy.lib.log#info] Sending request from 192.168.25.1 to radius_server_auto
2021-06-30T19:58:14.813502+0000 [duoauthproxy.lib.log#info] Received new request id 221 from ('192.168.25.1', 42890)
2021-06-30T19:58:14.814524+0000 [duoauthproxy.lib.log#info] (('192.168.25.1', 42890), sander, 221): login attempt for username 'sander'
2021-06-30T19:58:14.816425+0000 [duoauthproxy.lib.log#info] Sending request for user 'sander' to ('192.168.25.20', 1812) with id 146
2021-06-30T19:58:14.817955+0000 [duoauthproxy.lib.log#info] Packet dump - sent to 192.168.25.20:
2021-06-30T19:58:14.818477+0000 [duoauthproxy.lib.log#info] b"\x01\x92\x00t\x0b\x969{\x82\\<\x81\xf6\xa8\xd9(r\x19\x10S\x04\x06\xc0\xa8\x19U\x1a\x18\x00\x00\x017\x0b\x12\xc7L(\xdc\xbe-\x9a\xab\xa3\xfc\xa4\x93\xd9T\xd6d\x1a:\x00\x00\x017\x194\xfa\x004M\x02\xd4jM\xe4^1\x84H\xf5\x16\x12\xb5a\x00\x00\x00\x00\x00\x00\x00\x00\x18\x87\xb2vB\xa5'X\xb1\xb2\xcf\xb8\xa0\xab\xbbuS\xa9\xc8\xa6\xd9\x81\x82\xbb\x01\x08sander"
2021-06-30T19:58:14.962598+0000 [duoauthproxy.lib.log#info] Packet dump - received from 192.168.25.20:
2021-06-30T19:58:14.963479+0000 [duoauthproxy.lib.log#info] b'\x02\x92\x00\xe5.\x17\x9d\xfea\xf2\xbdw\xf7\xc5\x10`c-8\x91\x07\x06\x00\x00\x00\x01\x06\x06\x00\x00\x00\x02\x19.jM\x05\xd8\x00\x00\x017\x00\x01\x02\x00\xc0\xa8\x19\x14\x00\x00\x00\x00\x00\x00\x00\x00\x00\x00\x00\x00\x01\xd7m\xea\x18\x00\xc2\xfd\x00\x00\x00\x00\x00\x00\x00\x01\x1a*\x00\x00\x017\x11$\x80\x01O\xa0\xae\xd4\x81L\x1e\x18WJ"J\xc04\xe7\xa3\x9bm\xab\x84\xe2mA_\x03_bX\xe3Z\xc5\\\x1a*\x00\x00\x017\x10$\x80\x02\x95\xf4\xb3\xa2\xc6Q\xafC\xb8\x08\x01\xe3\x17]q\xd1\xd8\xf5"\x87\x96g\xefR\x9e\x95\xc3\x10Q\x1c\x06\xcf\x1a3\x00\x00\x017\x1a-\xfaS=E339F1D242120D7A546D99995F3BB759BB25201E\x1a\x10\x00\x00\x017\n\n\xfaBIERMAN'
2021-06-30T19:58:14.965134+0000 [duoauthproxy.lib.log#info] Got response for id 146 from ('192.168.25.20', 1812); code 2
2021-06-30T19:58:14.968214+0000 [duoauthproxy.lib.log#info] http POST to https://api-xxxxxxxx.duosecurity.com:443/rest/v1/preauth: failmode=safe&ipaddr=0.0.0.0&user=sander
2021-06-30T19:58:14.976804+0000 [duoauthproxy.lib.http._DuoHTTPClientFactory#info] Starting factory <_DuoHTTPClientFactory: b'https://api-xxxxxxxx.duosecurity.com:443/rest/v1/preauth'>
2021-06-30T19:58:15.238349+0000 [duoauthproxy.lib.log#info] (('192.168.25.1', 42890), sander, 221): Got preauth result for: 'auth'
2021-06-30T19:58:15.239363+0000 [duoauthproxy.lib.log#info] User IP not provided. Authorized Networks policies will not work for this authentication.
2021-06-30T19:58:15.240858+0000 [duoauthproxy.lib.log#info] http POST to https://api-xxxxxxxx.duosecurity.com:443/rest/v1/auth: auto=xxxxxxxx&factor=auto&ipaddr=0.0.0.0&user=sander
2021-06-30T19:58:15.248591+0000 [duoauthproxy.lib.http._DuoHTTPClientFactory#info] Starting factory <_DuoHTTPClientFactory: b'https://api-xxxxxxxx.duosecurity.com:443/rest/v1/auth'>
2021-06-30T19:58:15.249525+0000 [duoauthproxy.lib.http._DuoHTTPClientFactory#info] Stopping factory <_DuoHTTPClientFactory: b'https://api-xxxxxxxx.duosecurity.com:443/rest/v1/preauth'>
2021-06-30T19:58:21.809831+0000 [duoauthproxy.lib.log#info] (('192.168.25.1', 42890), sander, 221): Duo authentication returned 'allow': 'Success. Logging you in...'
2021-06-30T19:58:21.812263+0000 [duoauthproxy.lib.log#info] (('192.168.25.1', 42890), sander, 221): Returning response code 2: AccessAccept
2021-06-30T19:58:21.813427+0000 [duoauthproxy.lib.log#info] (('192.168.25.1', 42890), sander, 221): Sending response
2021-06-30T19:58:21.814435+0000 [duoauthproxy.lib.log#info] Packet dump - sent to 192.168.25.1:
Note: Information how to create a SSH connection to the UDM(-PRO) can be found here.
Execute the following command to show the real-time VPN logging:
sudo swanctl –log
VPN logging output with a successful login is shown below.
10[NET] received packet: from 10.0.0.253[500] to 24.9.198.175[500] (408 bytes)
10[ENC] parsed ID_PROT request 0 [ SA V V V V V V V V ]
10[ENC] received unknown vendor ID: 01:52:8b:bb:c0:06:96:12:18:49:ab:9a:1c:5b:2a:51:00:00:00:01
10[IKE] received MS NT5 ISAKMPOAKLEY vendor ID
10[IKE] received NAT-T (RFC 3947) vendor ID
10[IKE] received draft-ietf-ipsec-nat-t-ike-02\n vendor ID
10[IKE] received FRAGMENTATION vendor ID
10[ENC] received unknown vendor ID: fb:1d:e3:cd:f3:41:b7:ea:16:b7:e5:be:08:55:f1:20
10[ENC] received unknown vendor ID: 26:24:4d:38:ed:db:61:b3:17:2a:36:e3:d0:cf:b8:19
10[ENC] received unknown vendor ID: e3:a5:96:6a:76:37:9f:e7:07:22:82:31:e5:ce:86:52
10[IKE] 10.0.0.253 is initiating a Main Mode IKE_SA
10[CFG] selected proposal: IKE:AES_CBC_256/HMAC_SHA1_96/PRF_HMAC_SHA1/MODP_2048
10[ENC] generating ID_PROT response 0 [ SA V V V V ]
10[NET] sending packet: from 24.9.198.175[500] to 10.0.0.253[500] (160 bytes)
08[NET] received packet: from 10.0.0.253[500] to 24.9.198.175[500] (388 bytes)
08[ENC] parsed ID_PROT request 0 [ KE No NAT-D NAT-D ]
08[ENC] generating ID_PROT response 0 [ KE No NAT-D NAT-D ]
08[NET] sending packet: from 24.9.198.175[500] to 10.0.0.253[500] (372 bytes)
05[NET] received packet: from 10.0.0.253[500] to 24.9.198.175[500] (76 bytes)
05[ENC] parsed ID_PROT request 0 [ ID HASH ]
05[CFG] looking for pre-shared key peer configs matching 24.9.198.175...10.0.0.253[10.0.0.253]
05[CFG] selected peer config "lns-l2tp-server"
05[IKE] IKE_SA lns-l2tp-server[199] established between 24.9.198.175[24.9.198.175]...10.0.0.253[10.0.0.253]
05[IKE] scheduling reauthentication in 2890s
05[IKE] maximum IKE_SA lifetime 3430s
05[IKE] DPD not supported by peer, disabled
05[ENC] generating ID_PROT response 0 [ ID HASH ]
05[NET] sending packet: from 24.9.198.175[500] to 10.0.0.253[500] (76 bytes)
06[NET] received packet: from 10.0.0.253[500] to 24.9.198.175[500] (476 bytes)
06[ENC] parsed QUICK_MODE request 1 [ HASH SA No ID ID ]
06[CFG] selected proposal: ESP:AES_CBC_256/HMAC_SHA1_96/NO_EXT_SEQ
06[IKE] received 250000000 lifebytes, configured 0
06[ENC] generating QUICK_MODE response 1 [ HASH SA No ID ID ]
06[NET] sending packet: from 24.9.198.175[500] to 10.0.0.253[500] (188 bytes)
08[NET] received packet: from 10.0.0.253[500] to 24.9.198.175[500] (60 bytes)
08[ENC] parsed QUICK_MODE request 1 [ HASH ]
08[IKE] CHILD_SA lns-l2tp-server{93} established with SPIs cda68721_i 1f3d8a82_o and TS 24.9.198.175/32[udp/1701] === 10.0.0.253/32[udp/1701]
08[CHD] updown:
08[CHD] updown: no response
11[IKE] sending retransmit 3 of request message ID 0, seq 1
11[NET] sending packet: from 24.9.198.175[500] to 75.87.47.34[500] (792 bytes)
15[IKE] sending retransmit 4 of request message ID 0, seq 1
15[NET] sending packet: from 24.9.198.175[500] to 75.87.47.34[500] (792 bytes)
07[KNL] 10.255.255.0 appeared on ppp100000
16[KNL] 10.255.255.0 disappeared from ppp100000
05[KNL] 10.255.255.0 appeared on ppp100000
13[KNL] interface l2tp0 activated
Used Information
Duo Authentication Proxy Reference
Duo RADIUS
Authentication Proxy – FAQ and Troubleshooting
UniFi – USG/UDM: Configuring L2TP Remote Access VPN
Intro to Networking – How to Establish a Connection Using SSH


Did you get this to work for Android?
Yes I created a VPN connection on Android and iOS.
Next blog will describe how to create the VPN connections on the mobile devices.
When can will expect your next blog on VPN connection on Android and iOS?
Both blogs are currently written. Give it a couple of days.
hello, i sent you an email regarding my issue replicating your config. i appreciate your response and thank you for the hard work you put into this!
sorry I still don’t understand why you need to setup the NPS policy, the whole Step 5. Without Step 5, the VPN still works right?
The reason why I use NPS is that Duo proxy can’t use MS-CHAP v2. And with a NPS policy I was able to use MS-CHAP v2.
Does this require a dream machine? Will it work on an older USG gateway?
Hi Michael,
Never tested the configuration on USG Gateways because I never had the hardware.
Kind regards,
Sander Bierman
Hi, great write-up! Does Duo work with SSH?
Absolutely. https://duo.com/docs/loginduo
Does this still actually work after recent UniFi updates? I am failing at Radius auth request timed out. I am not using an NPS just the duo auth proxy and the dream machine as the radius server.
If you don’t use NPS you can’t use MS-CHAP v2. That’s the reason why I used NPS.
Thank you for this!