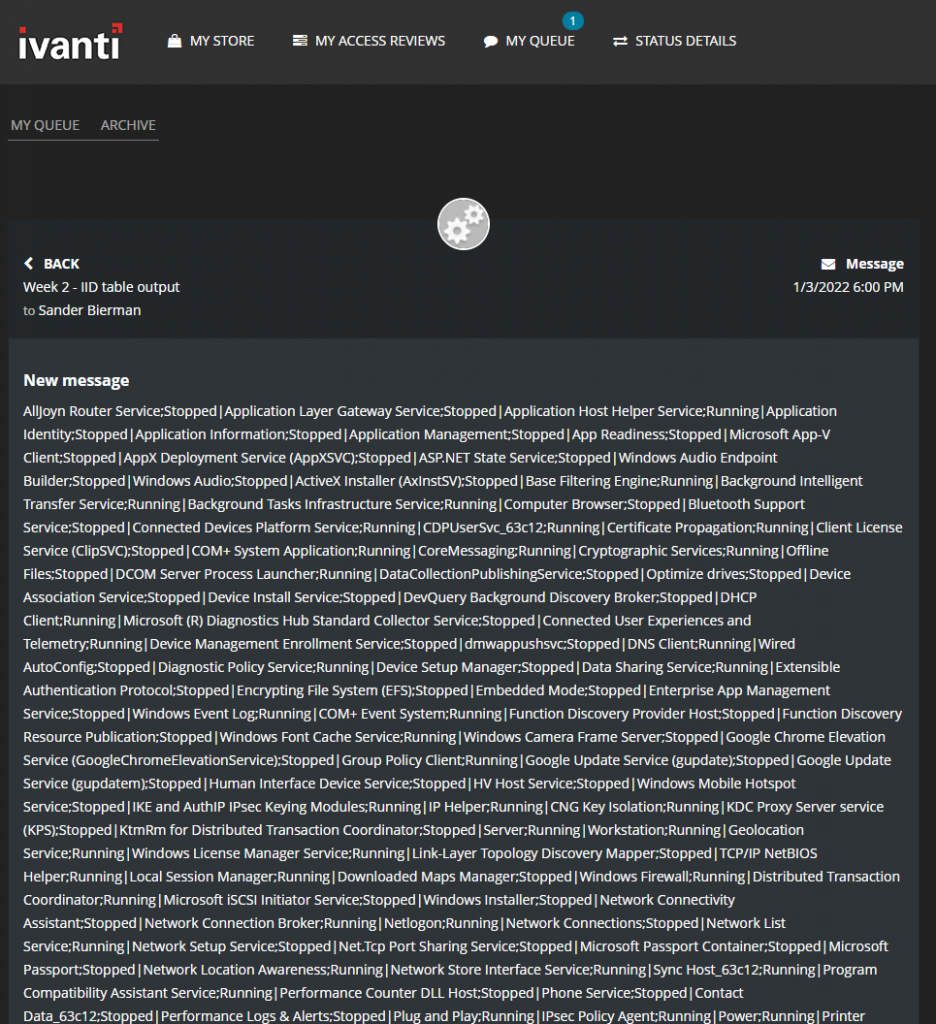
In week 2 of Tip of the Week we created a service attribute table from a PowerShell script and showed this in a message in Ivanti Identity Director. The output was difficult to read with all the semi-colons and pipe characters. As we learned in week 2 the semi-colon is used to separate columns and the pipe character marks the end of a row.
In week 2 of Tip of the Week we will show you how to show every value of a column on a single line and how to write a table rows on a single line.
The goal is to make the mess below…
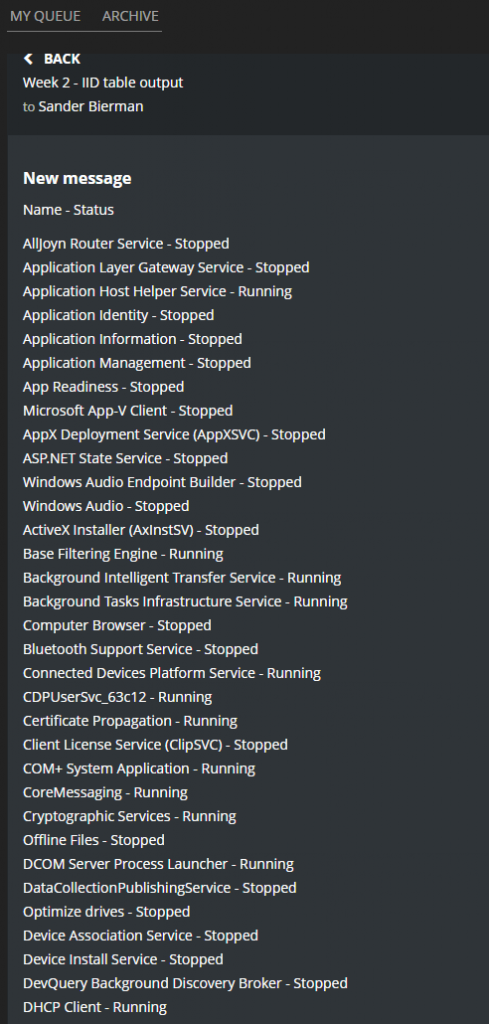
To a more readable format like…
Let’s start with logging in to the Ivanti Identity Management Portal and go to Entitlement Catalog. Open the service created in week 2 or use the Tip of the Week 2 to create the service.
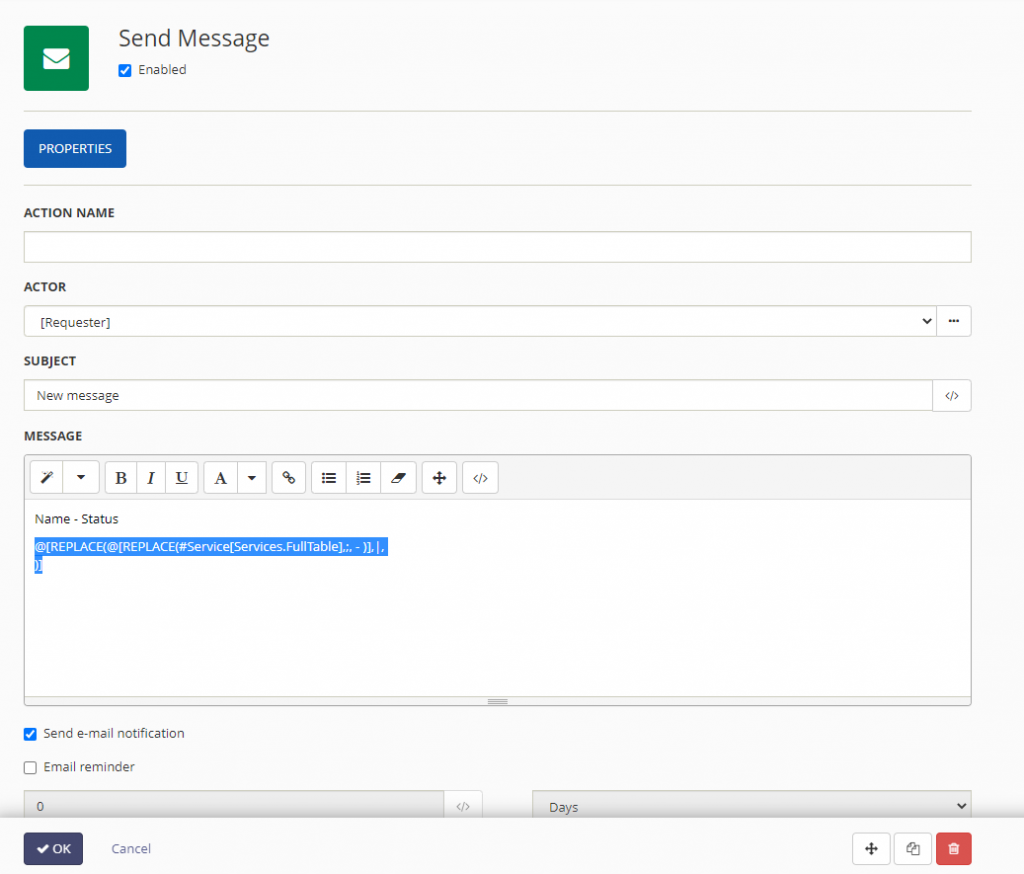
Go to the Workflow tab and select the Message workflow action.
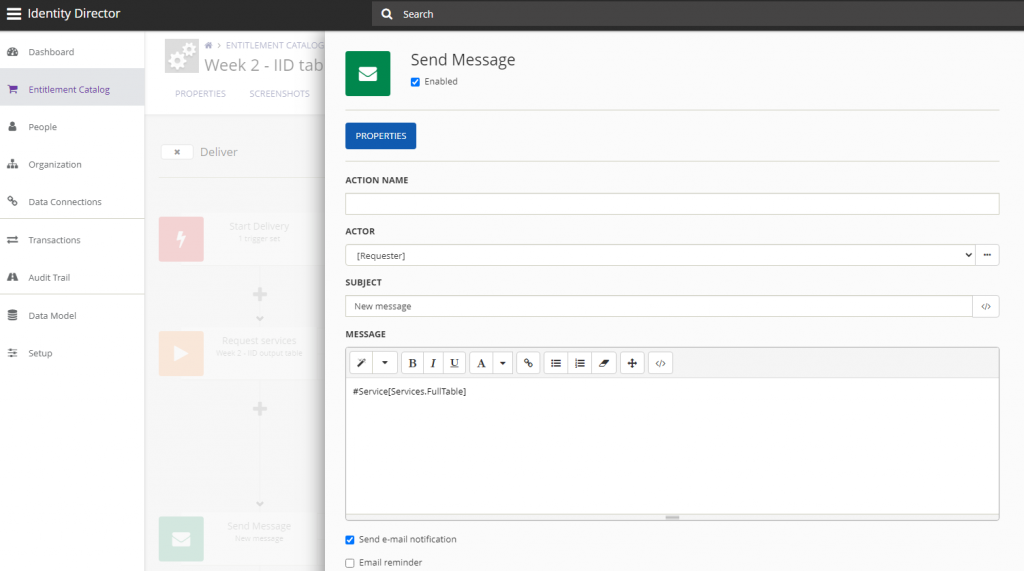
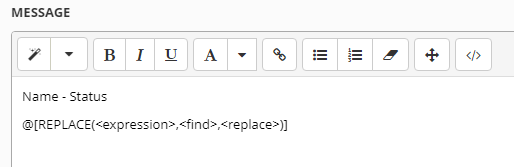
Remove the value in the Message and type Name – Status as we used those values from the services and these are the names of the columns created in the Service Attribute Table.
Next step is replacing the semi-colon and the pip character. Ivanti Identity Director and Ivanti Automation holds a lot of predefined functions and one is the replace function. When you select the menu item Placeholder (last icon on the menu bar) and scroll down open the functions and all available functions are available.
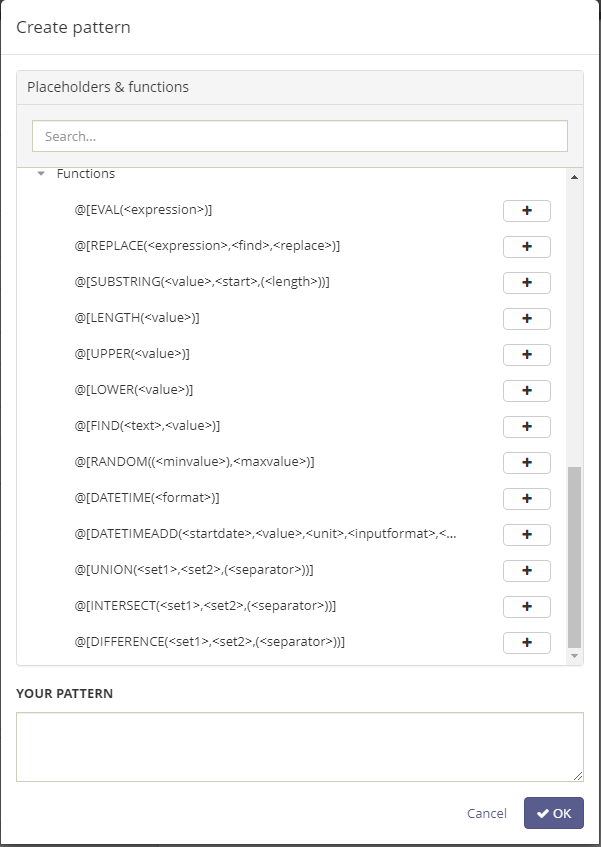
Select the @[REPLACE(<expression>,<find>,<replace>)]. The full function is now added to the message.
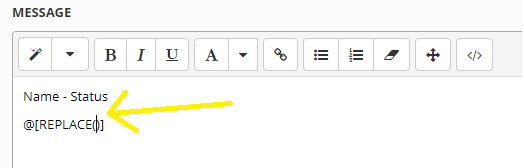
Remove the bold information and make sure the cursor is behind the first parentheses (see arrow in the screenshot below).
Select the placeholder menu item again and select the same function (Replace) again. When finished the result should be:
@[REPLACE(@[REPLACE(<expression>,<find>,<replace>)])]
Now we need to add the Full table Service Attribute to the function. Mark <expression> and remove this, Make sure the cursor is behind the second parentheses and select the placeholder menu option again. Select the FullTable from the Services Service attribute.
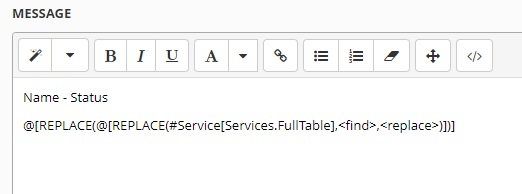
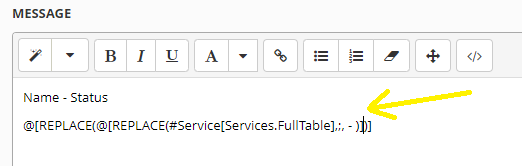
Next we need to make sure that the semi-colons are changed in <spacedashspace>. Select <find>and remove this and type ;. Next select <replace> and remove this and type ” – ” without the quotes. When finished the full function looks like:
@[REPLACE(@[REPLACE(#Service[Services.FullTable],;, – )])]
The replace will make sure the data shows like below:
Application Identity – Stopped
The next step is making sure every row is place on a new line.
Place the cursor behind the second closing square bracket as shown below:
Type the following ,|,<shift+return>. <Shift+Return> moves the )] to another line. When finished the result looks like:
@[REPLACE(@[REPLACE(#Service[Services.FullTable],;, – )],|,
)]
Select OK to save and select Save to store the changes in the service.
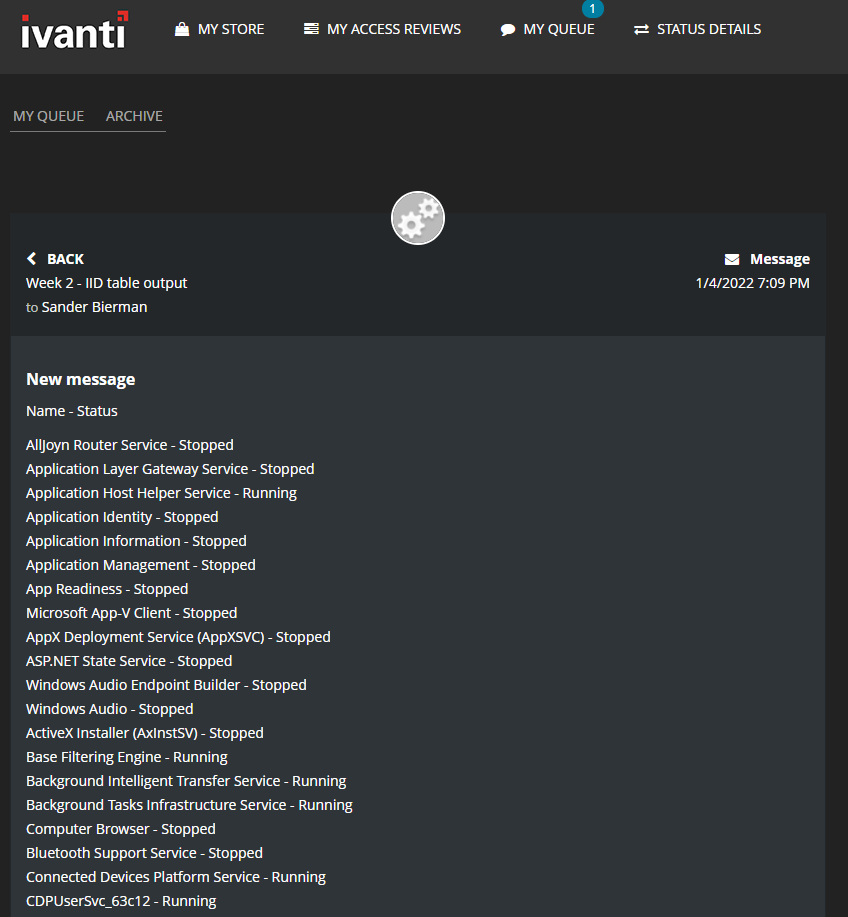
Logon to the Ivanti Identity Web Portal and request the service. When the transaction is finished the output in the message looks like:
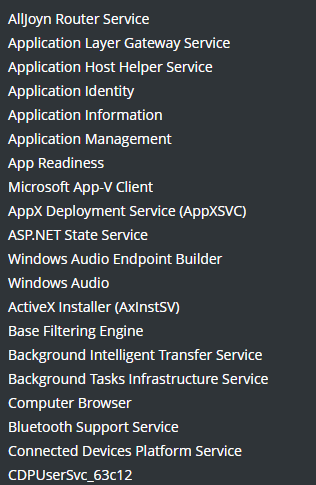
We can also make a list of one column by creating the following function:
@[REPLACE(#Service[Services.EntireColumn.Name],;,
)]
Save the changed settings in the Message workflow action and save the service. Request the service again to check the result.
In this example we selected the values of the Name table. All service DisplayNames are shown in the message.
Thank you for joining the Tip of the Weeks and hope to see you next week,