Ivanti Identity Director tables are very useful for storing data. In Tip of the Week 2, we discuss how to create PowerShell output in Ivanti Automation which can be imported in an Ivanti Identity Director table.
A full video recording of this blog is available on the bottom of this blog.
Tables are build with columns and rows. Ivanti Identity Director separates columns with semi-colons “;” and rows are separated with the pipe character “|”. Knowing this we need create the PowerShell output with semi-colons and the pipe character.
Example of a table output:
123-123-1234;S4;Phone;Android;8008937810;Active|123-123-1235;iPad;PDA;iOS;;Wiped
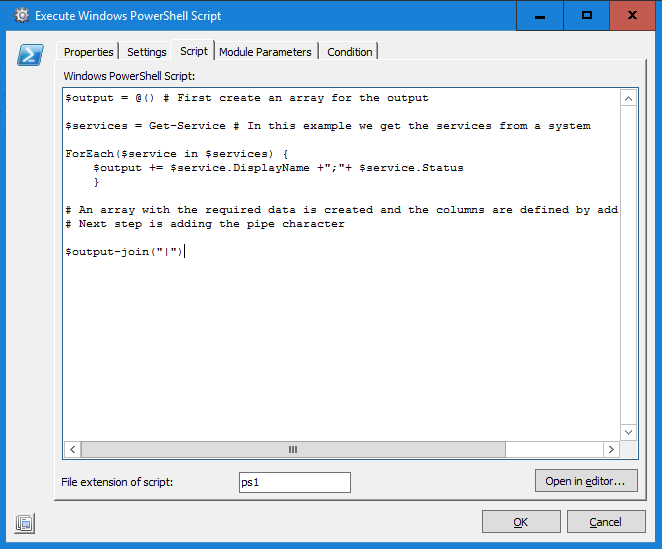
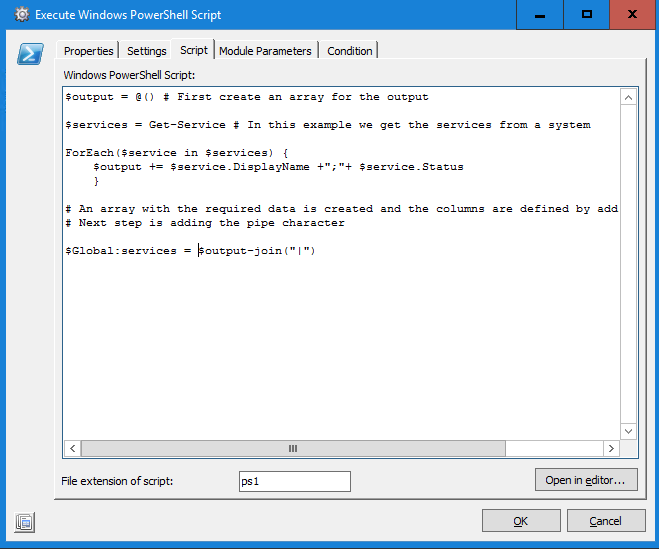
The PowerShell script below uses the command Get-Service to get all services from a system.
$output = @() # First create an array for the output

$services = Get-Service # In this example we get the services from a system

ForEach($service in $services) {
    $output += $service.DisplayName +";"+ $service.Status
    }

# An array with the required data is created and the columns are defined by adding the semi-colon
# Next step is adding the pipe character

$output-join("|")
Add this script to an Ivanti Automation Module as described below.
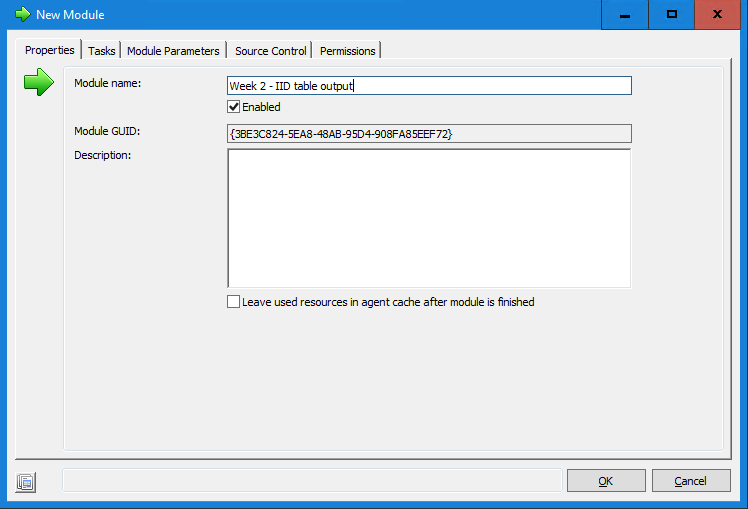
Create a new module and enter a name for the new module.
Go to the Tasks tab and select Add.
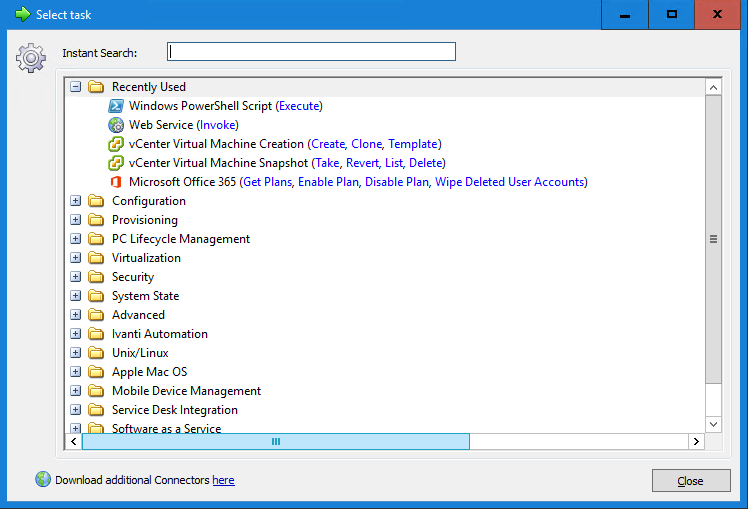
Select the Windows PowerShell Script (execute) task. Select the Script tab and add a script.
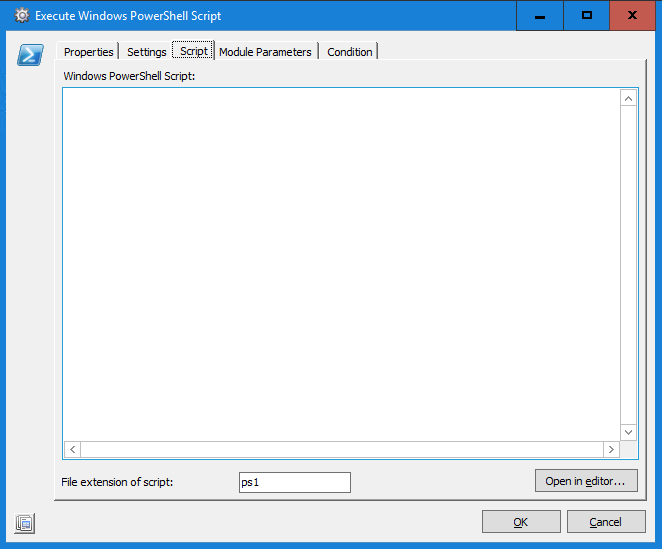
In this example the script discussed earlier is used.
The script is created but the output is not added to a parameter. Next step is creating a Module Parameter and make sure the output of the script is added to the parameter.
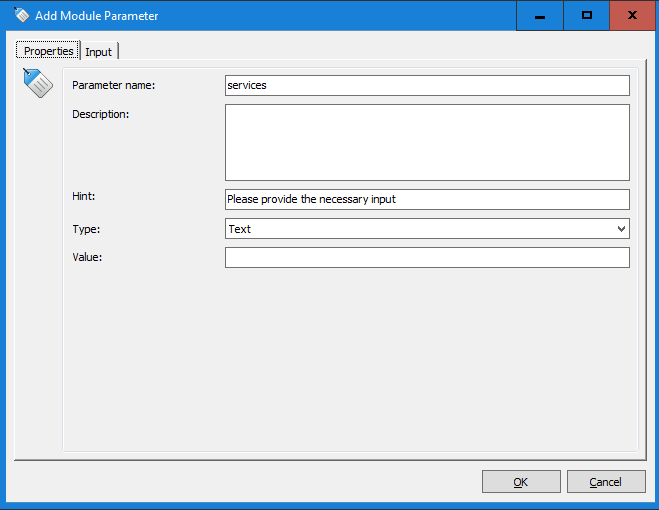
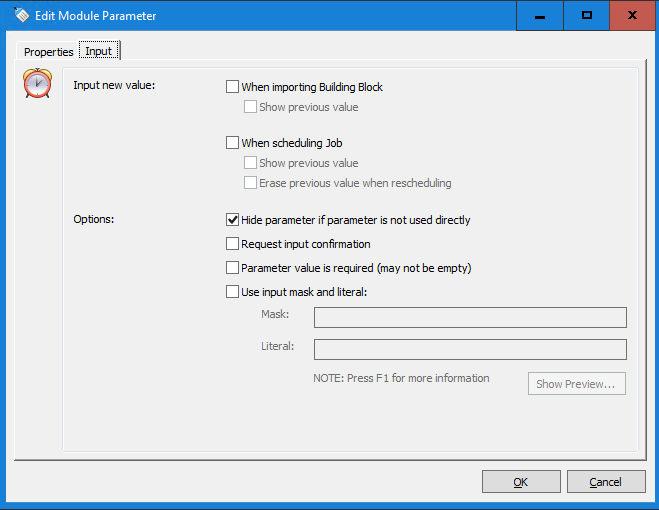
Go to Module Paramaters and create paramater (i.e. services) and make sure the parameter type is text. And make sure the Input – When scheduling job is disabled.
Next step is adding the output to the parameter. Use the Tip of the Week 1 blog how to use the Global option to add the output to the parameter.
The result should look like below screenshot:
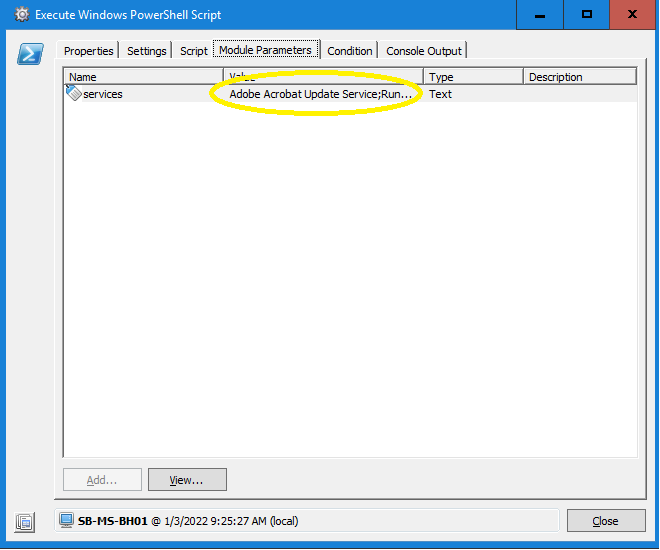
Before we create the Runbook (Ivanti Identity Director can only work with Runbooks) we test the new module. When the module succeeds the parameter services should have data like below screenshot.
Because Ivanti Identity Director only invokes Runbooks we need to create a new Runbook and add the new created module.
In the latest releases of Ivanti Automation we added a new system menu item or menu item. It’s possible to create a Runbook directly from the module.
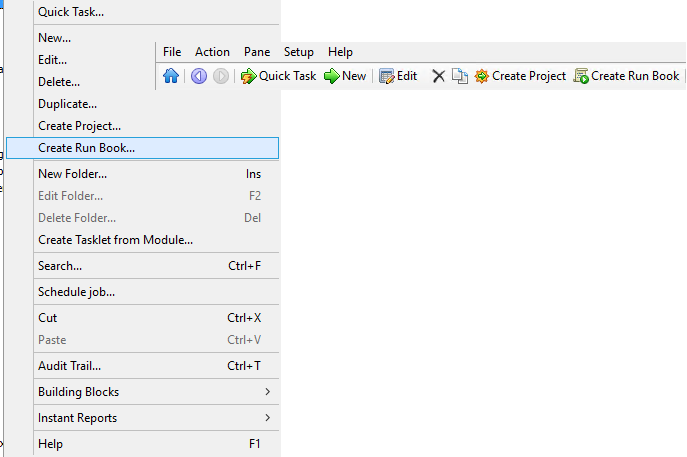
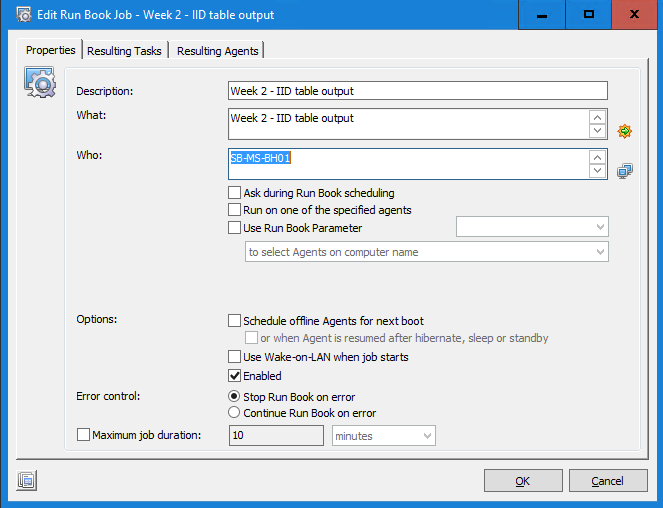
When using this option a new Runbook is created and the module is added. Make sure the Who is configured by adding an agent or team.
Last step in Ivanti Automation is make sure the output can be resolved by Ivanti Identity Director.
Go to the Run Book Parameters tab and select the sub tab Links. The parameters created in the module are available.
When using the Create Runbook from the menu’s in the module overview the action is automatically configured to both.
Personally I don’t like this because this will show the parameter in the Run Book Parameters and Run Book Results tab in the Invoke Run Book workflow action. And because it’s only needed as result we need configure the action.
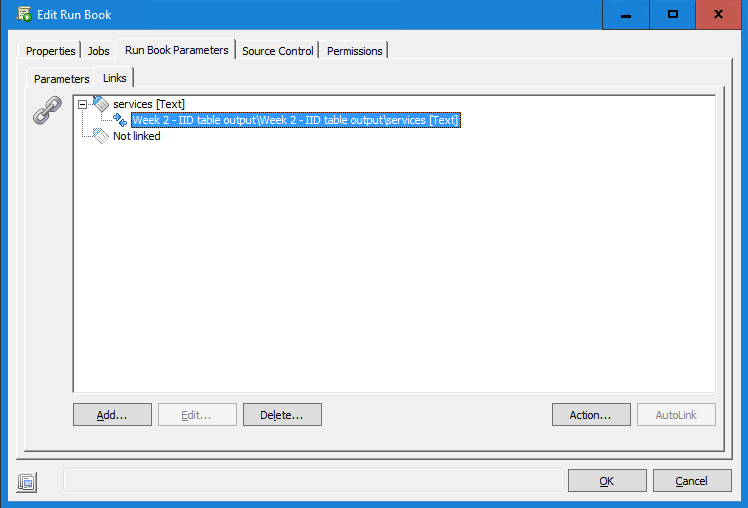
Configure the action to Get final value as shown below. The arrow should pointing to the left.

Next step is creating a new Service in Ivanti Identity Director. Open a web browser and open the Ivanti Identity Director Management Portal (i.e. https://<FQDN/IdentityDirector) and select Entitlement Catalog in the menu on the left side.
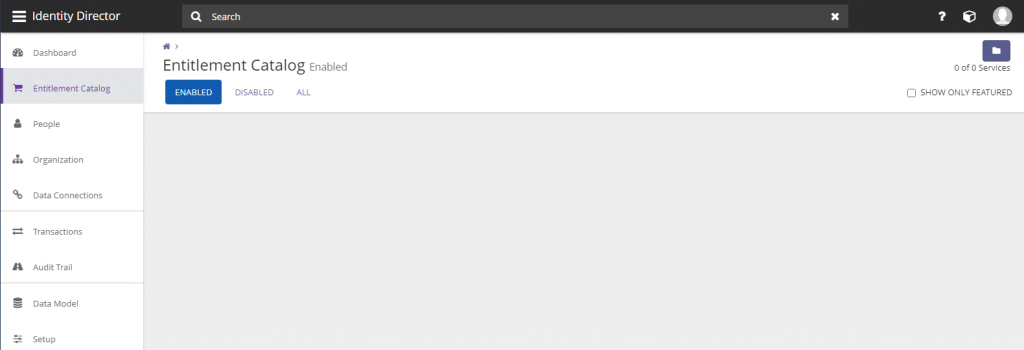
Select the Add button on the bottom of the page and a new service is created.
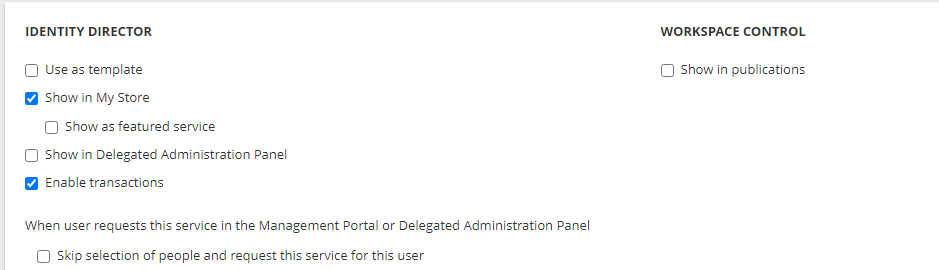
Give the new Service a unique name and make sure the following settings are configured:
- Name
- Show in MyStore
- Transaction Enabled
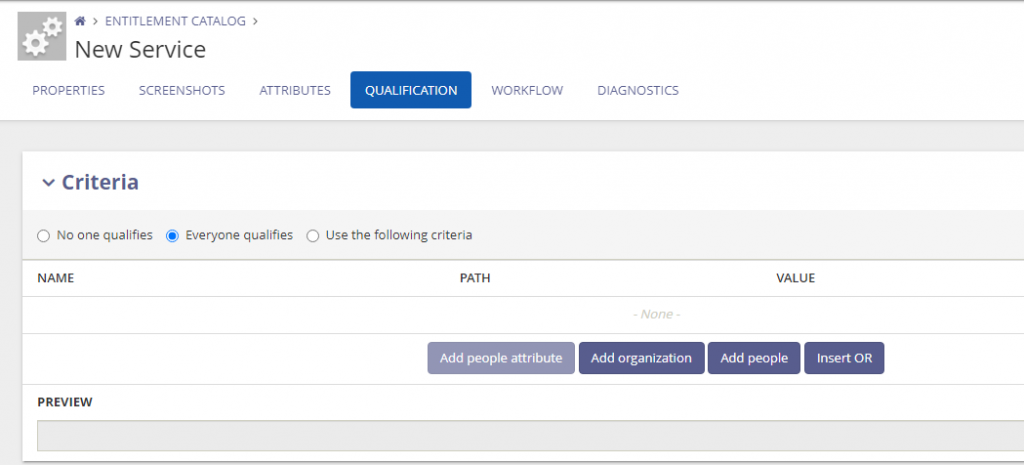
- Qualification Criteria
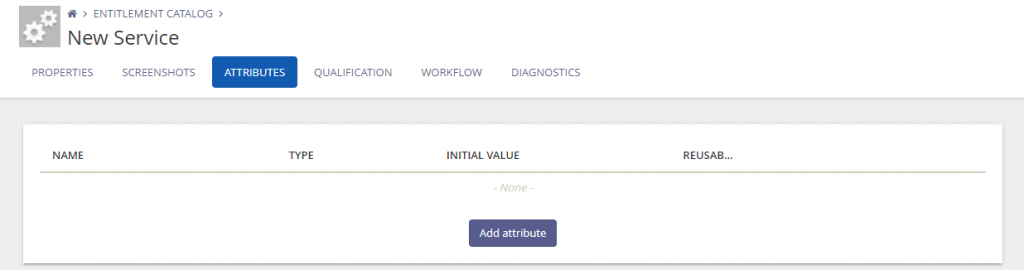
Next we need to create a Service Attribute. Go to Attributes and select Add attribute.
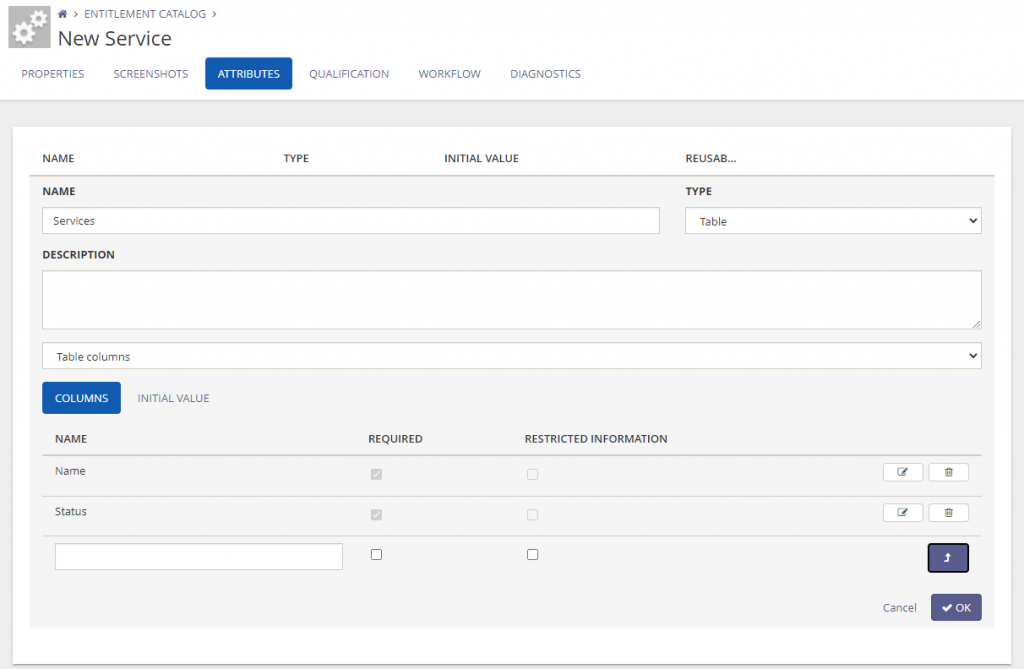
Give the Service Attribute a name and select the type Table from the drop down list. Based on the columns from the PS Script create the columns in the Service Attribute. In this example I used the DisplayName and Status of the services. I need to create 2 columns. It’s not needed to use the same names for the columns. If the value in the columns in required make sure this is enabled.
When finished select OK to save the Service Attribute and go to the tab Workflow.
Click on the Start Delivery in the Deliver workflow and for select the option Self Servicing – When qualified people request the service.
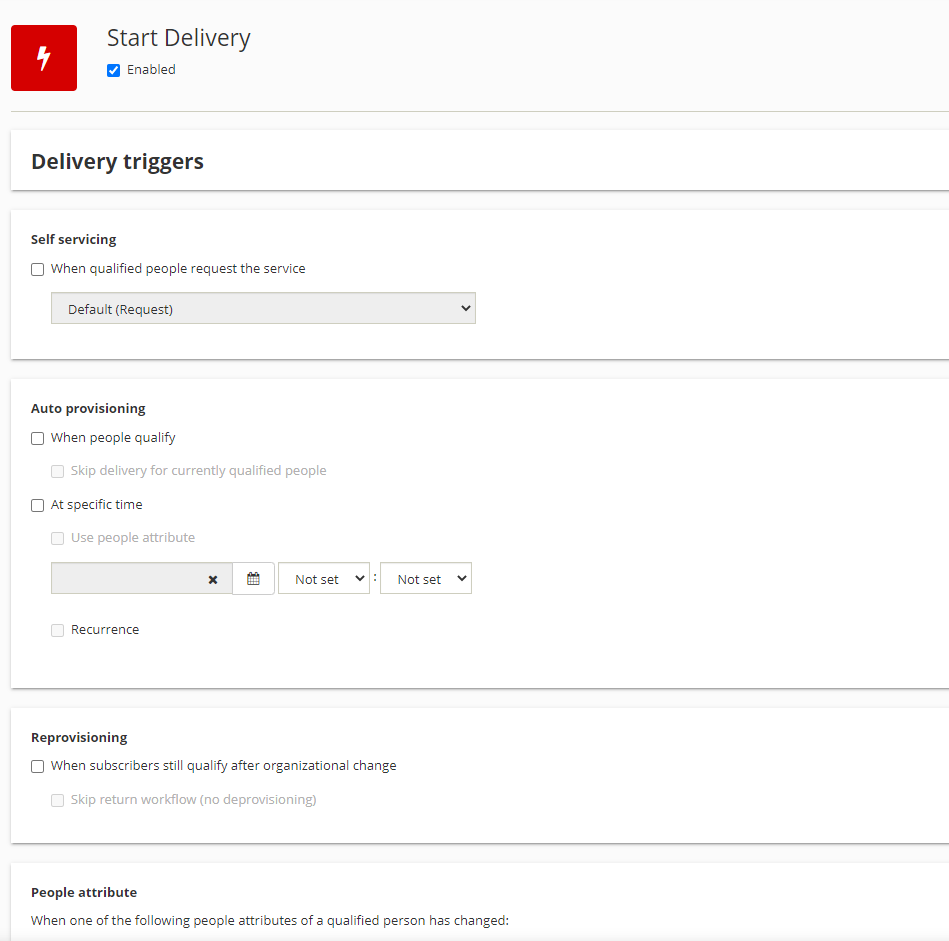
Select OK to continue. Select the + sign between the Start Delivery and End Workflow in the Deliver workflow.
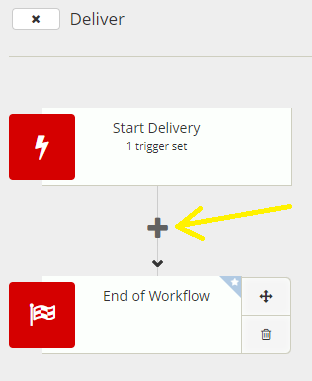
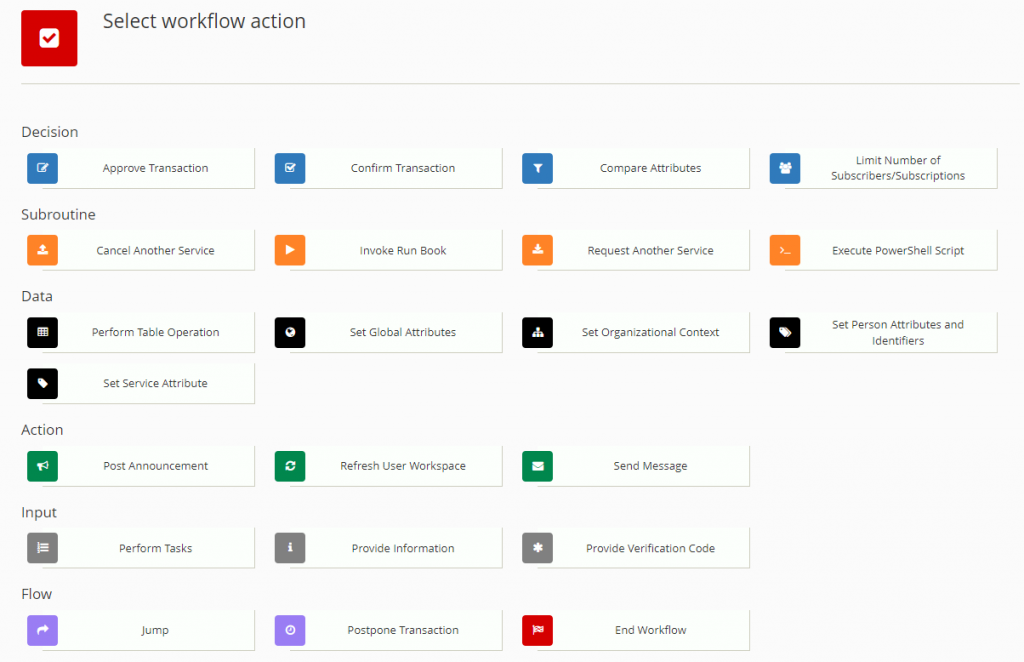
Select the workflow action Invoke Runbook from the list of workflow actions.
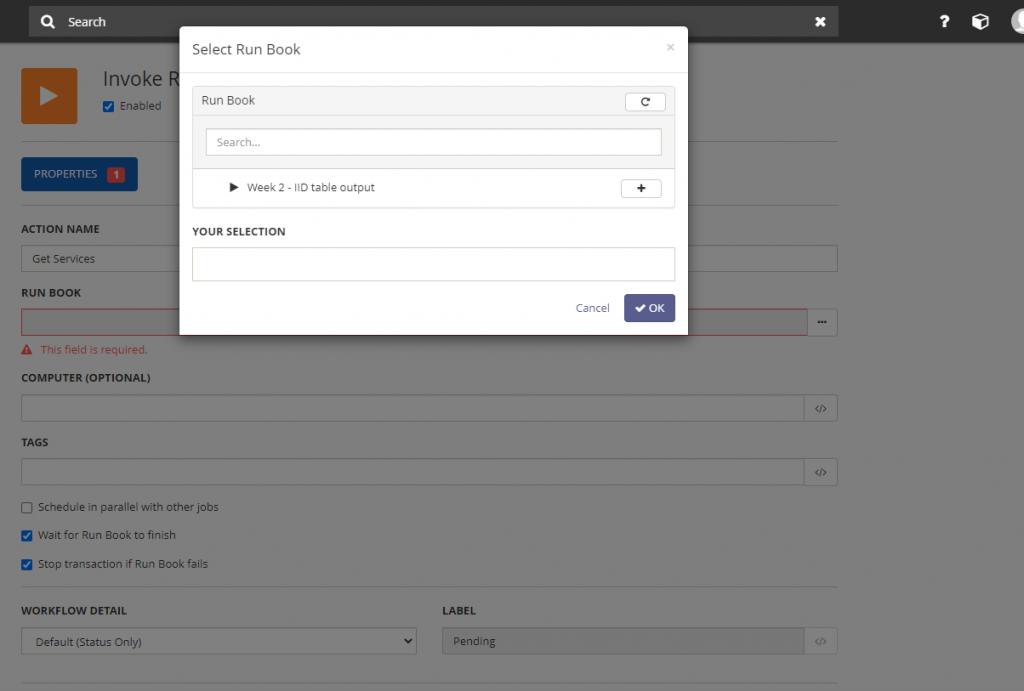
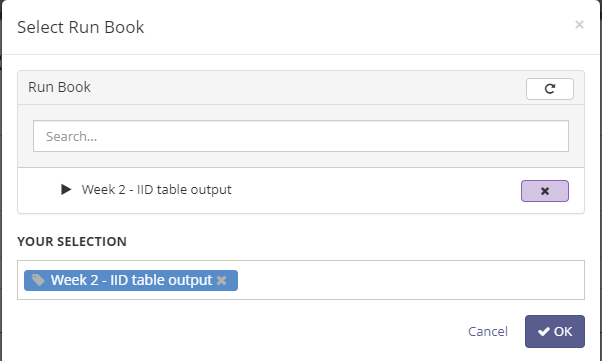
Give the workflow action a name and select the created Ivanti Automation Module by selecting the 3-dots icon behind Run Book.
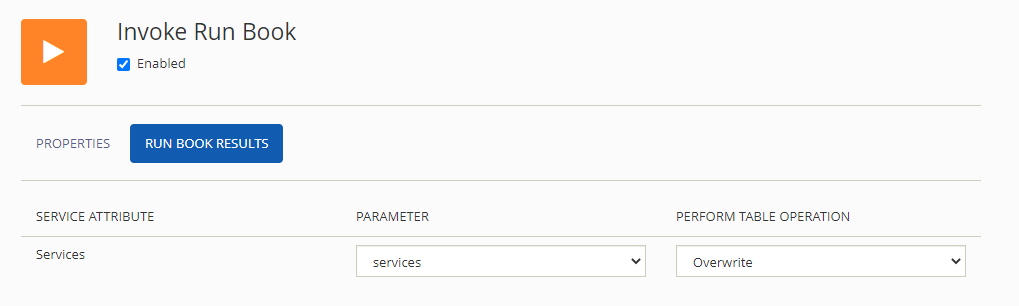
After selecting the Runbook the tab Run Book Results appear. This is the tab where we need to connect the Service Attribute to the Ivanti Automation parameter. For tables there are 2 options. Overwrite and append. In this blog we use the option overwrite.
This means every time the service is used the Service Attribute table is overwritten with new data.
When finished select OK to continue and store the workflow action.
Select the + sign under the new created Invoke Runbook workflow action and select the workflow action Send Message.
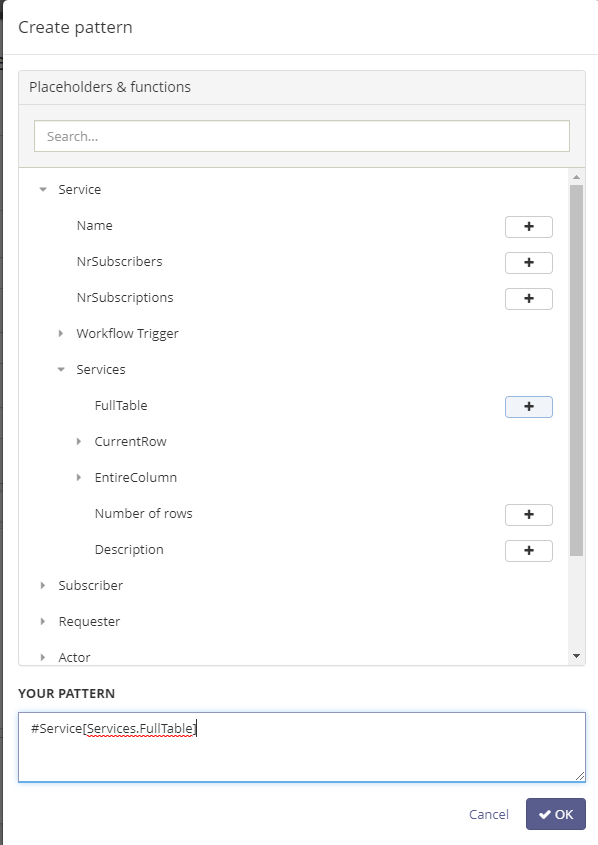
Set the Actor to Requester and remove the default data in the Message. Add the value Service Attribute Full Table to the Message field.
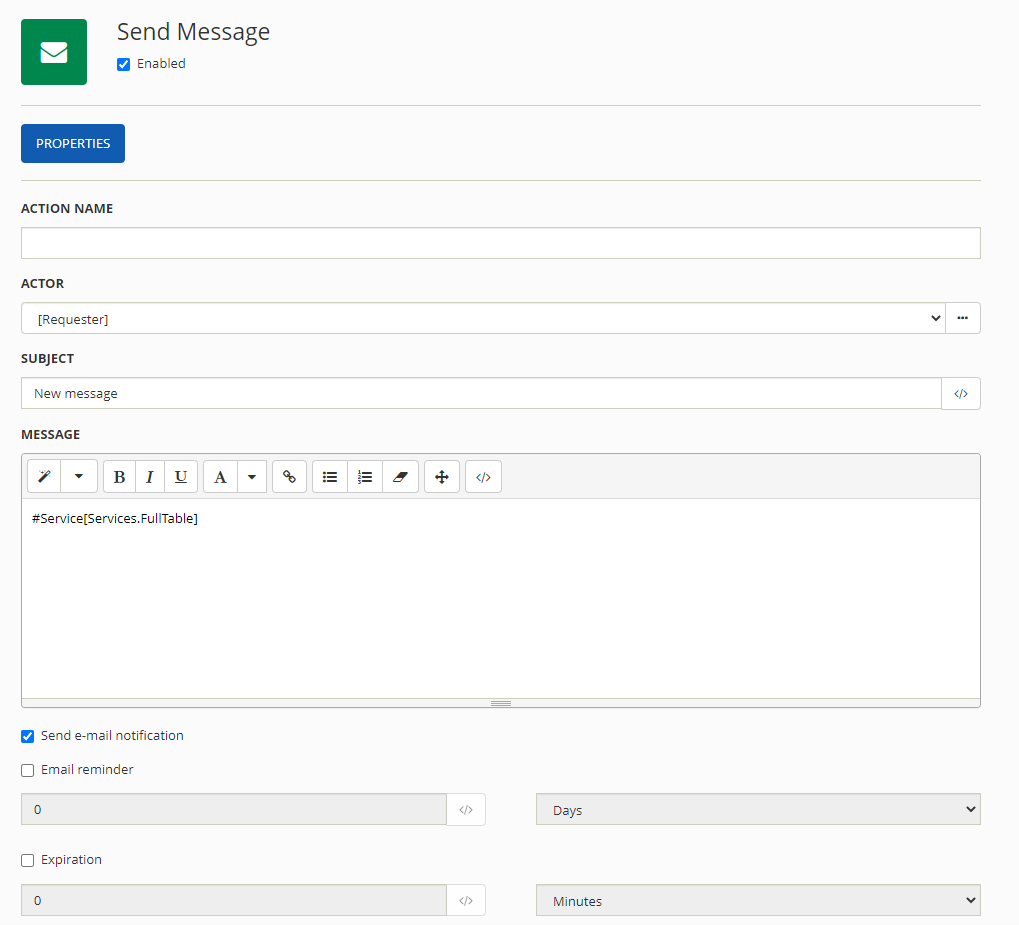
Make sure the Delivery Option is only configured for Identity Director. We will not send mails in this blog.
Select OK to continue and save the workflow action.
Last action before we start testing is making sure the service is returned when the service is executed.
Select the x in front of Deliver to close the Deliver workflow and select the Start Return in the Return workflow

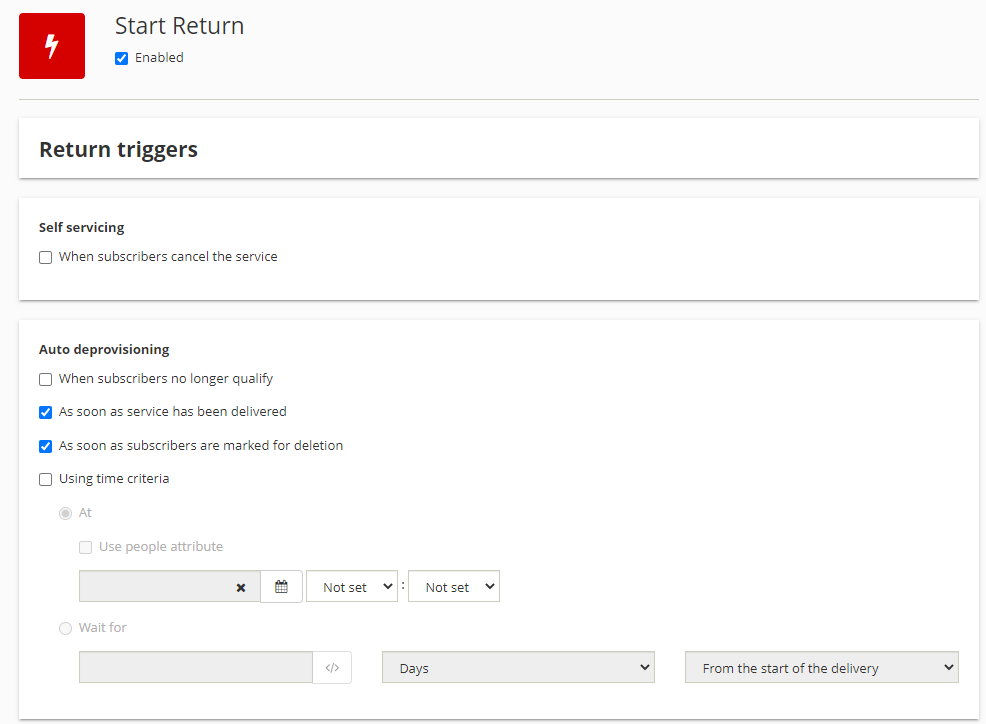
After selecting the option As soon as service has been delivered click OK to continue and select Save on the bottom of the page to save the service.
Open de Ivanti Identity Director WebPortal for testing the new service and login with a synchronized and active user account.
After logon the new created service is available. Select the service and request the new created service.
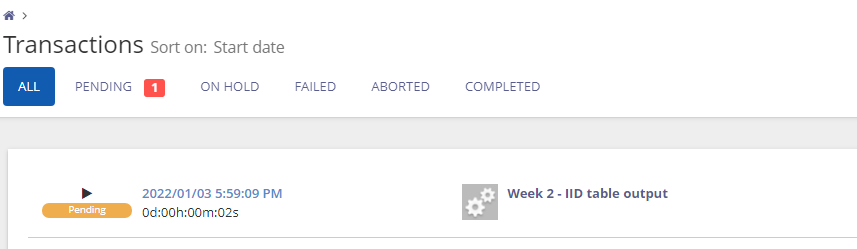
During the execution the status can checked in the Transactions of the Ivanti Identity Director Management Portal and because there is an Invoke Runbook the job status can be checked in Ivanti Automation.

When both service and runbook are finished correctly a new message appears in the My Queue overview. When selecting the message the output looks like below. When the data is shown in the message from the services the process is working as expected.
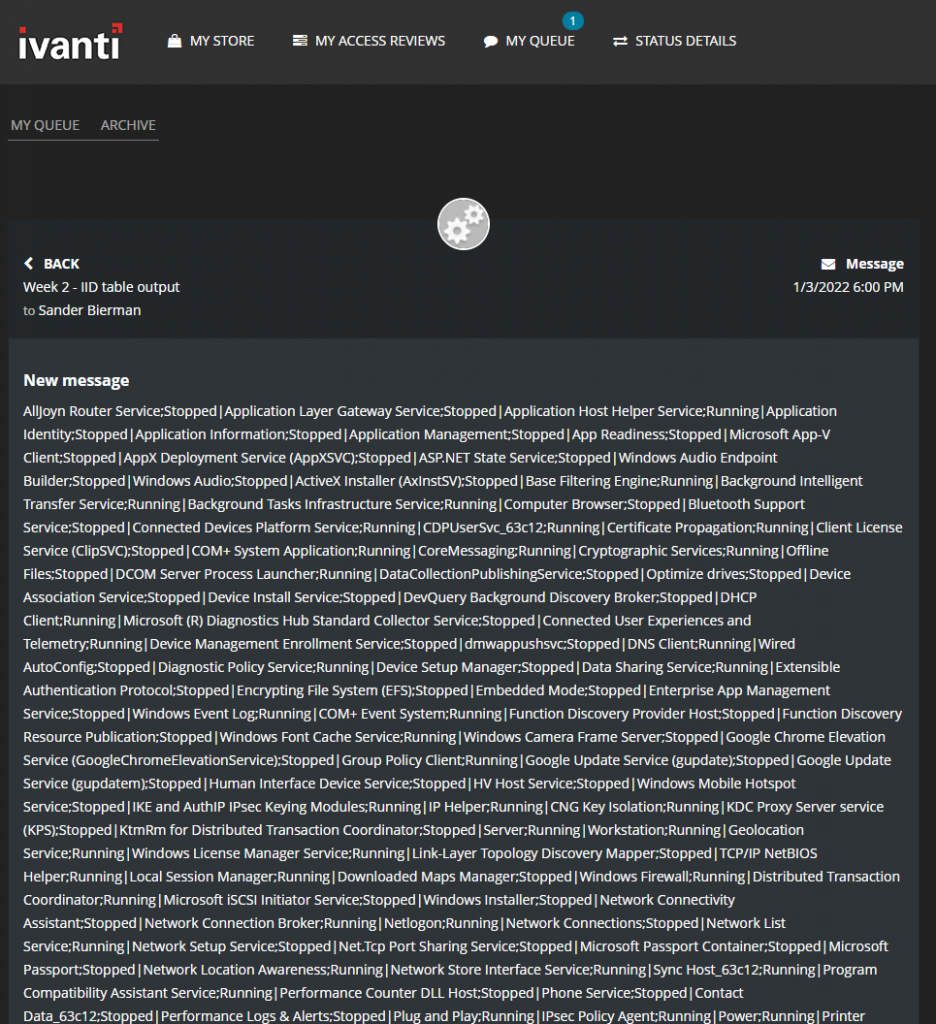
We see the semi-colons and pipe characters in the message and makes the text hard to read. In week 3 of Tip of the Week we discuss how we can make the text more readable.
Hi Sander,
This is rather interesting. What are your thoughts on dealing with roles within Automation/Identity? At the moment I’m using 2 CSV files filled up roles seperated with ; etc, it is tedious to always update and keep accurate, do you have any advice similar to the above when dealing with a lot of roles from AD? Thanks
Marc