High Availability is the most important requirement for current automated business processes. In this blog we describe how the Ivanti Automation Dispatcher WebAPI can be load balanced for a secure business continuity.
After the acquisition by Ivanti the old RES Software tool Automation is used as glue between all the products of Ivanti. For example Ivanti Service Manager, Ivanti Endpoint Manager etc.
For most of these integrations the Ivanti Automation Dispatcher API is used. Unfortunately most of these products of Ivanti but also 3th party software can only connect to one IP of a Dispatcher. When connecting to one Dispatcher there is a single point of failure which is not recommended in production environments.
To prevent the single point of failure this blog describes how to configure a Load Balanced solution with 2 or more Ivanti Automation Dispatchers. Both HTTP and HTTPS configuration are discussed. The port is not related to HTTP or HTTPS and can be changed in the Dispatcher API global setting.
The following are steps needed for a successful Dispatcher WebAPI configuration:
- Enable Ivanti Automation Dispatcher WebAPI with and without SSL;
- Create Dispatcher Monitor on the Citrix ADC;
- Create Dispatcher Service Group on the Citrix ADC;
- Create Load Balancer Virtual Server on the Citrix ADC;
- Add the certificate used for the Dispatcher WebAPI to the Citrix ADC;
- Add the new create Load Balancer Virtual Server IP Address to local DNS;
- Add the IP Address or FQDN to Ivanti Service Manager as an example.
Enable Ivanti Automation Dispatcher WebAPI non-secure
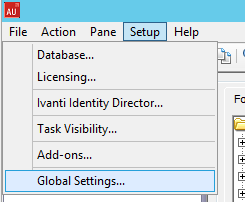
Open the Ivanti Automation Console and select Setup – Global Settings from the top menubar.
Search for the option Dispatcher WebAPI – WebAPI State in the list.

When using the non-secure configuration normally port 80 is used. Sometimes the Ivanti Automation Management Portal is installed which runs on the IIS (Internet Information Service Server). To be sure if the port is available execute the command below:
netstat -an |find /i “<port number>”
When port 80 and 443 are used by IIS another port can be used (i.e. 8080, 8081).
To enable the Ivanti Automation Dispatcher WebAPI configure the WebAPI state by double-click the setting and configure the setting as below.

Disable the option SSL enabled and enter the port number which is available and select OK to continue.
Execute the following command to test if the Dispatcher WebAPI is enabled.
http://<ipaddress_dispatcher:<portnumber _when_not_80>/Dispatcher/SchedulingService/Help
When a login window appears the Dispatcher API is enabled. How to create an account to login will be discussed later in the blog.
Enable Ivanti Automation Dispatcher WebAPI secure
First need is a certificate for the Dispatcher WebAPI. Normally a wildcard certificate can be used but because I use Let’s Encrypt certificates and I don’t want to change the Thumbprint every 3 months I created an internal certificate with a local installed Root CA Server.
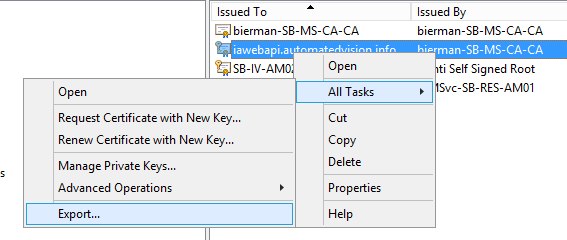
Import the certificate on all Dispatchers. See screenshot below:
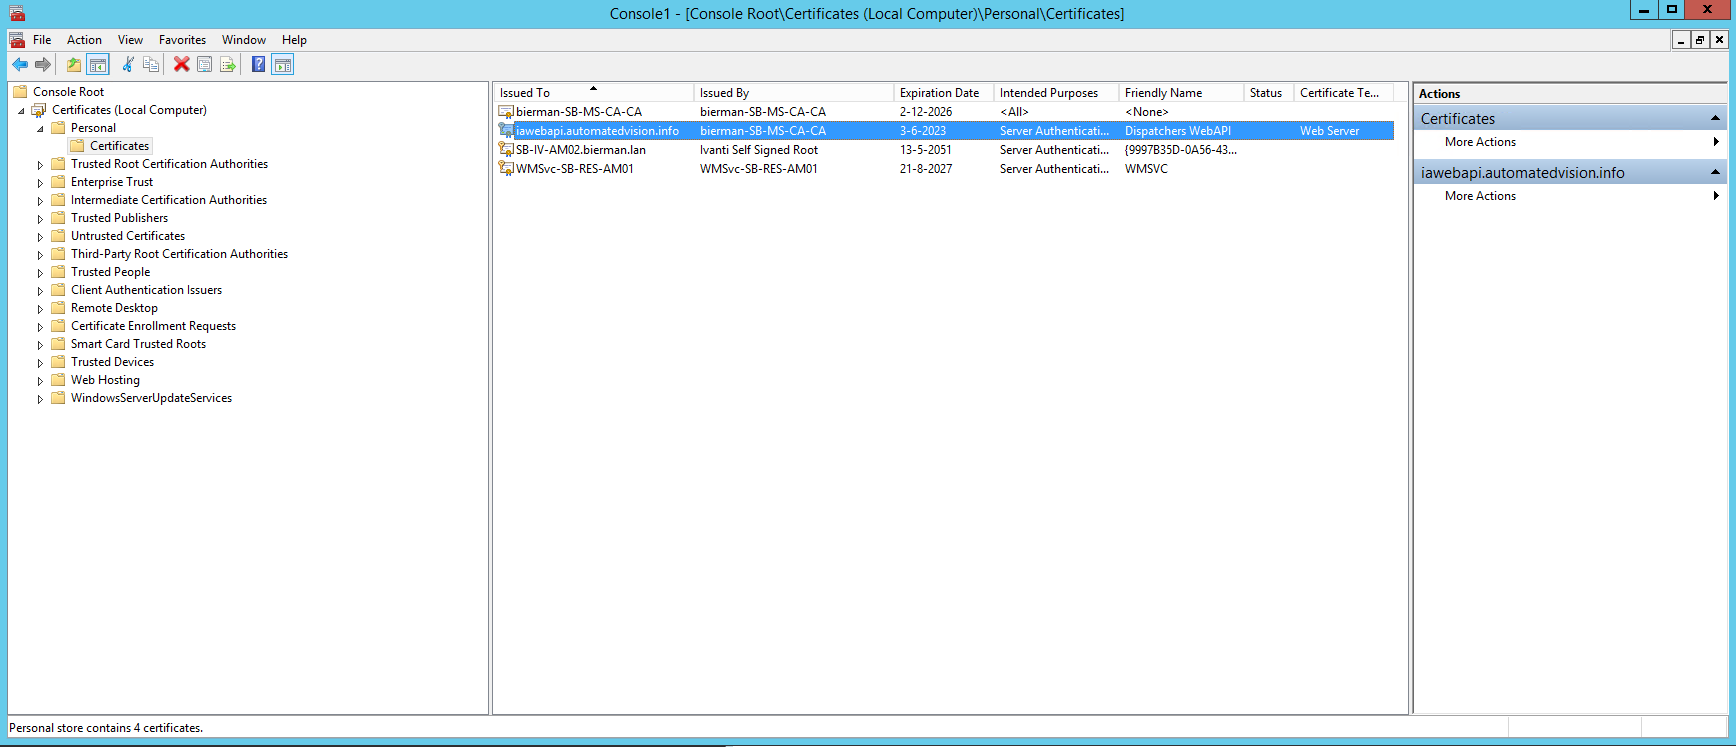
I used the hostname iawebapi.automatedvision.info and added the name in the DNS (discussed later).
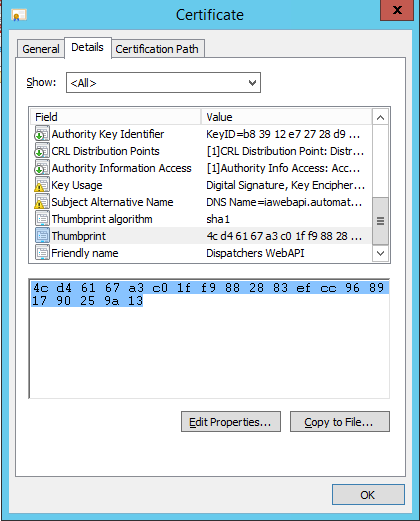
Open the certificate and click on Details tab. Scroll down until Thumbprint. Select the hexadecimal value and execute CTRL+C (as right mouse – Copy doesn’t work).
And paste the thumbprint value in the WebAPI setting as below screenshot. Make sure the option SSL Enabled is also selected.
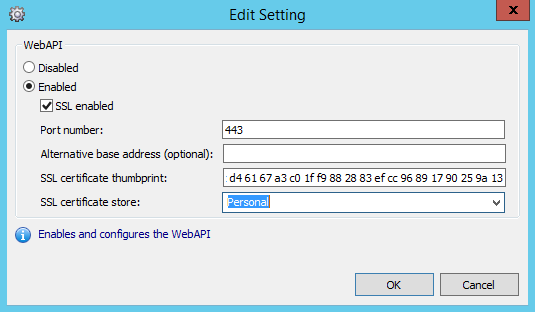
From the dropdown box select the Personal Store. This is the location of the certificate used for the Ivanti Dispatcher WebAPI. Select OK to save the configuration.
Note: When port 443 is used another port can be used (i.e. 8080, 8081).
Test the Dispatcher API
Non-Secure http://<Dispatcher IP>:<portnumber>/Dispatcher/SchedulingService/Help
Secure https://<Dispatcher IP>:<portnumber>/Dispatcher/SchedulingService/Help
When using the secure solution the message appears that the certificate isn’t valid.
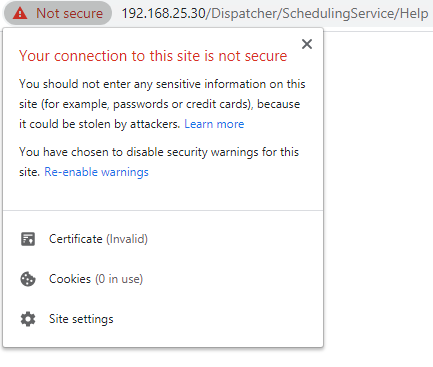
This is normal behavior when using the IP Address and not the hostname. Using an internal created certificate or 3th party certificate make sure a DNS entry is created (discussed later).
When the test succeed a logon window appears. Because there is probably not an Automation User Account created. Next step is creating an Automation User Account (Ivanti Automation Authentication).
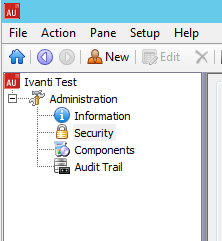
Go to the Ivanti Automation Console and open Administration – Security. When no users are created be prepared to add your domain account in the Logins tab. If this account isn’t created a logon window will popup when starting the Ivanti Automation Console.
Adding a domain user account steps:
Select New from the menu.

Add a domain user (Domain\Username) and select Microsoft Windows Authentication from the Account Type dropdown box.
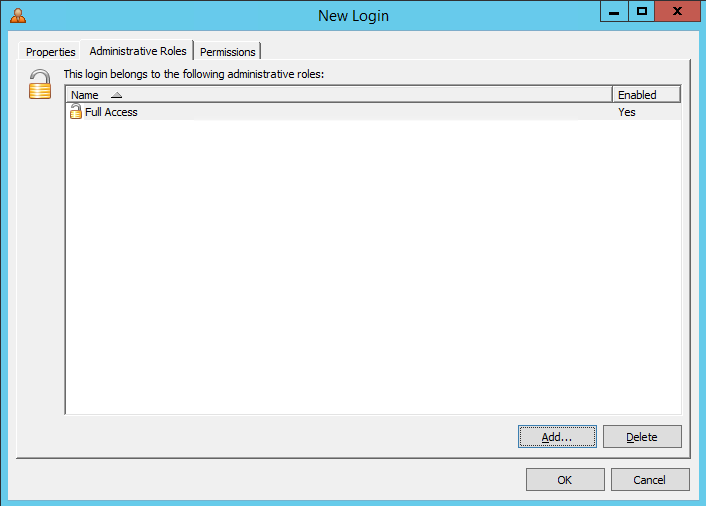
Make sure the Check Type dropdown box is set to Domain. Select the tab Administrative Roles and select Add. Select the option Full Access (default setting during installation).

Select OK to save this new domain user. Next step is creating a WebAPI user (Ivanti Automation Authentication).
Select New from the menu.
Give the Login a name (i.e. webapi) and select Ivanti Automation Authentication from the Account Type dropdown list. Enter the password twice and select the option Do not apply global Password Security Policy (this setting is important because we don’t want to change this password every 3 months).

Next step is adding the Administrative Role. Go to the Administrative Role tab and select Add.
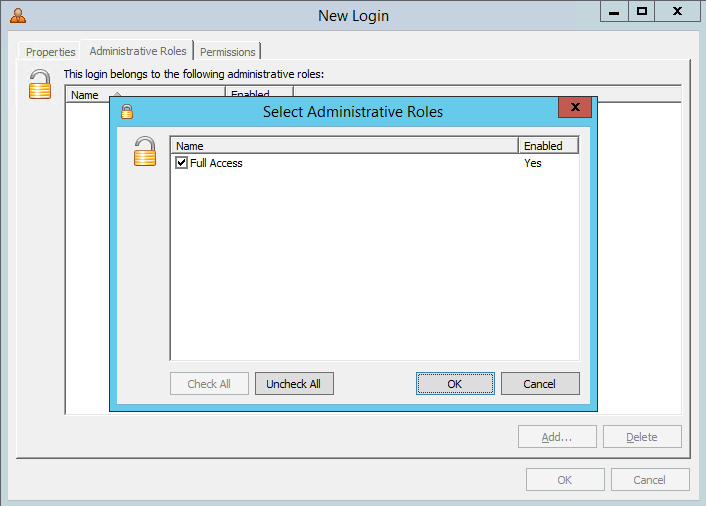
Select the Full Access and select twice OK to store the new account.
Test the Dispatcher WebAPI again and type the Ivanti Automation Authentication username and password in the login window.
https://192.168.25.50:8081/Dispatcher/SchedulingService/Help
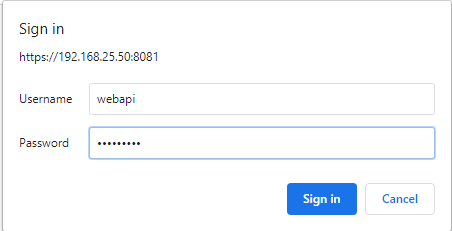
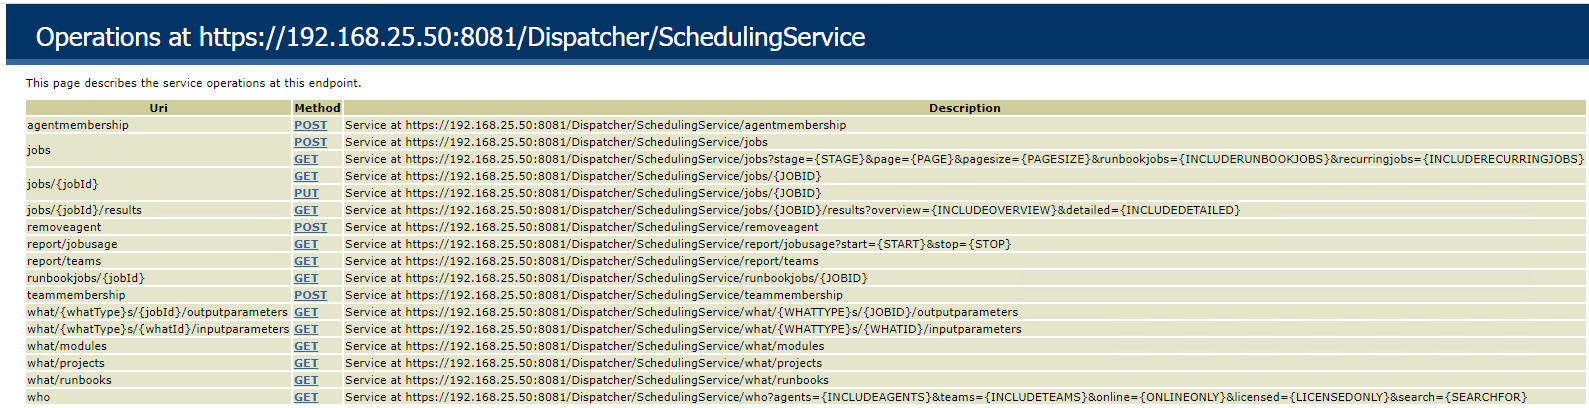
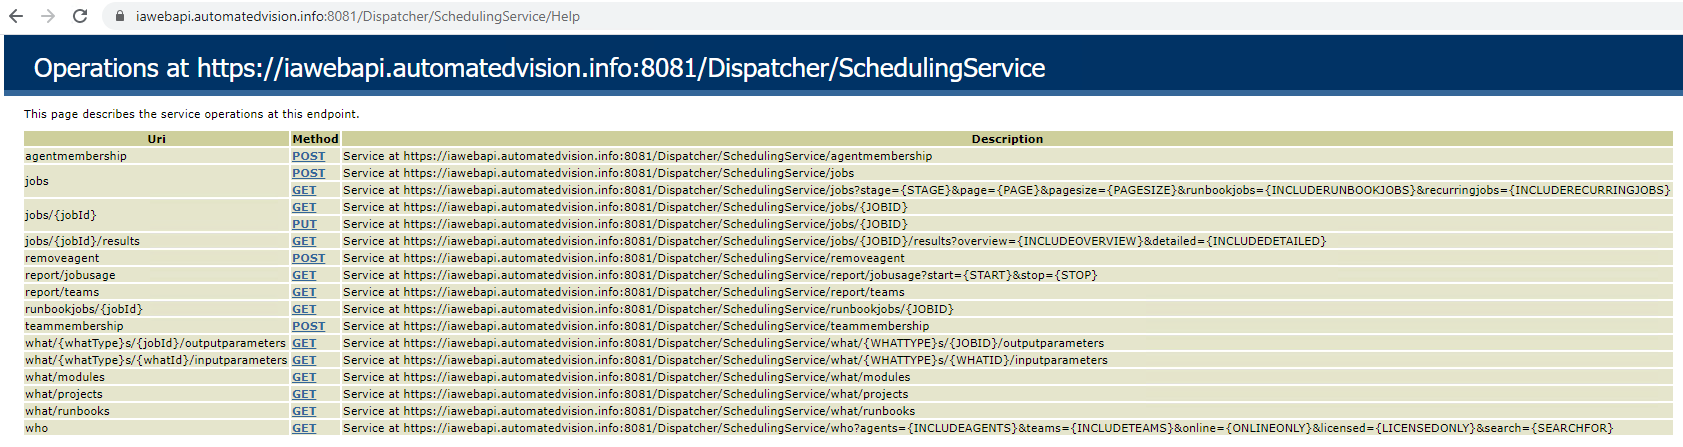
When the login succeeds the screenshot below is shown and the Ivanti Automation Dispatcher WebAPI is successful configured.
Now the Dispatcher WebAPI is enabled and working we move on to the Citrix ADC (this blog describes the Citrix ADC/NetScaler but I’m trying to write more blogs in future for other Load Balancers, like F5).
Create a new Monitor for the Load Balancer Service Group
Because the monitor is used to check if the source is available and the dispatcher WebAPI uses a logon to resolve a 200 value as Request Method return we need to create a new monitor which can login and resolve the Request Method value. The steps are described by CLI and by the GUI.
Create a monitor by GUI
The monitor will use an username and password (Account created in Automation) to authenticate against the Ivanti Automation Dispatchers used for the Load Balancing.
Because we don’t want to add unencrypted password in the Send String. First step is to create a base64-encoded string containing the username and password.
For example:
Username : webapi
Password : Test1234
Open een Putty session to the Citrix ADC and login. Next type shell followed by <enter>.

Next type the command below followed by <enter>:
echo -n webapi:Test1234| b64encode -m – | sed -n ‘2p’
Change the username and password when needed.
A base64-encode value is returned and must be copied and paste somewhere safe.
For Example – d2ViYXBpOlRlc3QxMjM0
Type exit twice to close the Putty session.
Creating the base64-encoded string can also be created with a tool named Wfetch but will be discussed in another blog.
Logon to the Citrix ADC and go to Traffic Management – Load Balancing – Monitor and select Add. Give the monitor a name (i.e. mon_ia_webapi).
Tip: Use lowercase as much as possible.
In the Type section select the type TCP-EVC and enter the following line in the Send String field:
GET /Dispatcher/SchedulingService/help HTTP/1.1\r\nAuthorization: Basic d2ViYXBpOlRlc3QxMjM0\r\nHost: <dispatcherIP:portnumber\r\n\r\n\r\n
After Basic enter the base64-encoded string created before (See marked in the string in above example).
Because 2 or more dispatchers are used we need to add all dispatchers in the Send String. <Enter> after the first line and add the second on a new line. Change the Dispatcher IP Address. Continue this process to add all dispatchers you want to use in the Load Balance Virtual Server. In my lab I have 4 Dispatchers but use only 2 to Load Balance the Dispatcher WebAPI.

Type 200 in the Receive String. This is the expected value when the Send String succeeds. And when the Dispatcher WebAPI is configured with SSL enable the option Secure.
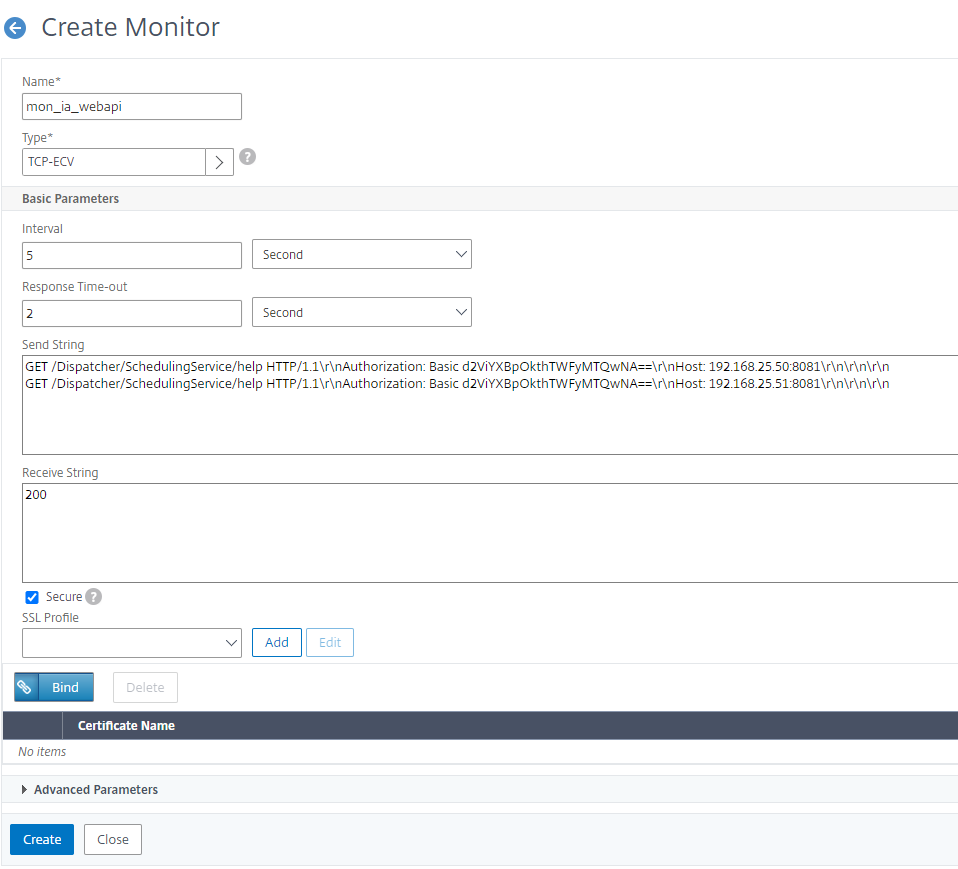
Select Create to continue.
When opening the new created the monitor the Send String remove all CRLF and place the 2 GET actions on one line.

Create a monitor by CLI
Open een Putty session to the Citrix ADC and login. Next type shell followed by <enter>.

Next type the command below followed by <enter>:
echo -n webapi:Test1234| b64encode -m – | sed -n ‘2p’
Change the username and password when needed.
A base64-encode value is returned and must be copied and paste somewhere safe.
For Example – d2ViYXBpOlRlc3QxMjM0
Type exit to close the shell.
Next create the monitor with the following command
add lb monitor mon_ia_webapi TCP-ECV -send “GET /Dispatcher/SchedulingService/help HTTP/1.1\r\nAuthorization: Basic d2ViYXBpOlRlc3QxMjM0\r\nHost: <dispatcherIP:portnumber> \r\n\r\nGET /Dispatcher/SchedulingService/help HTTP/1.1\r\nAuthorization: Basic d2ViYXBpOlRlc3QxMjM0\r\nHost: <dispatcherIP:portnumber> \r\n\r\n ” -recv 200 -LRTM ENABLED
When using the SSL Dispatcher API add the following to the Send String above -Secure YES.
The new monitor is created as in screenshot below.

The monitor is created and the next step is creating the Load Balance Service Group.
Create a new Load Balancer Service Group
Create Load Balance Service Group by GUI
Go to Traffic Management – Load Balancing – Service Groups and select Add. Give the ServiceGroup a name (i.e. svcgrp_ia_webapi).
In the Protocol select HTTP when using the non SSL Dispatcher WebAPI and SSL when using the SSL Dispatcher WebAPI.
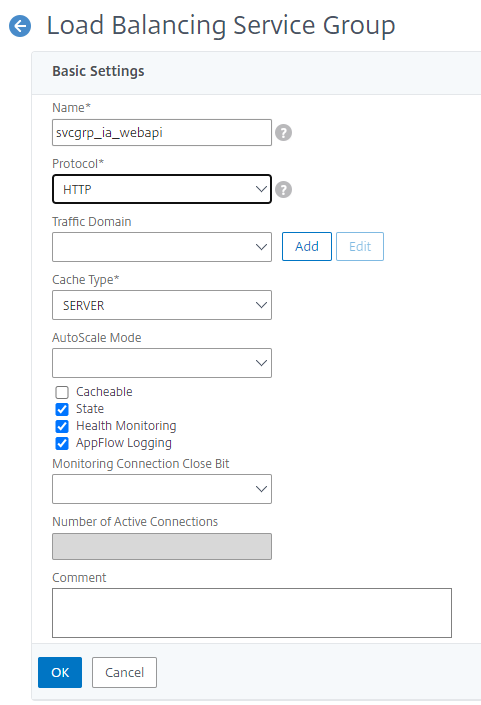
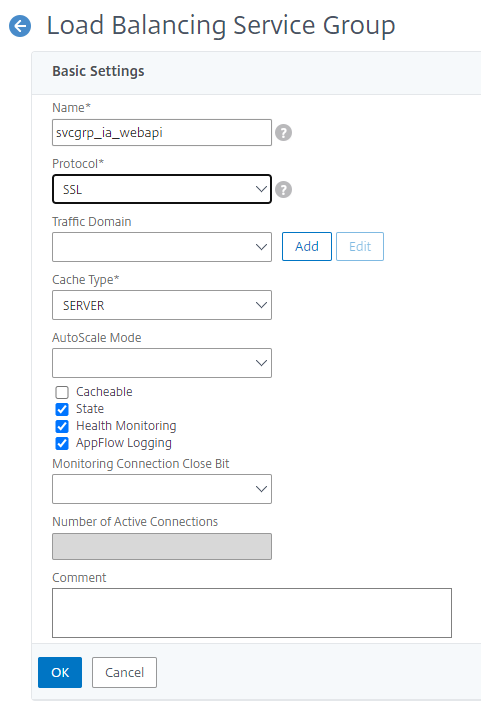
Select OK to continue. Next action is adding the Service Group Members (Ivanti Automation Dispatcher servers). I added 2 Ivanti Automation Dispatcher servers to the Servers menu. See example below screenshot.
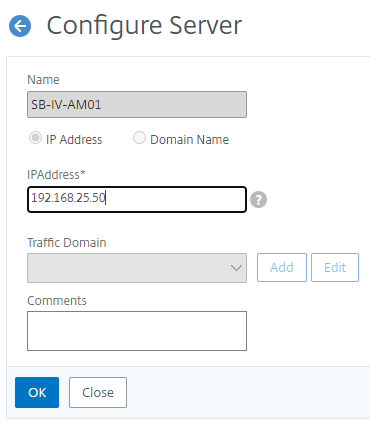
Add the Dispatcher Servers.
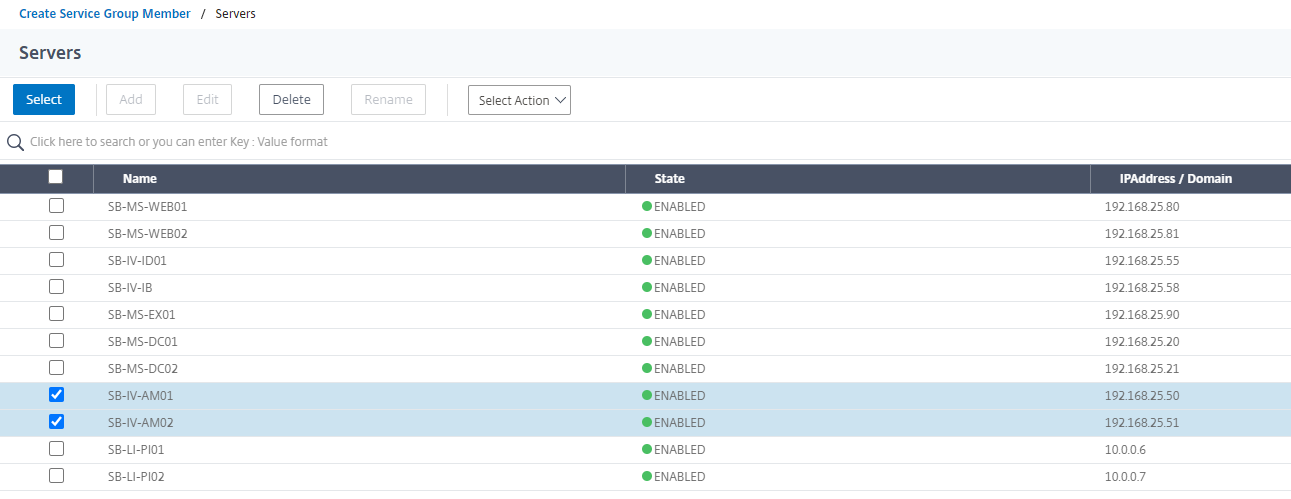
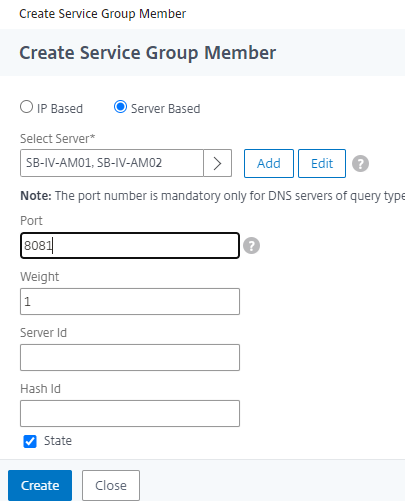
When the servers are added select the No Service Group Members. Select the option Server Based and select the added Dispatcher Servers from the list and click Select.
Enter the port used in the Dispatcher WebAPI and select Create in the next screen to continue.
Select OK to continue and select the menu item Monitors from the menu on the right side.

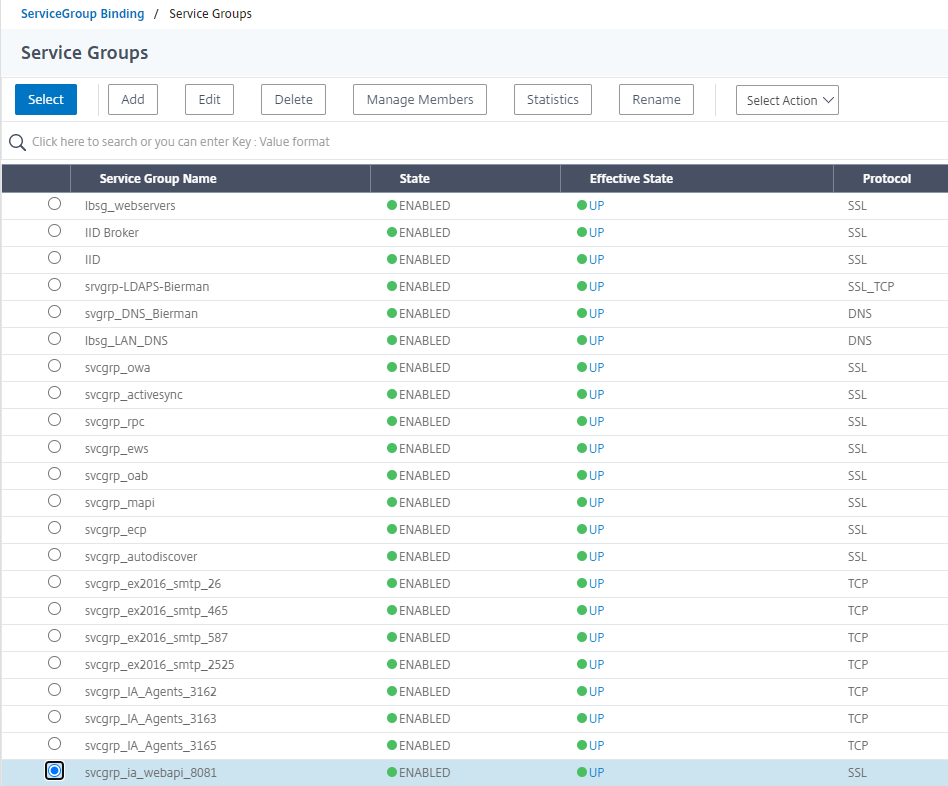
Select the No Service Group to Monitor Binding to add the new created monitor.
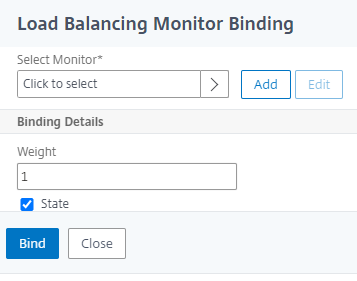
The new created monitor is probably on the second page. Just scroll down and select the next page and select the monitor.
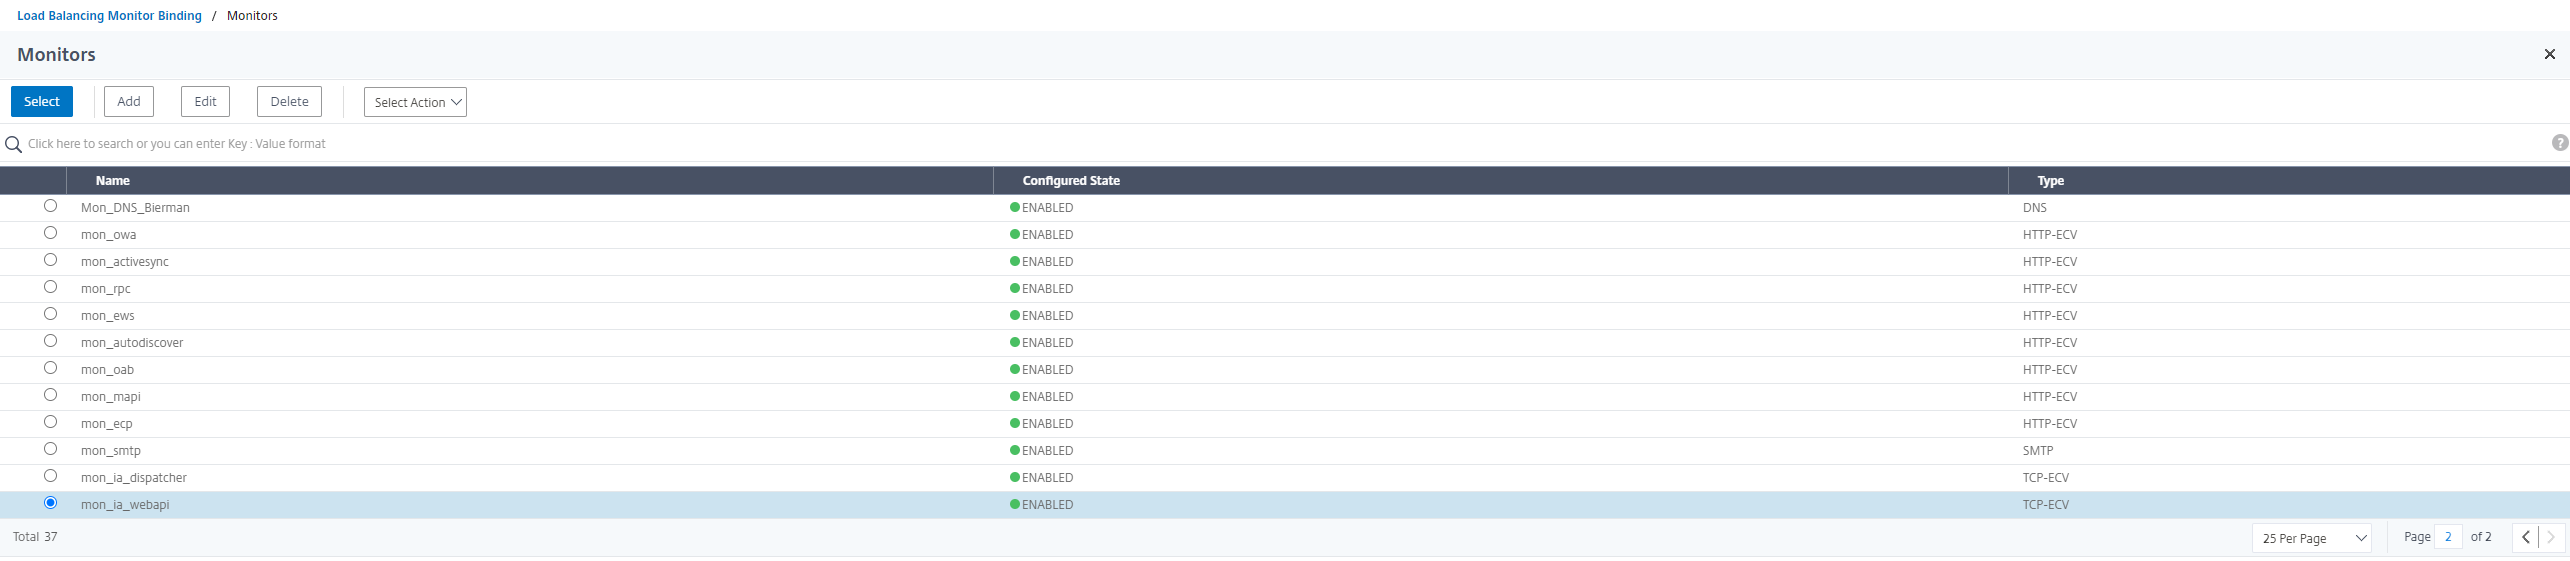
When finished click Select to add the monitor to the Service Group. Next select Bind to finish.
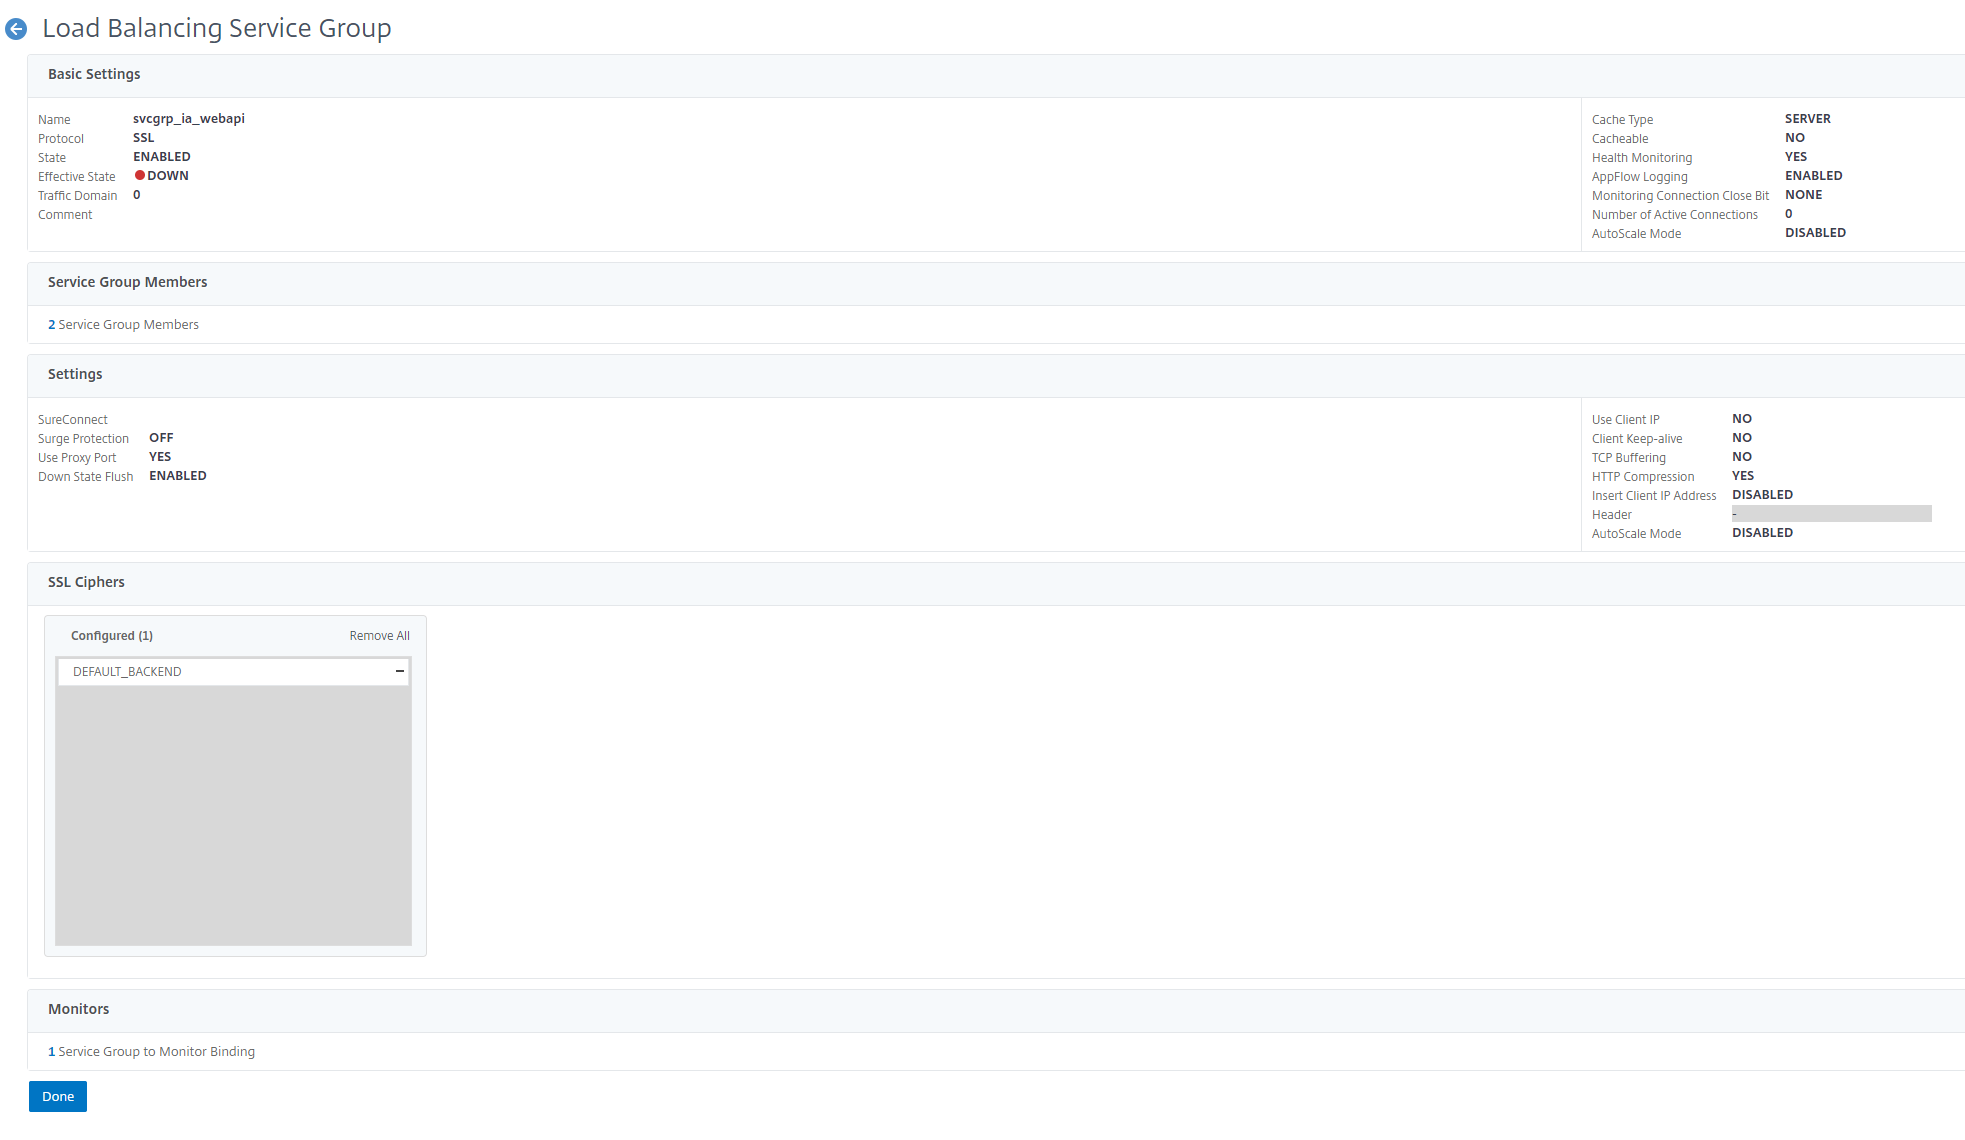
Select Done to finish the Service Group configuration. When the Service Group is working correctly the Effective State will show UP.

Create Load Balance Service Group by CLI
Open een Putty session to the Citrix ADC and login and execute the commands below.
add servicegroup svcgrp_ia_webapi_8081 SSL  ## when using SSL
add servicegroup svcgrp_ia_webapi_8081 HTTP  ## not using SSL
bind servicegroup svcgrp_ia_webapi_8081 SB-IV-AM01 8081
bind servicegroup svcgrp_ia_webapi_8081 SB-IV-AM02 8081
bind serviceGroup svcgrp_ia_webapi_8081 -monitorName mon_ia_webapi
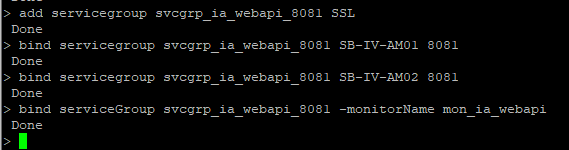
When finished refresh the GUI and check if the settings are applied. When correctly executed the State and Effective State are green.

Create the Load Balance Virtual Server
Create the Load Balance Virtual Server by GUI
Go to Traffic Management – Load Balancing – Virtual Servers and select Add.
Note: Make sure you have an IP Address available.
Enter a name (i.e. lb_vrsv_ia_webapi_8081), Protocol (SSL or HTTP), IP Address and Port (i.e. 8081)

Select OK to continue. Next step is adding the Service Group.
Select the option No Load Balancing Virtual Server ServiceGroup Binding.
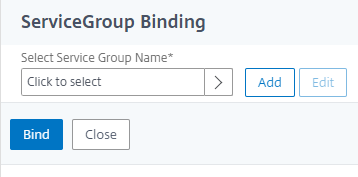
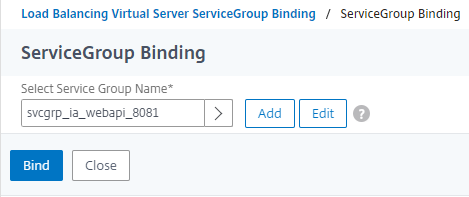
Select the Service Group and click Select.
Select Bind to continue.
Select Continue to continue. Next step is adding the certificate but because the internal created certificate isn’t added to the Citrix ADC we continue by selecting Continue. We add the certificate later in the process.
Scroll down and select Done.
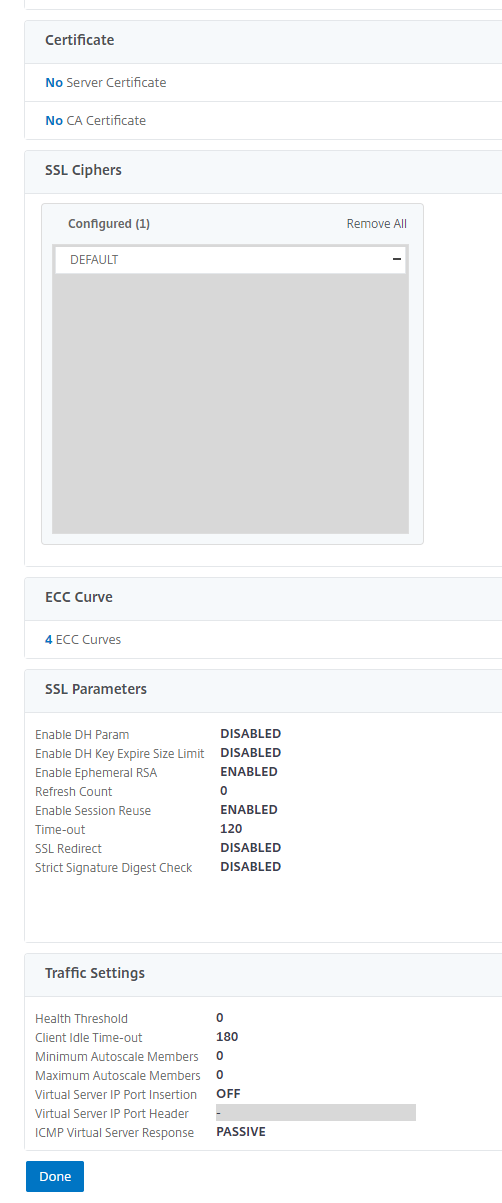
Because there is no certificate added the Virtual Server will be down.

Create the Load Balance Virtual Server by GUI
Open een Putty session to the Citrix ADC and login and execute the commands below.
add lb vserver lb_vsrv_ia_webapi_8081 SSL 172.16.1.106 8081  ## when using SSL
add lb vserver lb_vsrv_ia_webapi_8081 HTTP 172.16.1.106 8081  ## not using SSL
bind lb vserver lb_vsrv_ia_webapi_8081 svcgrp_ia_webapi_8081

When finished refresh the GUI and check if the settings are applied.
Import Certificates to Citrix ADC
Add the certificate to the Citrix ADC by GUI
First step is exporting the certificate from a Ivanti Automation Dispatcher Server. Open MMC and add the Certificate Snap-In (Computer Account/Local Machine) and export the certificate.
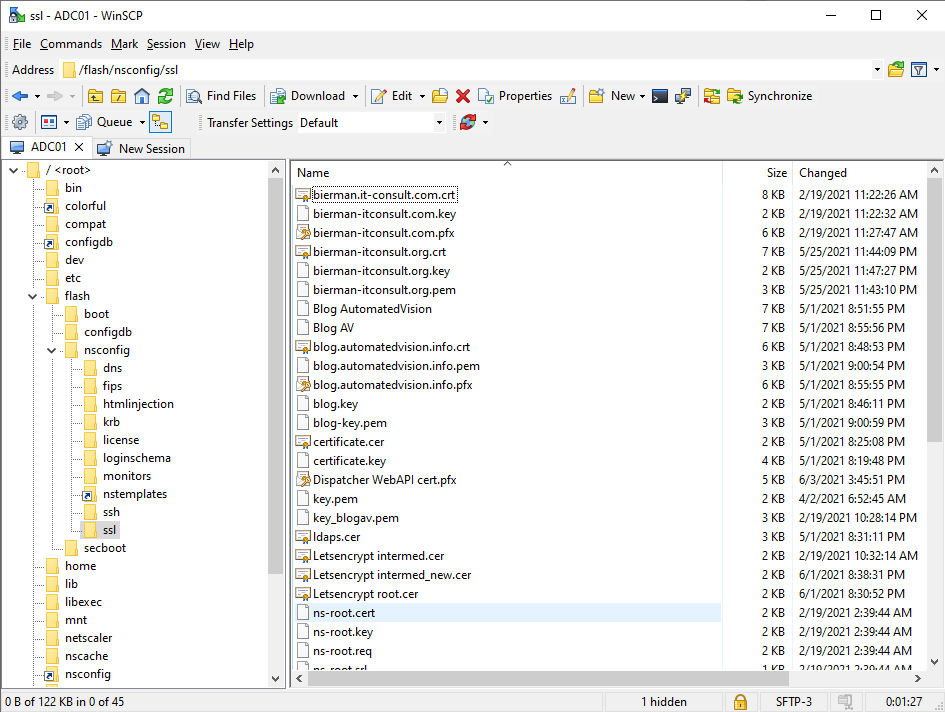
Download WinSCP to upload the PFX file (exported certificate) to the Citrix ADC. Connect WinSCP to the Citrix ADC and upload the export certificate (PFX file) to the /nsconfig/ssl folder.
Next open Putty and login to the Citrix ADC. Because a PFX file contains all information (Root/Intermediate/Server/Private Key) we need to extract the PFX file.
Type shell in the Putty console.
First we extract the Private Key with the following command:
openssl pkcs12 -in “<yourfile>.pfx” -nocerts -out keyfile-encrypted.key
Enter the Export Password and enter the PEM pass phrase password twice.

Next step is extracting the certificate.
openssl pkcs12 -in “<yourfile>.pfx” -clcerts -nokeys -out certificate.crt

Go to WinSCP and check if both files are created.

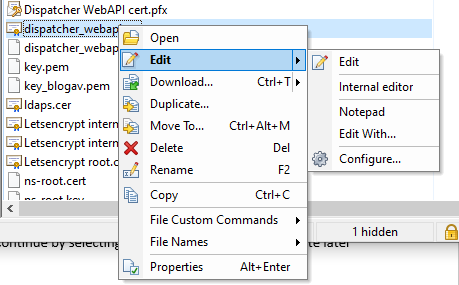
Open the CRT with the Edit option.
Remove all the text before —–BEGIN CERTIFICATE—-
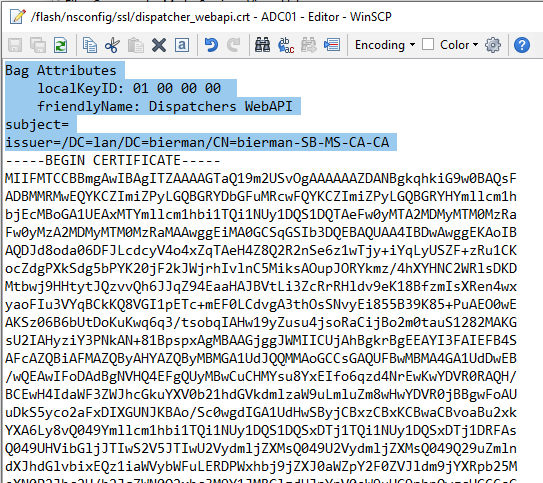
Save and close the file.
Importing the Certificate and Private Key in Citrix ADC by GUI
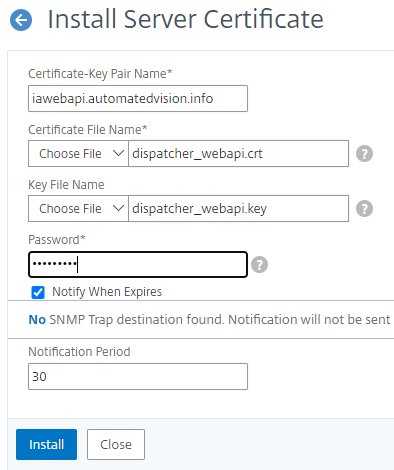
Go to Traffic Management – SSL – Certificates – Server Certificates and select Install. Because we used the OpenSSL on the Citrix ADC choose the file from the appliance.
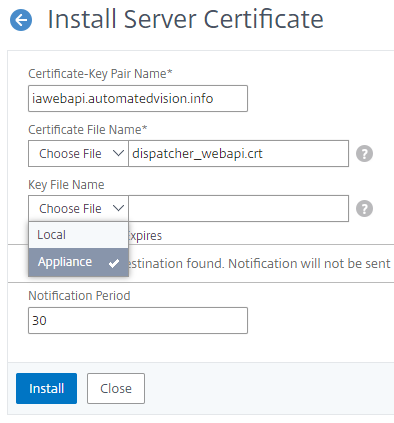
Enter the PEM Pass Phrase password used when exporting the private key and select Install to finish.
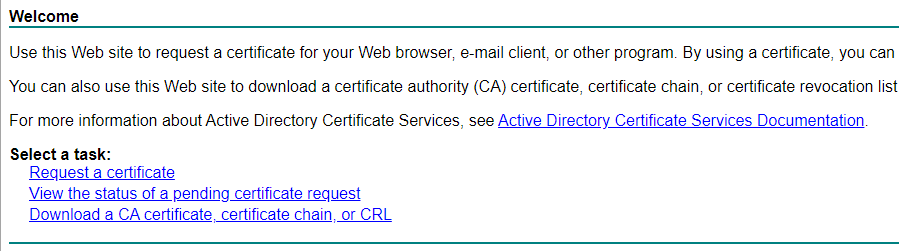
Note: When using a local CA server don’t forget to install the Root Certificate on the Citrix ADC. Root certificate can be downloaded from the CA website. Last option in the screenshot below.
Check below screenshot when the certificate is installed.

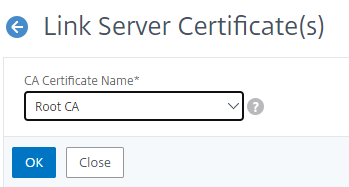
When the Root certificate is installed check if the link is configured. Select Link from the menu when selecting the 3 dots icon.
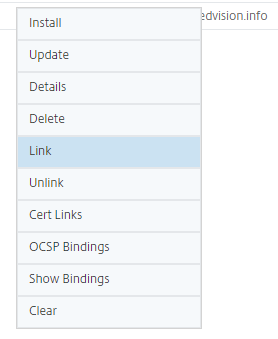
When linked correct to a root certificate it look like the screenshot below:
Next step is adding the certificate to the Load Balance Virtual Server. Go to Traffic Management – Load Balancing – Virtual Server and select the virtual server.
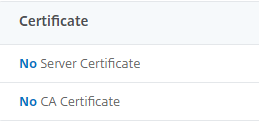
Select the option No Server Certificate.
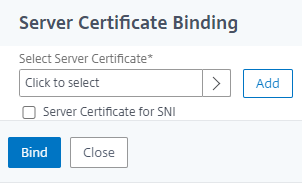
Select the certificate and click Select.
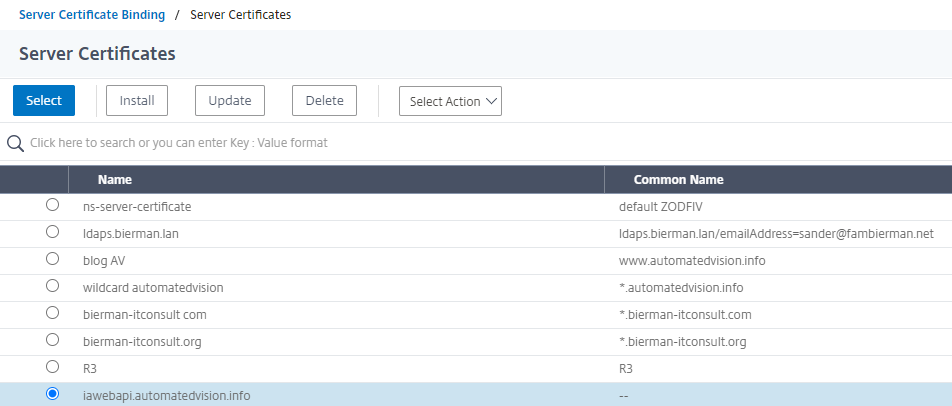
Select Bind and scroll down and select Done to finish adding the certificate.
When finished the State and Effective State are both UP.

Importing the Certificate and Private Key in Citrix ADC by CLI
When the Key and Crt file are created execute the following commands to import the certificate and bind to the Virtual Server.
add ssl certkey <certificatename> -cert /nsconfig/ssl/<certificate>.crt -key /nsconfig/ssl/<yourkey>.key -password <pempassphrase> -expiryMonitor ENABLED -notificationPeriod 30
bind ssl vserver <name_lbserver -certkeyName <certificatename>

Last step is checking if the Virtual Server is Up.

Don’t forget to save the Running Config. In the GUI select the Disk icon.

Or in Putty (CLI)
save ns config
Close the connections and the Load Balancing for Ivanti Automation Dispatchers is configured.
Local DNS A record
Open the DNS Management tool and create a new primary zone for automatedvision.info which is not the Active Directory Domain (this is described in this blog).
Create a new A record with the Load Balance Virtual Server (i.e. 172.16.1.106) and enter the DNS name for the certificate (i.e. iawebapi).
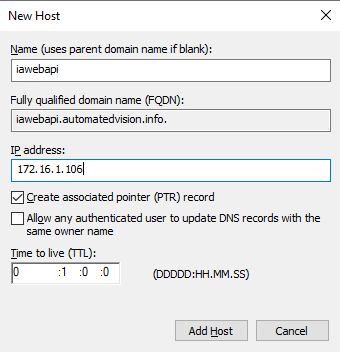
When testing the new URL there is no certificate error anymore and the login screen appears.
(i.e. https://iawebapi.automatedvision.info:8081/Dispatcher/SchedulingService/Help).
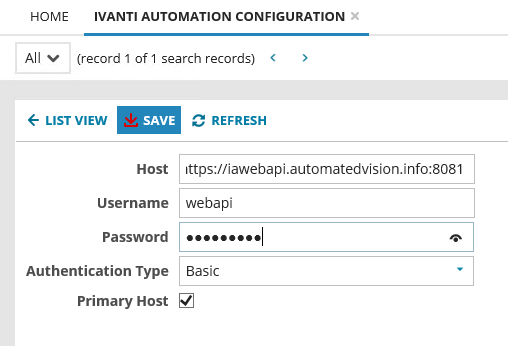
Examples where and how to use the load balanced Ivanti Automation Dispatcher WebAPI hostname
Ivanti Service Manager
Executing API with a PowerShell Script
# Ivanti Automation Basic WebAPI variables

$secpasswd = ConvertTo-SecureString  "<password>"  -AsPlainText -Force
$mycreds = New-Object System.Management.Automation.PSCredential ( "webapi" , $secPasswd)
$url = "https://iawebapi.automatedvision.info:8081//Dispatcher/SchedulingService/jobs"

$body = '{
"Description":" Send message ",
"When": {
    "Immediate":true,
    "IsLocalTime": true,
    "UseWakeOnLAN": false
},
"What": [{
    "ID":" 3C53B06D-009C-42F5-B497-99CA03EA5595 ",
    "Type": 0,
    "Name":" Send Message "
}],
"Who": [{
    "ID":" 2CD345BF-F85B-48F5-A671-173100C39639 ",
    "Type": 0,"Name":" SB-MS-BH01 "
}]
}'

# Execute Web-API to schedule a module

Invoke-WebRequest -Uri $url -Method Post -Credential $mycreds -ContentType "application/json" -Body $body