This blog describes the installation and configuration of Ivanti Automation on devices which can be a domain member or in a workgroup and used inside and outside the LAN. This blog describes also how to configure Reverse Proxy on Citrix ADC.
When configuring the solution the following steps need to be executed:
- Configuring internal and external DNS
- Re-creating Self-Signed Certificate
- Change Dispatcher Global Settings
- Create an Ivanti Automation Agent installation component
- Create Firewall rules
- Configure Servers, Service Group and Load Balancer Virtual Server on the Citrix ADC
Prerequisites:
- Installation of Ivanti Automation Console and Dispatcher
- Active Directory and DNS
- External hostname (i.e. automation.automatedvision.info)
- Firewall rules for port 3162, 3163 and 3165
DNS configuration
In the external DNS configuration add an A record or CNAME record. I used a CNAME record which connects to the Dynamic DNS name. In this blog a DNS host automation.automatedvision.info is created.

Configuring internal DNS requires more steps:
Open DNS and Ivanti Automation Console and make sure 1 or more Dispatchers are installed. It’s recommended to install 2 Dispatchers.
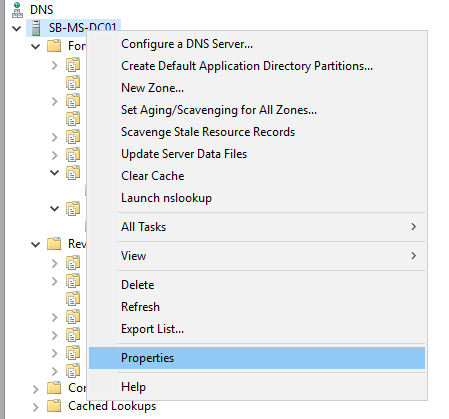
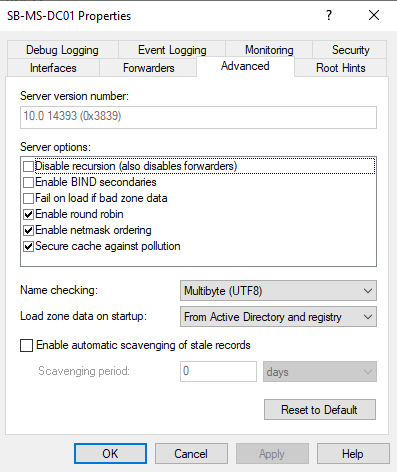
In DNS right click the DNS server and select Properties.
Select the tab Advanced and make sure the option Enable Round Robin is selected.
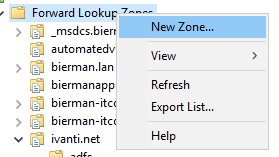
Because the external DNS name is not the same as the Active Directory DNS we need to create a new zone in the Forward Lookup Zone.
Follow the steps below to create a new zone.
Right click the Forward Lookup Zone and select New Zone.
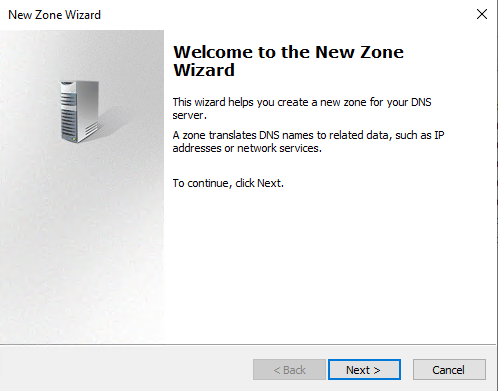
Select Next in the new window to start the New Zone Wizard.
Select Primary zone and select Next to continue.
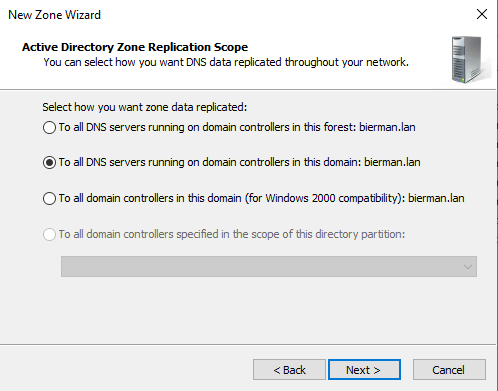
Select the option To all DNS Serves running on domain controllers on this domain: <domain name> and select Next to continue.
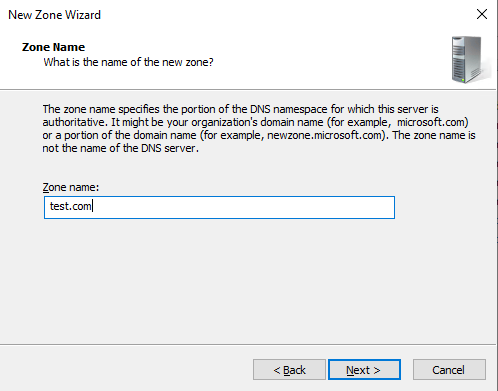
In the next screen enter the Zone Name (i.e. automatedvision.info) and select Next to continue.
Select Allow only secure dynamic updates (recommended for Active Directory) and select Next to continue.
Complete the New Zone Wizard by selecting Finish.
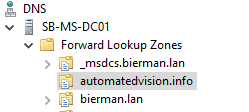
A new zone is created.
Go to the Ivanti Automation Console and click on Topology – Dispatchers. Check all Dispatchers and write down the IP addresses when executing a ping command.

In this example there are 4 Dispatchers available. Go back to the DNS Management tool and right click on the new created zone (i.e. automatedvision.org). Select the option New host (A or AAAA).
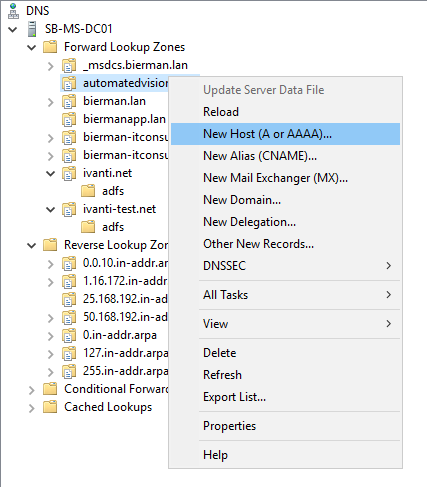
In the New Host window enter automation and enter the first IP Address resolved during the ping command.
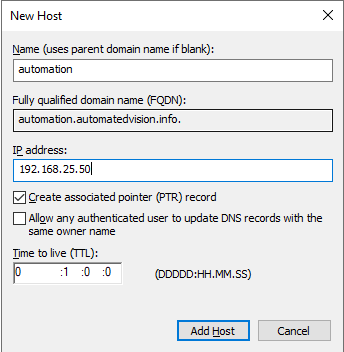
Repeat this action for all dispatchers. Give all hosts the name automation.

Internal and External DNS settings are now configured.
Re-create the Self-Signed certificate
When installing Ivanti Automation there is a step which creates the secure binding between the dispatchers and the agents (port 3165). This action creates the Self-Signed Root certificate.
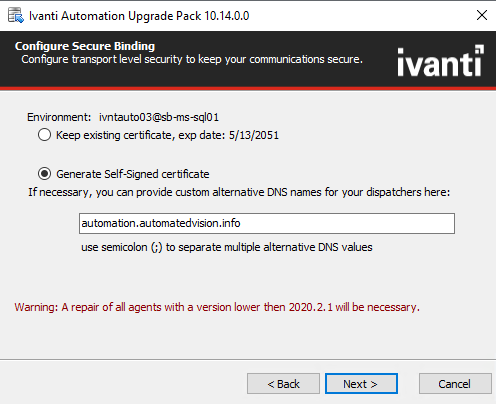
When Ivanti Automation is installed use the Upgrade Pack to change the Self-Signed Root certificate. A new certificate is needed with an alternative DNS name included. In the Secure Binding option during the upgrade select the option Generate Self-Signed Certificate and enter the host name created in the DNS (i.e. automation.automatedvision.info).
Note: Current agents need to be repaired to re-install the certificate.
Finish the Upgrade.
To be sure if the certificate is generated with the Alternative DNS name execute the following steps”
- Execute MMC
- Add the Certificate Snap-In (Local Computer/Local Machine)
- Check the Certificates folder in Trusted Root Certification Authorities
- Search for the Ivanti Self Signed Root. When multiple certificates check the expiration date.
- Open the certificate and select the Details tab.
- Search the option Subject Alternative Name and check if the DNS Name is shown.
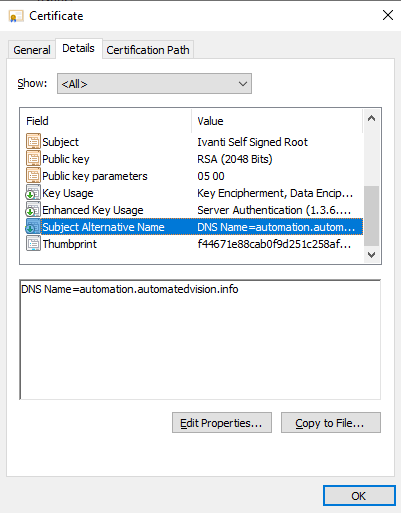
The Self-Signed Certificate is updated with the correct Subject Alternative Name.
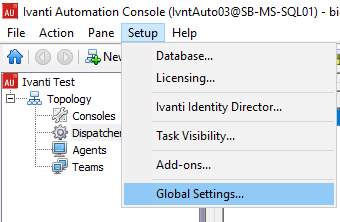
Next step is changing the Dispatcher configuration in the Global Settings of Ivanti Automation.
Go to Ivanti Automation Console and select Global Settings from Setup in the top menu.
In the Dispatcher Detection select the option Dispatcher discovery. Normally the Dispatcher installed are added to the Dispatcher address list. Remove all the dispatchers and add only the new created hostname (i.e. automation.automatedvision.info).
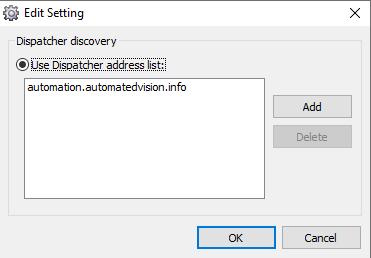
With the Round Robin setting in DNS and the creation of the A records this hostname can connect to all Dispatchers.
Create an Ivanti Automation Agent installation component
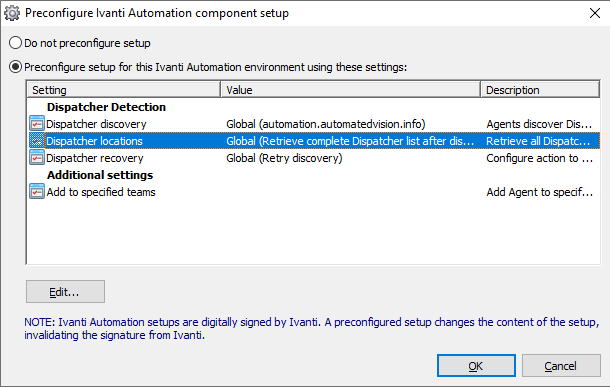
In the Ivanti Automation Console go to Administration – Components and select the Ivanti Automation Agent+(x64) <version>.msi. Right click the component and select the option Save component as….
In the window Preconfigure Ivanti Automation component setup select the option Preconfigure setup for this Ivanti Automation environment using these settings.
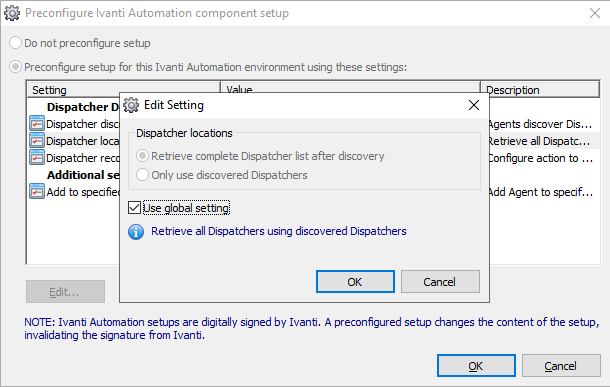
Select the option Dispatcher locations and unselect the option Use global setting and select the option Only use discovered Dispatchers.

When finished select OK to save the component with the preconfigured configuration.
Install the preconfigured component on the devices. If preferred it’s also an option to configure these settings as Global Setting. The option New in the agent topology will use the settings when installing a new agent.
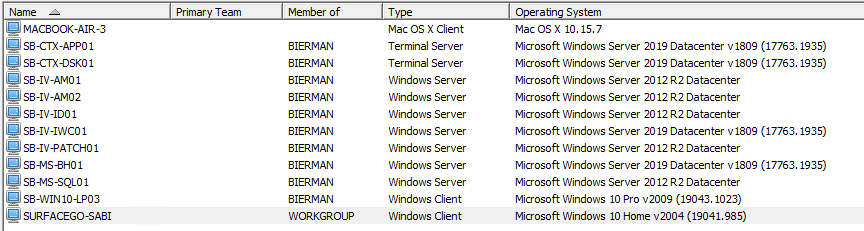
Below screenshot shows an overview of (non) domain members.
Firewall rules
Make sure ports 3162, 3162 and 3165 are forwarded to Load Balancer Virtual Server IP address on the Citrix ADC.
Enabling reverse proxy on Citrix ADC (optional)
Configuring with the CLI (Putty)
#Add servers
add server SB-MS-AM01 192.168.25.50
add server SB-MS-AM02 192.168.25.51

#Add Service Group
add servicegroup svcgrp_ia_agents_3162 TCP
add servicegroup svcgrp_ia_agents_3163 TCP
add servicegroup svcgrp_ia_agents_3165 TCP

#Bind Service Groups
bind servicegroup svcgrp_ia_agents_3162 SB-IV-AM01 3162
bind servicegroup svcgrp_ia_agents_3162 SB-IV-AM02 3162
bind serviceGroup svcgrp_ia_agents_3162 -monitorName tcp-ecv
bind servicegroup svcgrp_ia_agents_3163 SB-IV-AM01 3163
bind servicegroup svcgrp_ia_agents_3163 SB-IV-AM02 3163
bind servicegroup svcgrp_ia_agents_3163 -monitorName tcp-ecv
bind servicegroup svcgrp_ia_agents_3165 SB-IV-AM01 3165
bind servicegroup svcgrp_ia_agents_3165 SB-IV-AM02 3165
bind servicegroup svcgrp_ia_agents_3165 -monitorName tcp-ecv

#Create Load Balancer VS
#Change the IP Address
add lb vserver lb_vsrv_ia_agents_3162 TCP 172.16.1.104 3162
add lb vserver lb_vsrv_ia_agents_3163 TCP 172.16.1.104 3163
add lb vserver lb_vsrv_ia_agents_3165 TCP 172.16.1.104 3165

#Bind Service Groups to vServer
bind lb vserver lb_vsrv_ia_agents_3162 svcgrp_ia_agents_3162
bind lb vserver lb_vsrv_ia_agents_3163 svcgrp_ia_agents_3163
bind lb vserver lb_vsrv_ia_agents_3165 svcgrp_ia_agents_3165
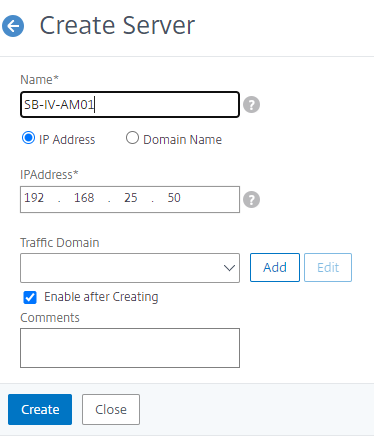
Login to Citrix ADC (NetScaler) and go to Traffic Management – Load Balancing – Servers. Add the dispatcher servers by entering the hostname and the IP address.
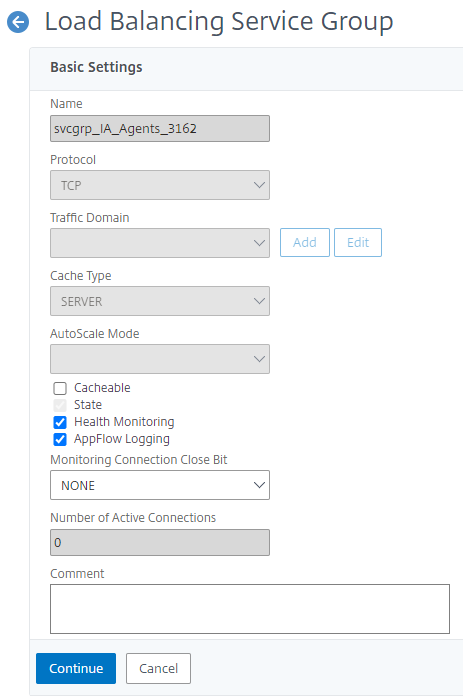
For this blog 4 dispatchers are available but only 2 servers are used for the external devices. After adding the required Dispatcher servers go to Traffic Management – Load Balancing – Service Groups.
Select Add to create a Load Balancer Service Group. Enter a name for the new Service Group (i.e. lbsg_IA_agents_3162) and select TCP from the Protocol list.
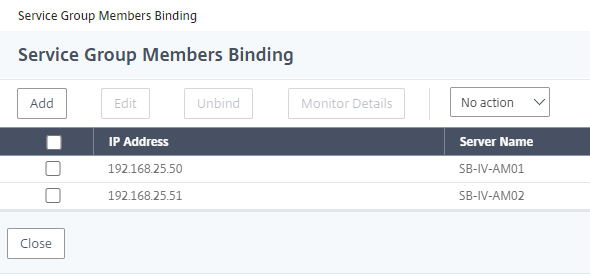
Select OK when finished and select the No Service Group Member to add the Dispatcher servers.
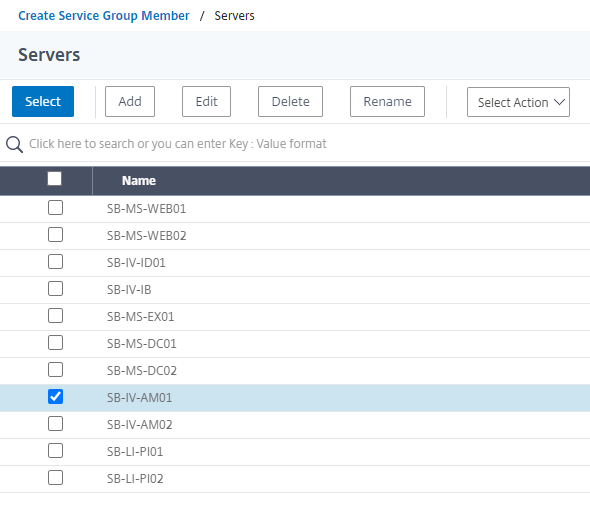
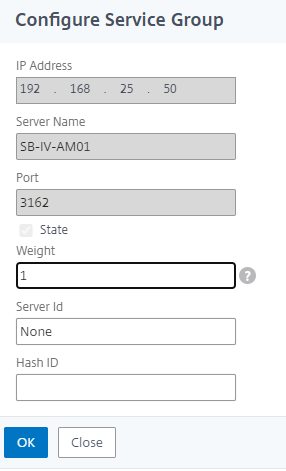
Select the option Server Based and select the first Dispatcher server from the server list.
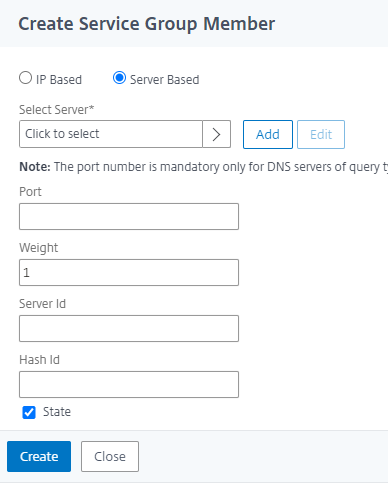
Enter 3162 in the Port field and select Create.
When all Dispatcher servers are added select Close.
And OK in the screen below.
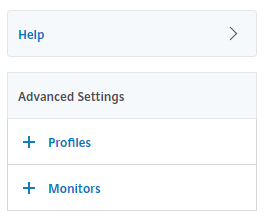
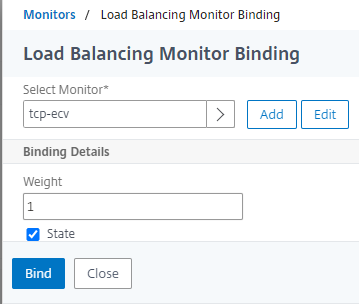
Next select the option Monitors in the Advanced Settings on the right side.
Select the option No Service Group to Monitor Binding and select the monitor ping from the list.
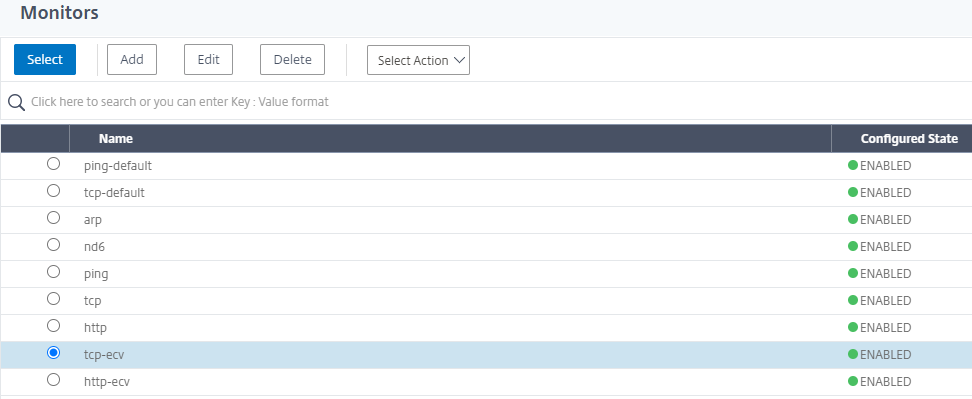
Select Bind in the screenshot below.
When all settings are configured select Done.
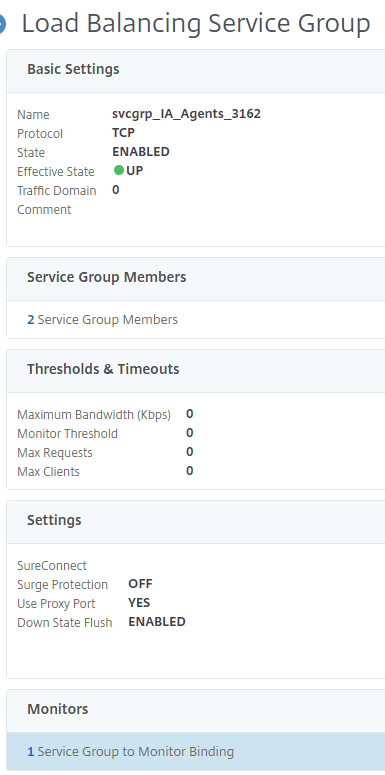
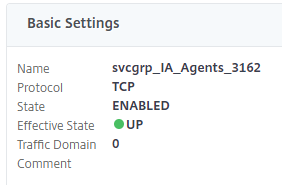
When all settings are configured the Service Group shows the State enabled and the Effective State Up.

Create the Service Group also for port 3163 and 3165.
Next step is creating the Load Balancer Virtual Server. Before starting the configuration make sure an IP Address is available.
Go to Traffic Management – Load Balancing – Virtual Servers and select Add.
In the screenshot below enter a name for the Virtual Server and select ANY from the protocol list. Enter an IP Address and type * in the Port field.
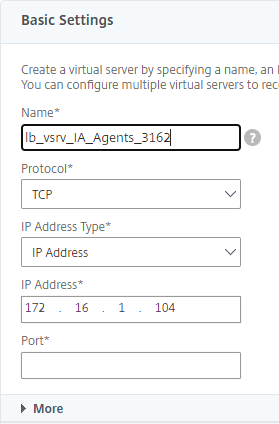
Select OK to continue.
Click on the No Load Balancing Virtual Server ServiceGroup Binding.
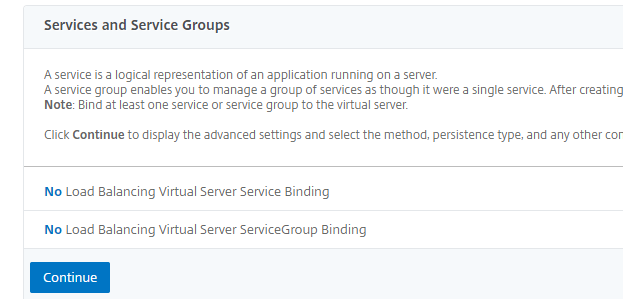
Select the ServiceGroup for port 3162.
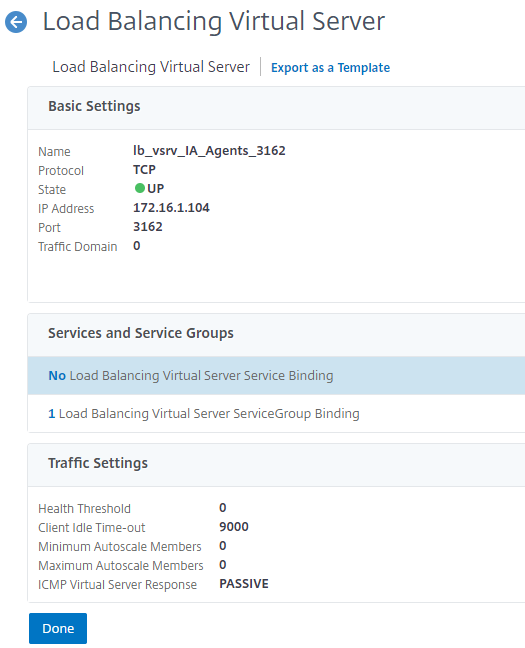
Repeat LB Virtual Servers for port 3163 and 3165.
When finished the settings look like the screenshot below:
