This blog describes how to integrate Microsoft Azure AD users with Ivanti Identity Broker to logon to Ivanti Xtraction.
Ivanti Identity Broker is a web application that acts as a “broker” for authentication between Ivanti Identity Director (Web Portal and Management Portal), Ivanti Automation Management Portal or Ivanti Xtraction.
Ivanti Xtraction is a visualization software that simplifies, yet enhances, your ability to report on various IT application databases. Use Xtraction to extract, manipulate, and aggregate data from any number of connected data sources into interactive, real-time dashboards, multi-page documents, and custom reports—all from a single web-based interface.
The AzureAD integration in Identity Broker is an Identity Provider. An Identity Provider can process authentications requests by means of external authentication endpoints.
Support Identity Providers are:
- Identity Broker Active Directory Authentication Provider
- Identity Broker Windows Authentication Provider
- ADFS Provider, using an ADFS server
- Azure AD Provider, using Azure Active Directory (M365 also included)
- OKTA Provider, using an OKTA instance
In this blog we discuss the integration between Ivanti Identity Broker and Ivanti Xtraction with the Azure Active Directory Provider.
First step is installing the Ivanti Identity Broker. This is written in the blog Installation of Ivanti Identity Broker.
After the installation the Identity Broker Provider for Azure Active Directory needs to be created. This is written in the blog Ivanti Identity Broker with Microsoft Azure AD.
After finishing both the installation and configuration of the Identity Broker Provider start with this blog.
From Ivanti Xtraction release 2021.2 the integration with Ivanti Identity Broker is available. Which means users can login to the Ivanti Xtraction Portal with their Azure AD account.
Note: The Xtraction integration with Ivanti Identity Broker will not work in Xtraction versions 2021.3, 2021.4 and 2022.4. Ivanti is currently investigating the issues in these versions.
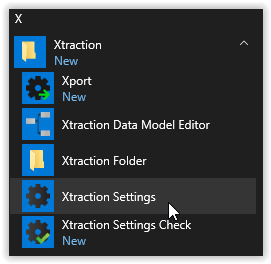
After the installation of Ivanti Xtraction open the Xtraction Settings.
In the Xtraction Settings select the Authentication tab.

Click the top row to create a new Authentication Provider for Xtraction.
Select the Active box to enable the Provider.
Enter an Id, select type Custom, enter a Provider name and type the URL.
- Active : Enabled
- ID : IdentityBroker
- Type : Custom
- Provider : IdentityBroker
- URL : /Xtraction/Auth/Local/AuthenticateOIDC.aspx (copy/paste the URL)
- Auto Create Users : Enabled
Check the screenshot below for an example.
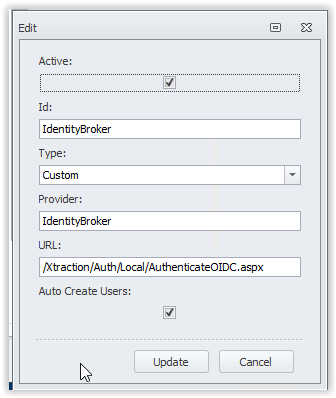
Note: the URL cannot have another value.
Select Update to store the new Xtraction Authentication.
Next step is creating a new Consumer in the Ivanti Identity Broker Management Portal. Open the Ivanti Identity Broker Management Portal as described in the Installation of Ivanti Identity Broker.
After a successful login in the Ivanti Identity Broker Management Portal the Identity Consumers page is opened. Select the Add button on the bottom to create a new consumer for Ivanti Xtraction.
Enter a Name, ID and Secret for the Consumer.
- Name : Xtraction
- ID : xtraction
- Secret : for example, secret (when finished click the lock to secure the value)
- Redirect URI : https://<xtraction_fqdn>/xtraction/#/api/session/signin-oidc
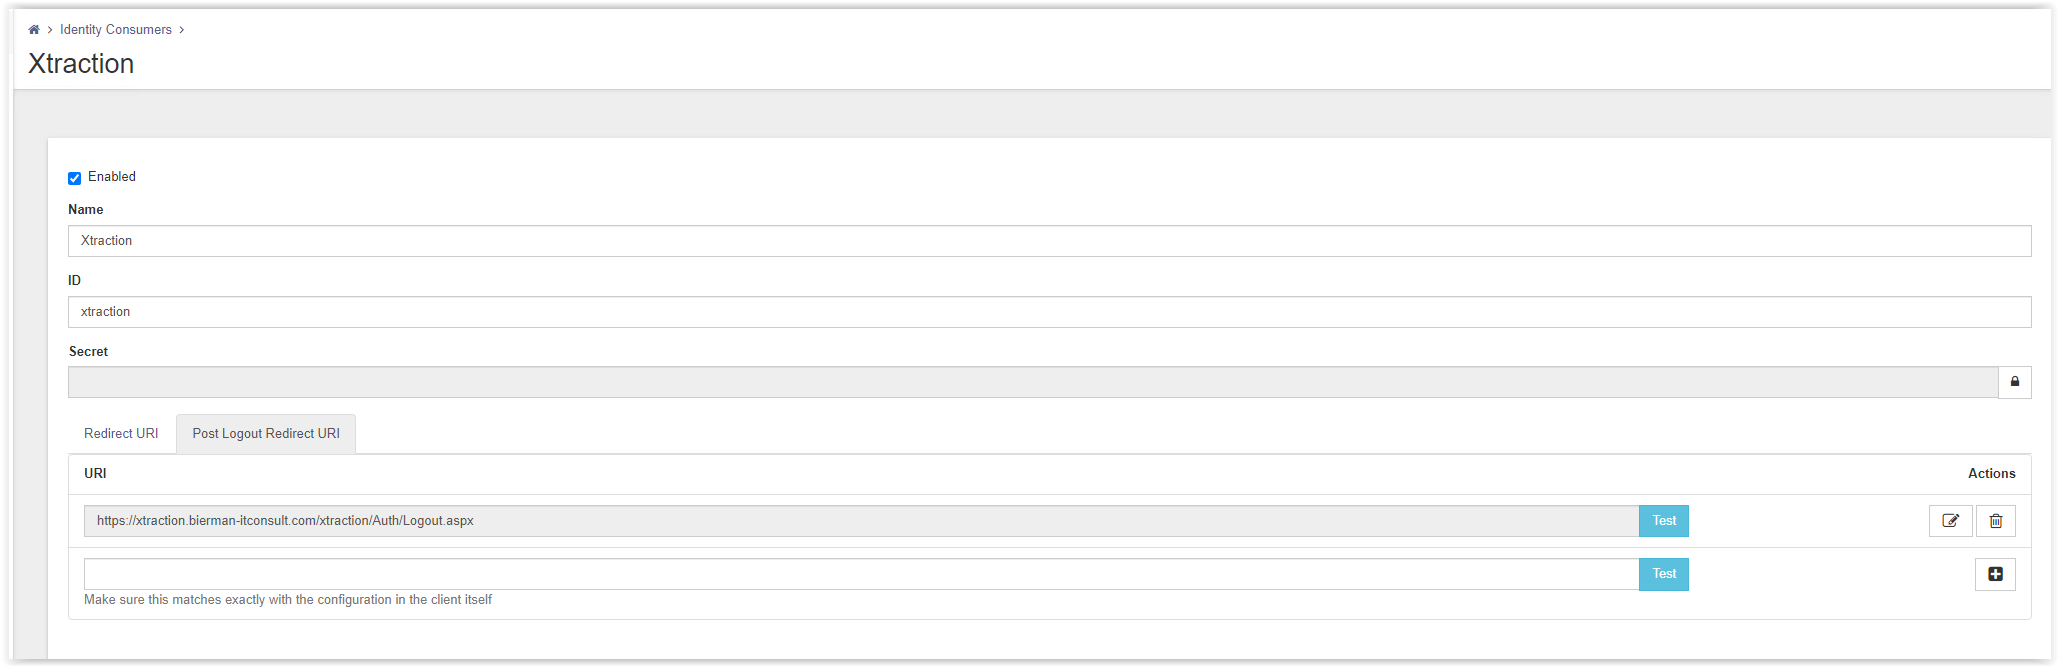
For example https://xtraction. Automatedvision.info/xtraction/#/api/session/signin-oidc - Post Logout Redirect URI
https://<xtraction_fqdn>/xtraction/Auth/Logout.aspx
For example https://xtraction.automatedvision.info/xtraction/Auth/Logout.aspx
Check the screenshots below for an example of the Consumer with all values configured.
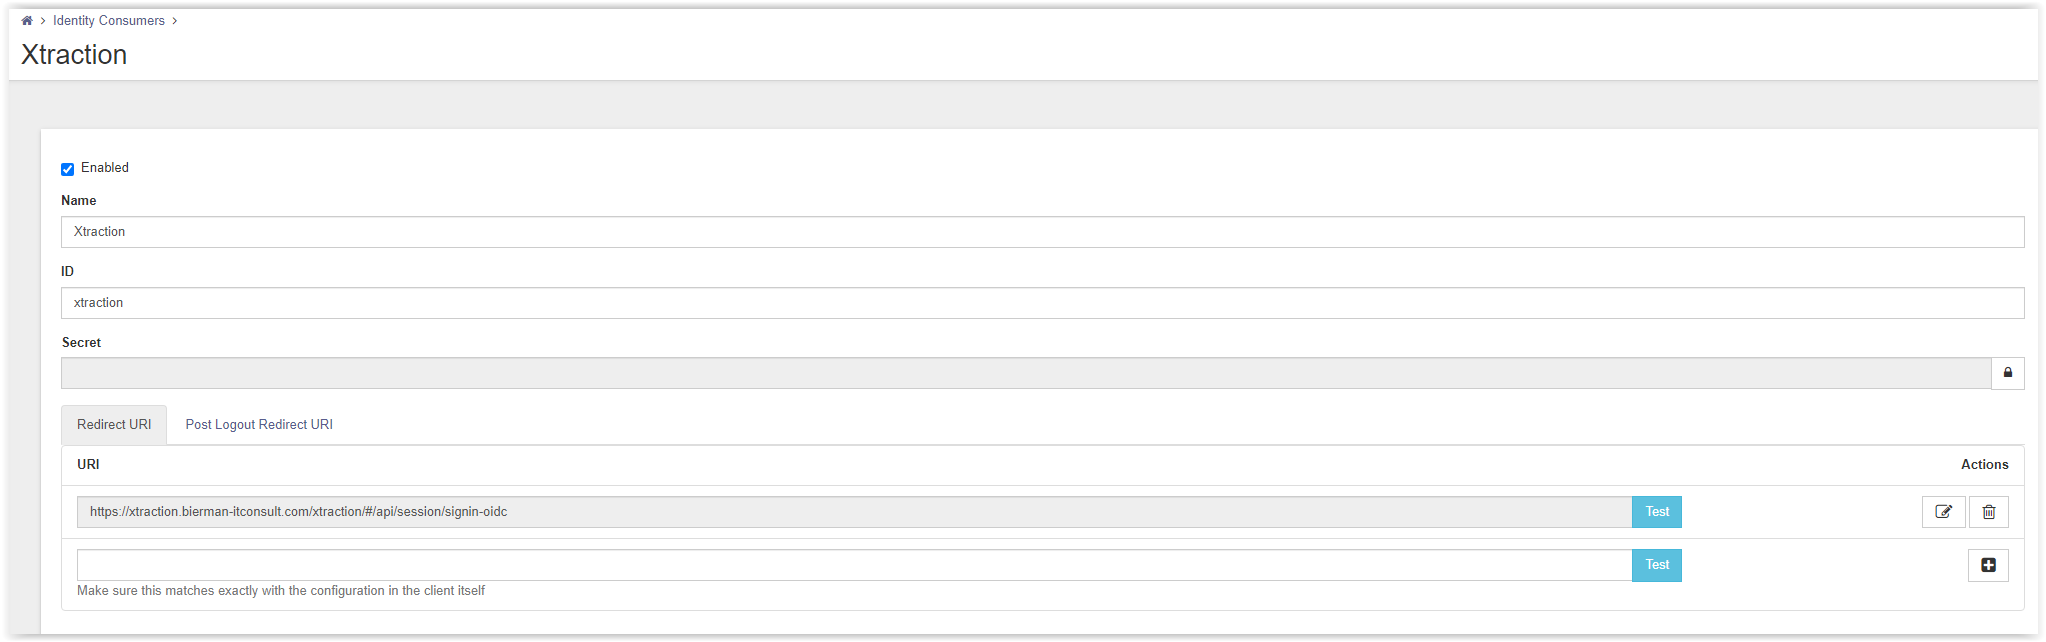
Store the Consumer by selecting the Save button on the bottom of the page.
The consumer is created. In the blog Ivanti Identity Broker with Microsoft Azure AD we already created the AzureAD provider.
On the Xtraction server we need to configure the Web.config file. Open the Windows Explorer and go to C:\Program Files (x86)\Xtraction Software\Xtraction\Web\Server.
Open the Web.config file with Notepad or related application. Scroll down till section IdentityBroker.
<identityBroker enabled="false"
	authority=""
	clientid=""
	clientsecret=""
	redirecturi=""
	postlogoutredirecturi="">
</identityBroker>
Set the value IdentityBroker enabled to true.
authority is the value configured in the Identity Broker AzureAD Provider and the Redirect URL in the App Registration in Azure AD (https://broker.automatedvision.info/IdentityBroker/ids/).
clientid is the ID given in the Xtraction Consumer ID (xtraction).
clientsecret is the secret configured in the Xtraction Consumer (secret).
redirecuri is the value configured in the Redirect URI of the Xtraction Consumer
(https://xtraction. Automatedvision.info/xtraction/#/api/session/signin-oidc).
postlogoutredirecturi is the value configured in the Post Logout Redriect URI of the Xtraction Consumer
(https://xtraction.automatedvision.info/Auth/Logout.aspx).
When all values are entered the IdentityBroker section looks familiar like below example.
<identityBroker enabled="true"
	authority="https://broker.automatedvision.info/IdentityBroker/ids/"
	clientid="xtraction"
	clientsecret="secret"
	redirecturi="https://xtraction. Automatedvision.info/xtraction/#/api/session/signin-oidc"
	postlogoutredirecturi="https://xtraction.automatedvision.info/xtraction/Auth/Logout.aspx">
</identityBroker>
Save the Web.config file and execute an IISRESET from an Administrator Command Prompt.
Last step is executing two PS command to prevent SSL/TLS errors when using the Identity Broker with the Azure AD provider when starting Ivanti Xtraction Web Portal.
Set-ItemProperty -Path 'HKLM:\SOFTWARE\Wow6432Node\Microsoft\.NetFramework\v4.0.30319' -Name 'SchUseStrongCrypto' -Value '1' -Type DWord
Set-ItemProperty -Path 'HKLM:\SOFTWARE\Microsoft\.NetFramework\v4.0.30319' -Name 'SchUseStrongCrypto' -Value '1' -Type DWord
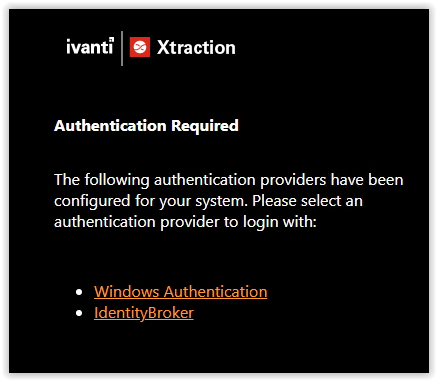
Next step is starting the Xtraction Web Portal. When multiple Authentication Providers are active in Xtraction the Authentication page is shown. Select the IdentityBroker for testing the Identity Broker configuration.
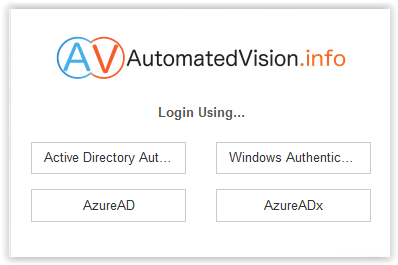
In my test lab I configured multiple Identity Broker Providers which are visible in the screenshot below. The Identity Broker Providers can be disabled when not used.
After selecting the correct Identity Broker Provider, the page is redirected to the Microsoft OAuth login page.
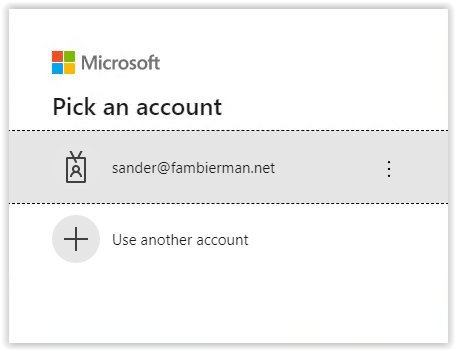
Select your account or use another account and enter your password in the screenshot below.
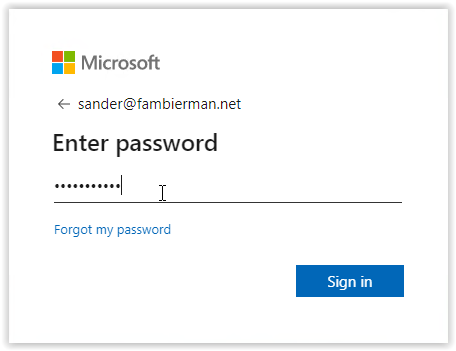
Next step is the Multi Factor Authentication. Approve this on your mobile device or other MFA technique when used.
After a successful Microsoft Authentication, the Xtraction Web Portal is started with the Azure Active Directory User Account.

After the Xtraction Web Portal is visible the integration is fully working.
Thank you for reading this blog and don’t hesitate if you have questions.