Part 2 – Preparing Ivanti EPM
Step 1 – Register the IdentityServer application with a client ID and shared secret
Ivanti Automation uses the PatchAPI and DistributionAPI introduced in EPM 2017.3.
- On the Core server, open folder C:\ProgramData\LANDesk\ServiceDesk\My.IdentityServer.
- Create a backup of the file IdentityServer3.Core.Models.Client.json.
- Open the original file in a text editor to modify the file. After the first square bracket beginning on line 2, add the following object where secret will be the shared secret and roclient the client id.
{
    "Enabled": true,
    "ClientId": "roclient",
    "ClientSecrets": [
      {
        "Description": "roclient",
        "Value": "secret",
        "Expiration": null,
        "Type": "SharedSecret"
      }
    ],
    "Flow": 4,
    "AllowAccessToAllScopes": true,
    "AllowedScopes": []
  },
- Save the file.
Write down the Shared Secret and Client ID. These values need to be added to the Ivanti Automation Global Variables.
Ivanti Endpoint Manager Client ID (type Text) holds the Client ID
Ivanti Endpoint Manager Client Secret (type Password) holds the Shared Secret
I suggest creating another shared secret and not copy/paste the shared secret from the example.
More information about the Ivanti Endpoint Manager PatchAPI and DistributionAPI are described in this link.
Step 2 – Make EPM Distribution Packages available
Open the Ivanti Management Console and log in. Make sure the Endpoint Manager is on release 2022 with Service Update 2 or higher.
Select Distribution (1) in the left bottom menu and Distribution (2) in the left top menu. The Distribution packages (3) are opened.
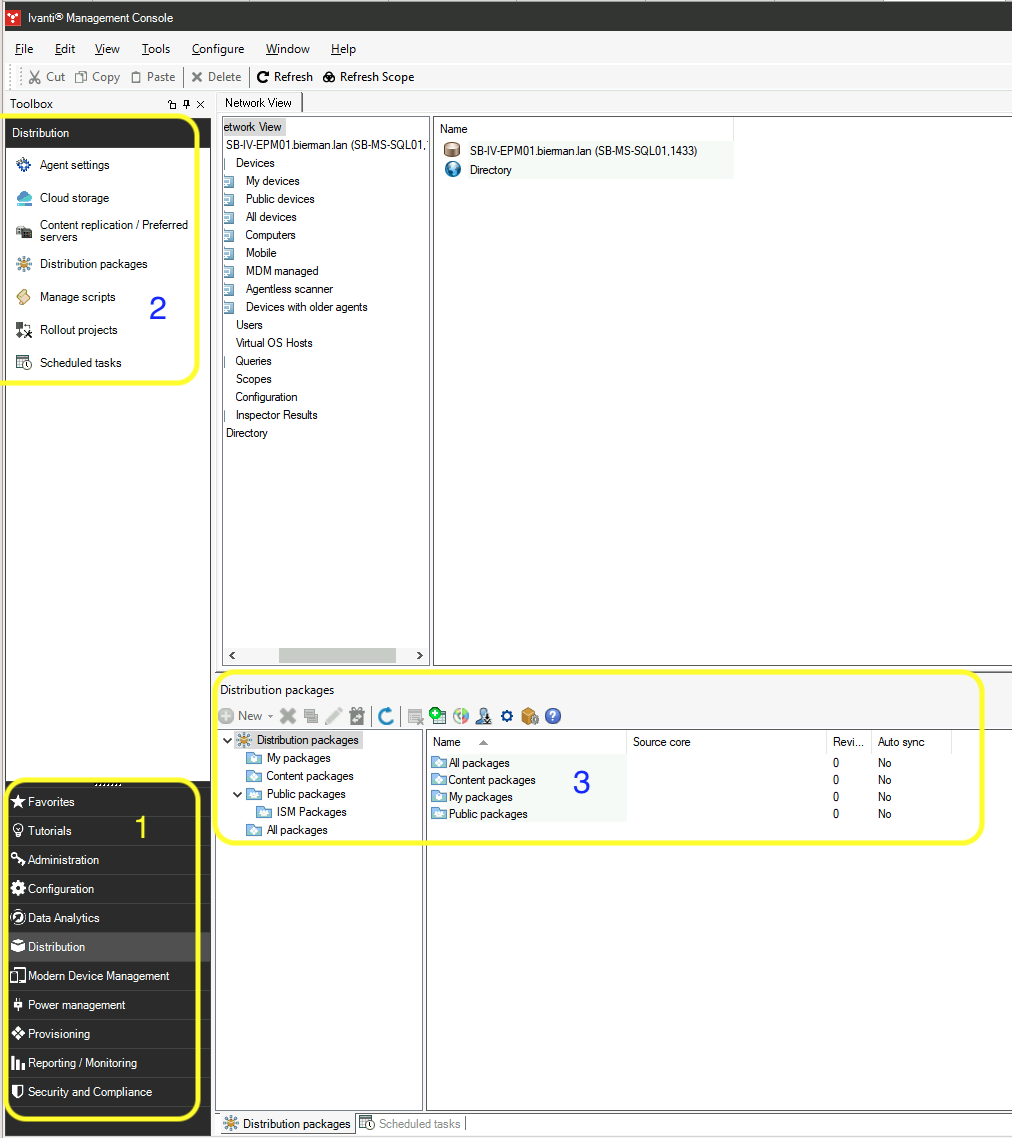
If distribution packages are already created, I suggest creating a subfolder under the Public packages and creating a new category. This prevents a lot of perhaps unused distribution packages from being created in ISM.
Select the root Distribution packages and select the gear wheel in the menu.

In the menu, select Categories, and enter the name of the new category in the Item field. I suggest using something like ISM or Ivanti Neurons for ITSM. Select Add to add the new category.
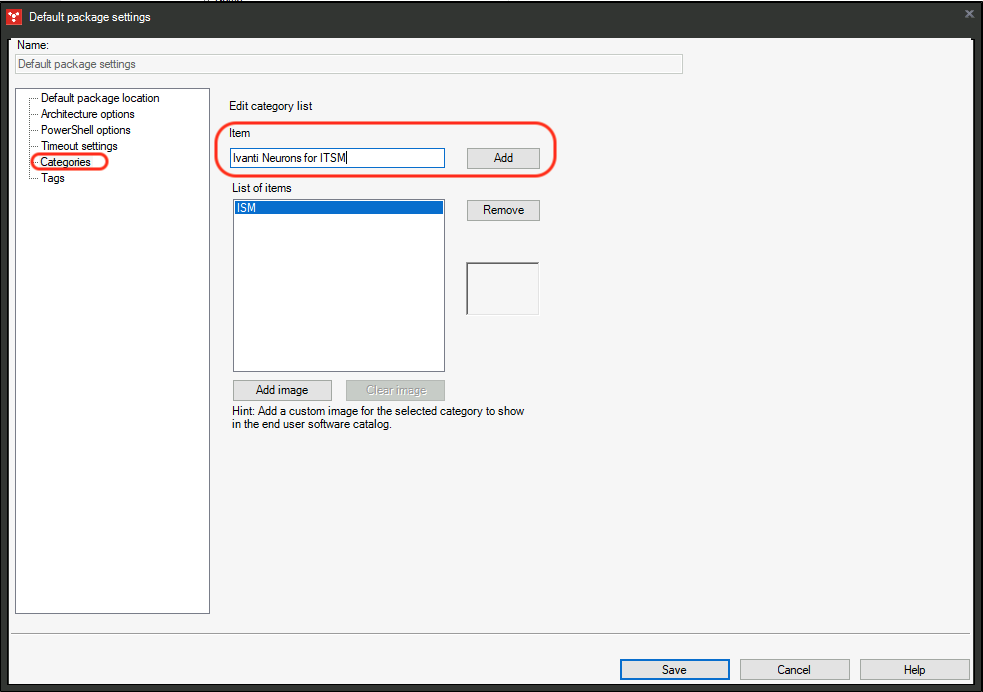
Save the categories. Next, create a subfolder under the Public packages. In this example, the subfolder is ISM same as the category.
Create some distributed packages in this folder and make sure when creating to add the application to the newly created category. The category is configured in Metadata – Categories. Select the new category name (or other category name) for the application.
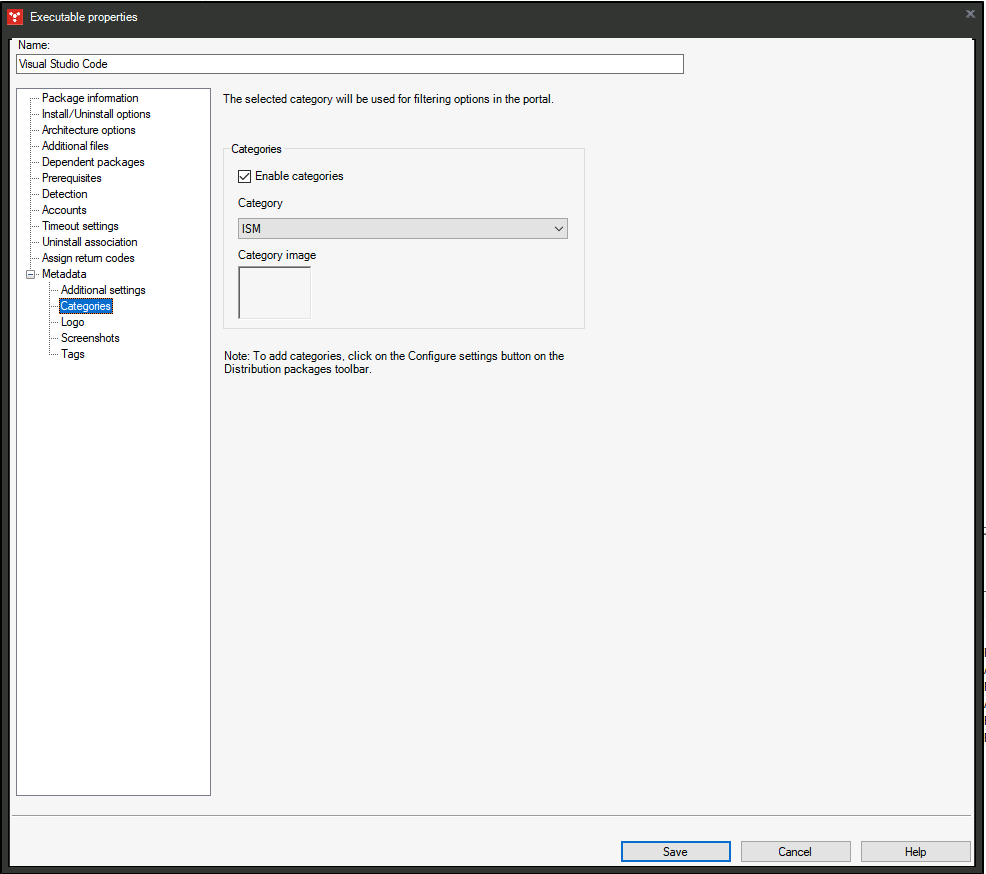
Select Save, and the application package is created. More about EPM Distributed Packages is described in this link.
Now, we finished the EPM section for the full integration.