Part 3 – Preparing Ivanti Neurons for ITSM (ISM)
Step 1 – Import EPM Agents as ISM CIs and assign to users
Ensure the EPM agents are imported into the ISM system as a CI and assigned to users. I briefly describe below how to configure LDAP and import EPM agents into the CI BO.
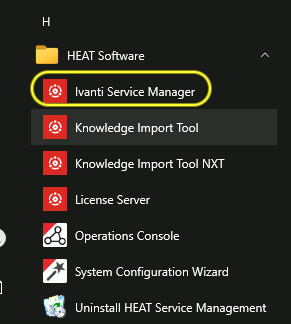
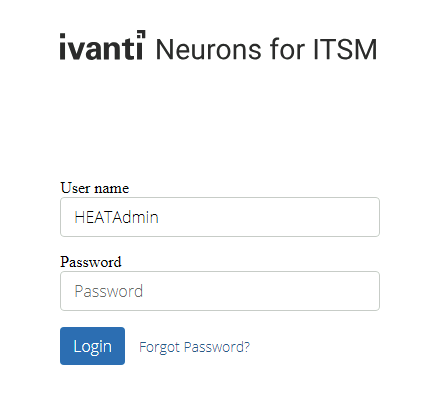
Start the ISM Ivanti Service Manager from the start menu.
When the site is started, log in with an account that has the Administrator Role assigned.
Select the wrench icon in the menu bar (on the right side).

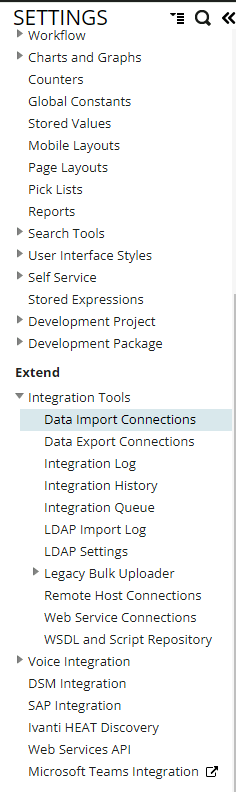
A new tab is opened with the ISM Settings. In the left menu, open the Integration Tools under Extend and open the LDAP Settings. For more information about configuring the LDAP, use this link.
The next step is importing the EPM Agent into the CI BO. In the same Extend – Integration Tools, select the option Data Import Connections.
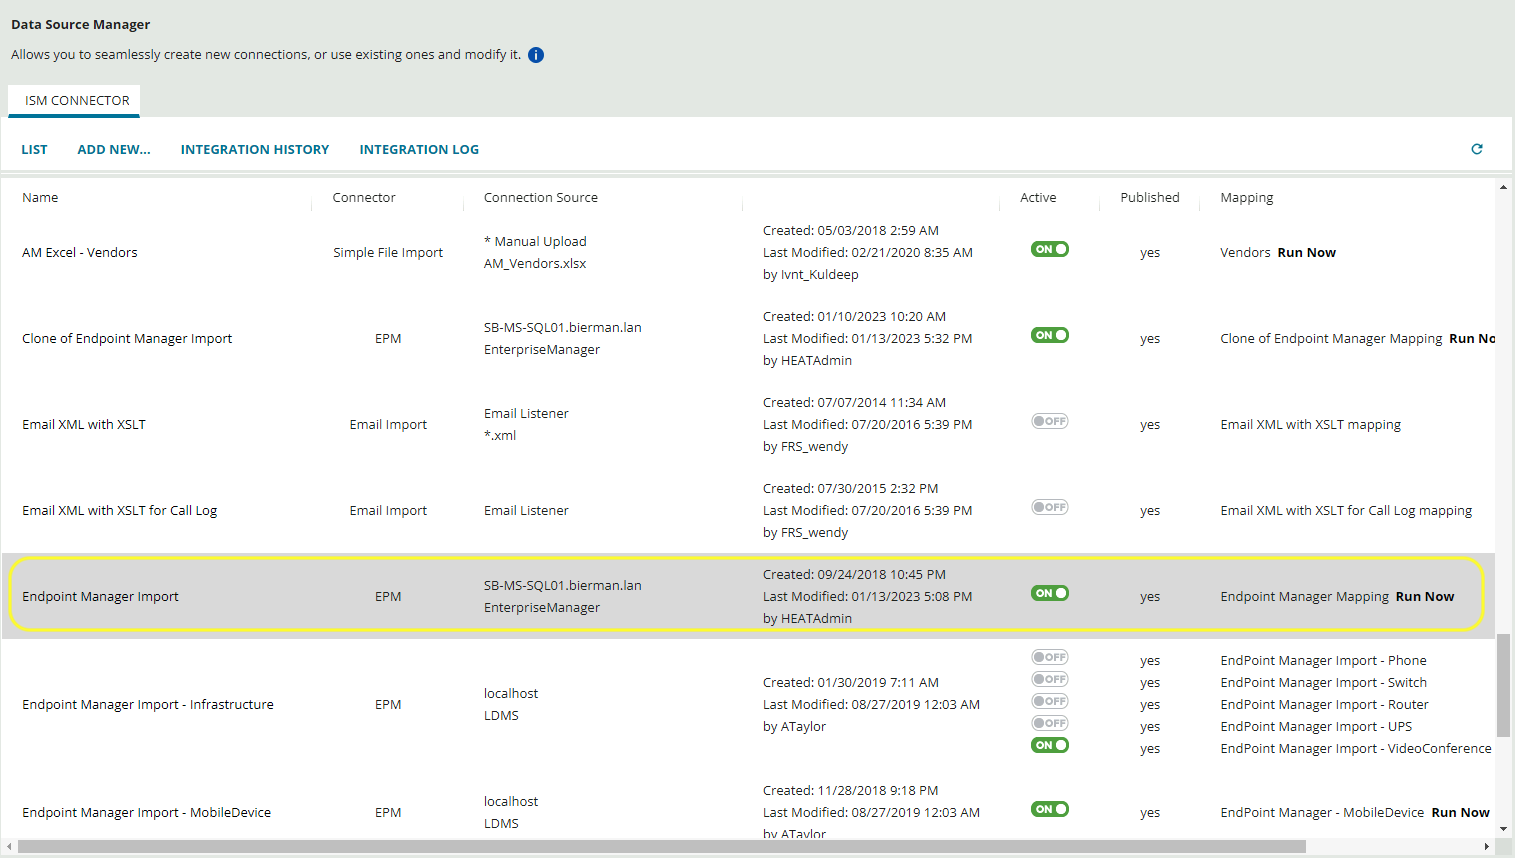
Scroll down until you find the Connector Endpoint Manager Import. If the Connector is not on the list, please contact the Ivanti ISM Support Team for more information.
Enter the following values in the Connection – Configuration Details:
- Connection Name – Endpoint Manager Import (name of the connector)
- Connection Type – EPM from the dropdown list
- Server Name – DNS or FQDN of the SQL Server that hosts the EPM DB
- Database Name – Name of the EPM Database
- Login – SQL Authentication Username of the database
- Password – SQL Authentication Password of the database
Select Test Connection for a connection test. When the test is successful, select 5x Next and leave all fields default. In the Review and Publish, select Publish & Run Now to import the EPM Agents.
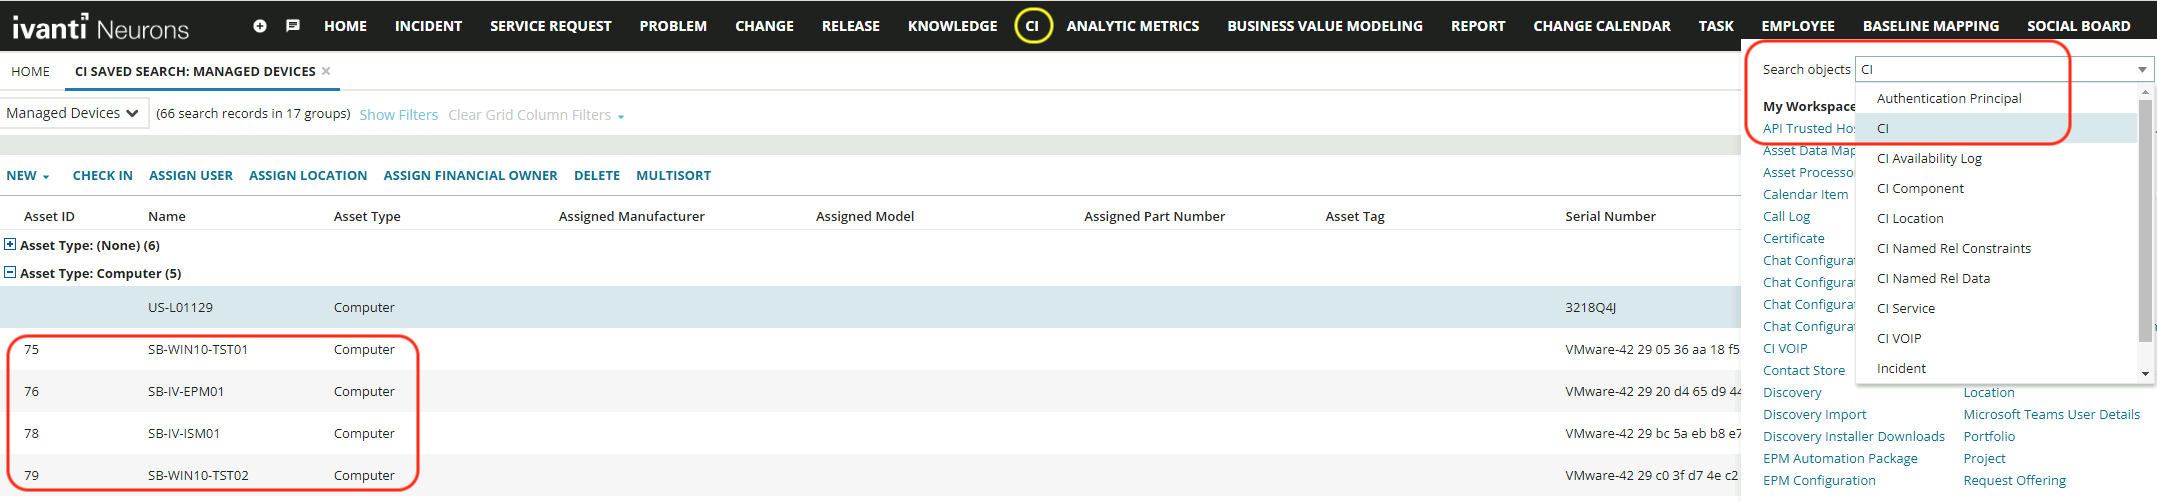
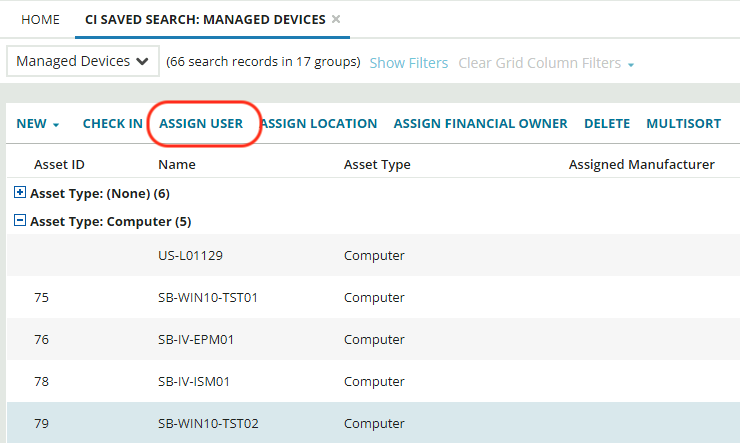
Head back to the first tab and select CI from the menu bar or enter CI in the More… search bar.
Under Asset Type:Computer, the EPM agents should be added.
The next step is assigning the CIs to the users. Select a CI and select Assign User in the menu.
Enter the username of the user, and the dropdown list shows the possible options.
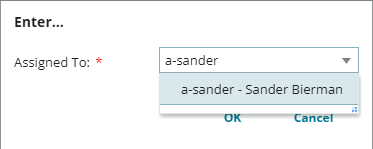
Select the name and select OK. When the CI is assigned, it’s shown as assigned with the name of the user.
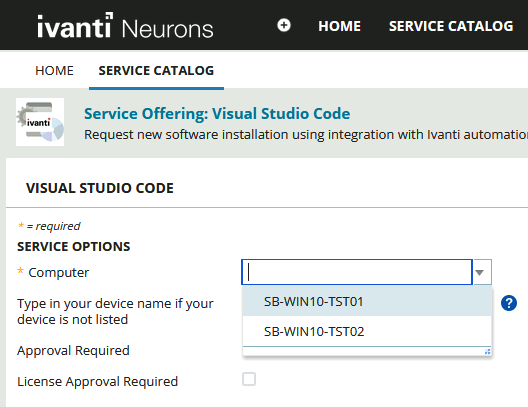
When a user logs into the ISM Self-Service Portal, the software installation is requested, and the selection of the device (users can hold multiple devices), and the assigned CIs of the user are shown in the list.
There are probably more ways to import the EPM Agents and assign them automatically, but that’s out of the scope of this blog. For more information, either Ivanti EPM support or Ivanti Professional Services could be a help in this.
Step 2 – Create an API key
An ISM is needed when transferring the EPM distributed packages to ISM with the connector available in IA.
Log in to the ISM site with and Administrator account. For Onprem ISM use http(s)://<FQDN>/HEAT and for Cloud https://<FQDN>.
When the site is started, log in with an account that has the Administrator Role assigned.
Select the wrench icon in the menu bar (on the right side).

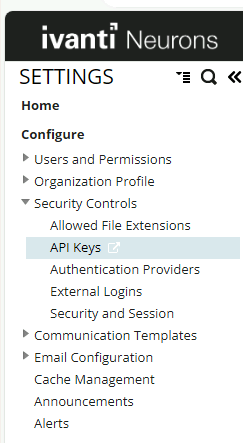
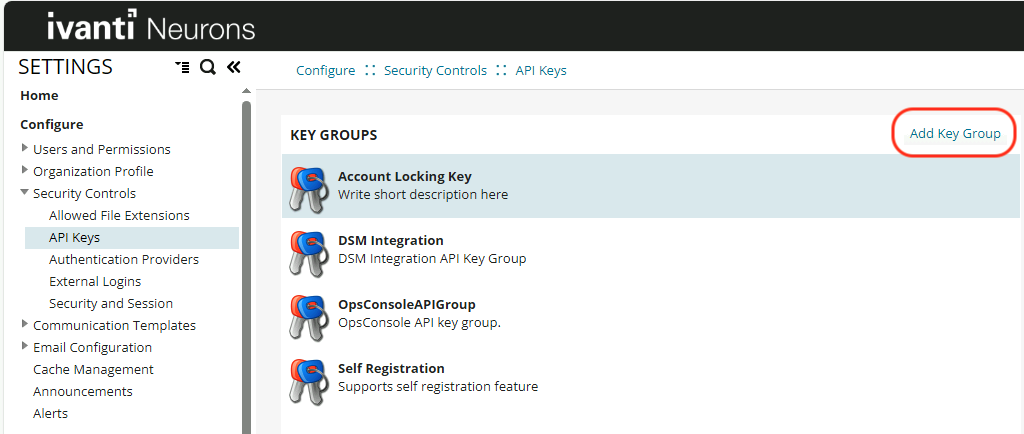
A new tab is opened with the ISM Settings. In the left menu, open the Security Controls menu in the Configuration menu. Select the API Keys from this menu.
Select the button Add Key Group.
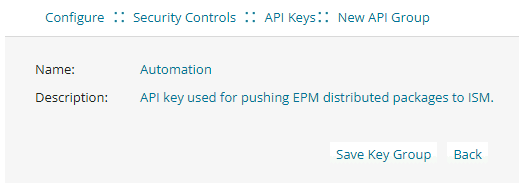
Enter a Name and Description for the API Group and select Save Key Group.
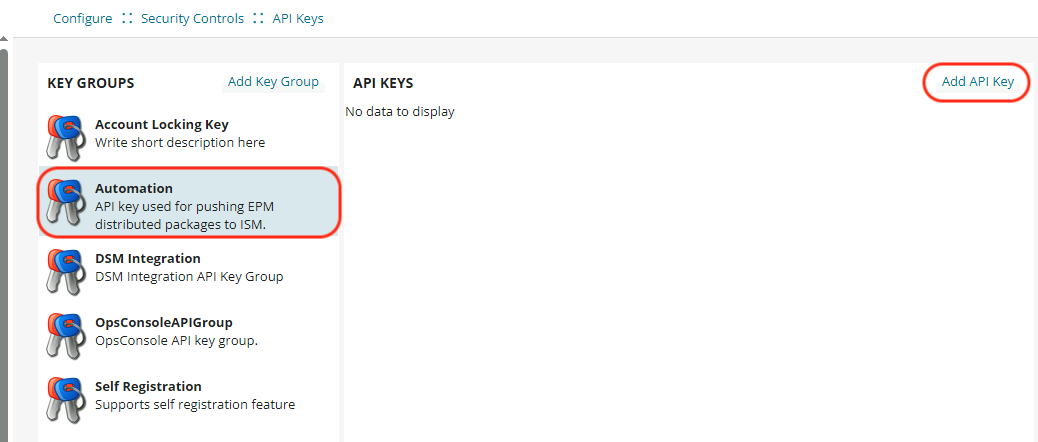
After saving the Key Group, select Back as the new Key Group page will not close automatically after saving the key group.
Select the newly created Key Group in the Key Groups overview. Select the button Add API Key.
A new key is automatically created. Enter a Description and select a user in the On Behalf Of. In this example, I added the HEATAdmin account, which is added to my name (Sander Bierman).

This account is attached to the Administrator Role. Select the value from the dropdown list.

When finished, select Save Key.
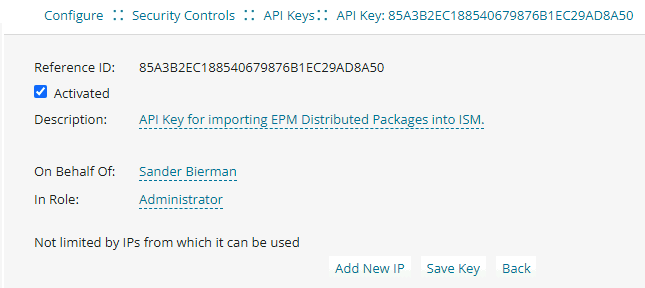
When finished, select Back to continue.
The API Key will be added to an IA global variable further in the configuration process.
Step 3 – Check if BO and template are available
Check if the BO ivnt_AutomationSoftwarePackage is available.
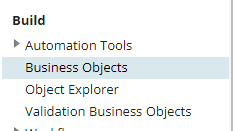
In the Neurons Settings page (same as where we created the API Key), select the menu item Business Objects in the Build overview.
Select the option View All.
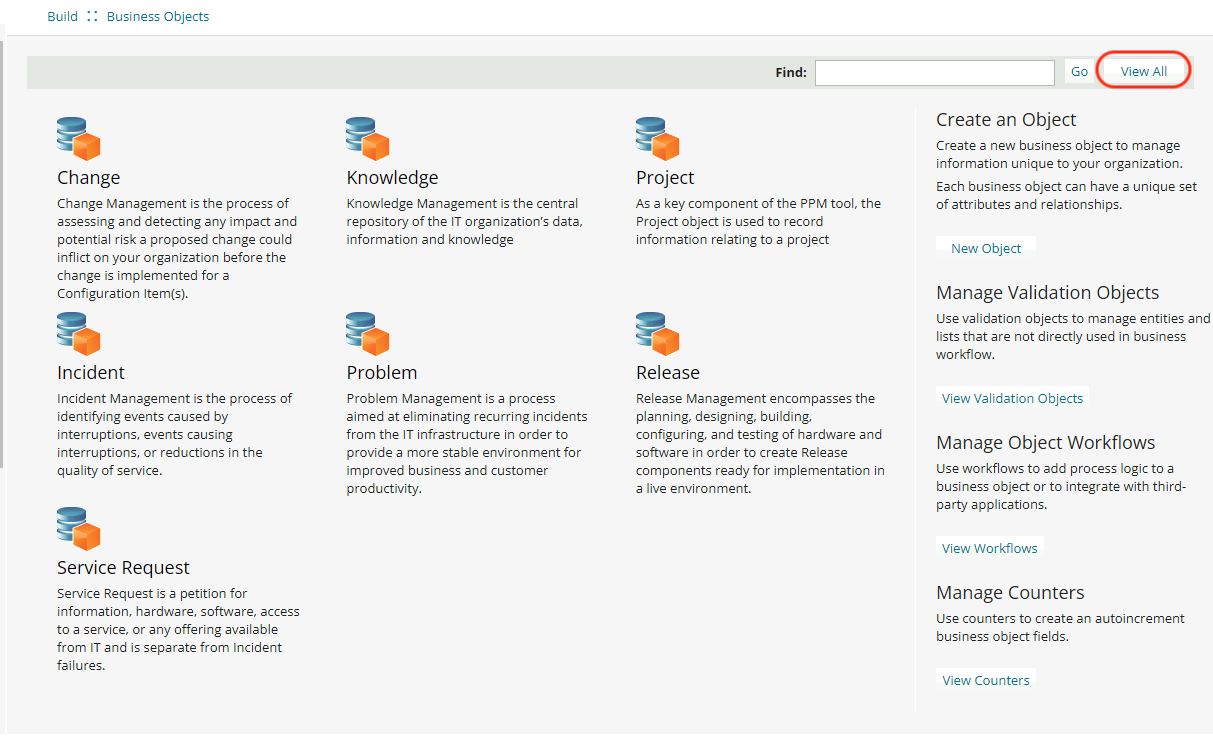
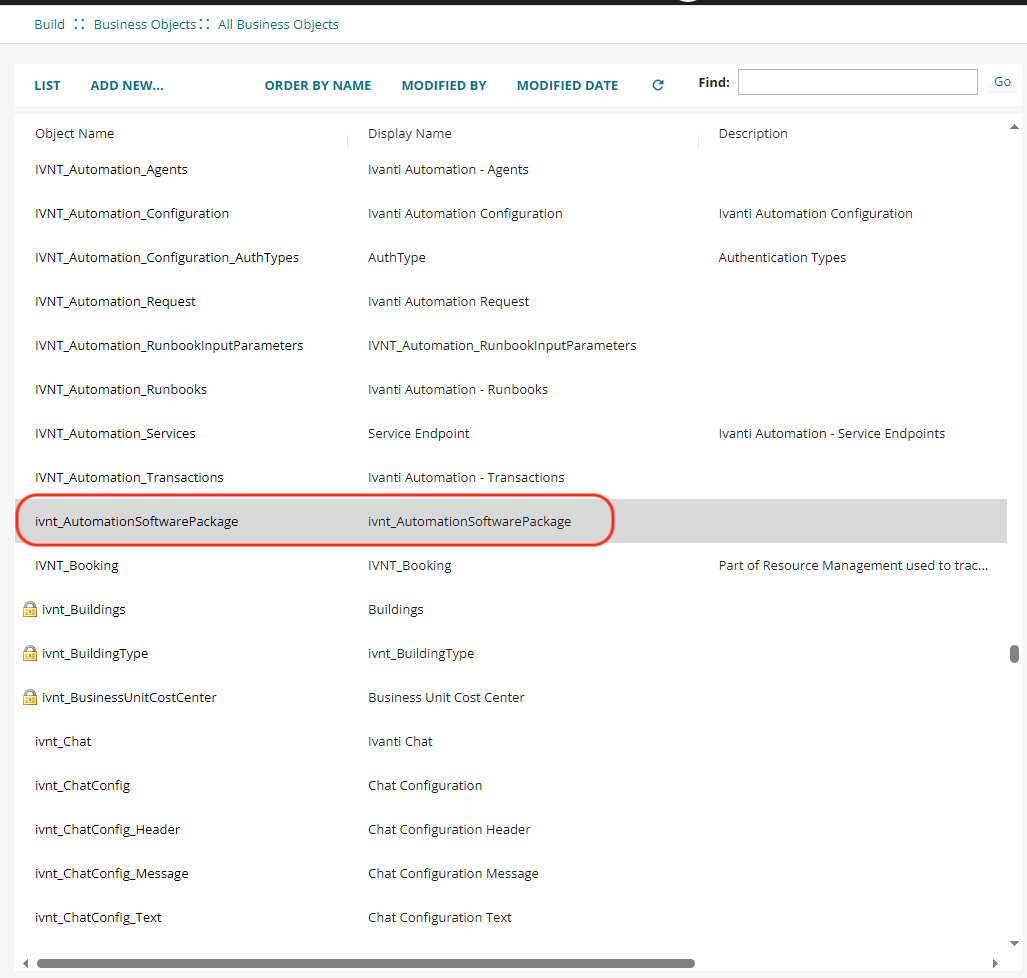
A list with all BOs is shown. Scroll down until you find the ivnt_AutomationSoftwarePackage BO.
When the BO ivnt_AutomationSoftwarePackage isn’t available, download the XML file here. The filename is Prebuilt_SoftwareInstallation.metdataPackage.
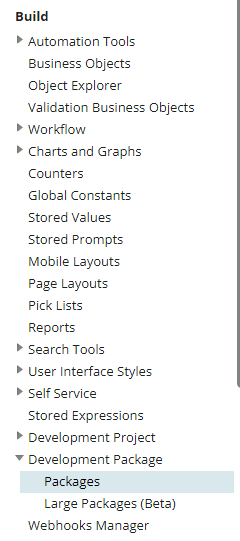
Select Development Package – Packages in the menu under Build.
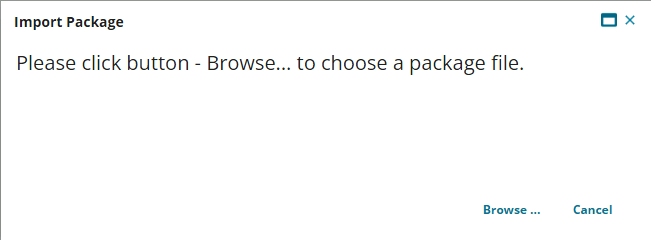
Select Import Package.

In the next screen, select the option Browse.
Select the file Prebuilt_SoftwareInstallation.MetadataPackage file.
Note: This file also installs the Request Offering Software Installation Template. Template is installed in the category Software.
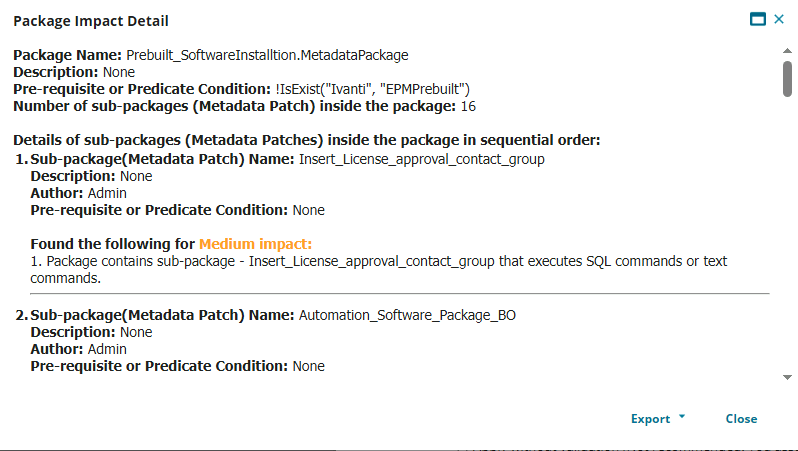
After selecting the file, select either the option Preview Impact or Skip Impact.
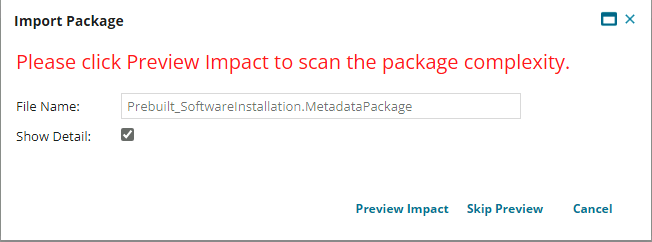
When selecting the option Show Impact, a new screen shows what will be installed during the import but also all connections with existing BOs.
In the next window select if the import needs to validated.
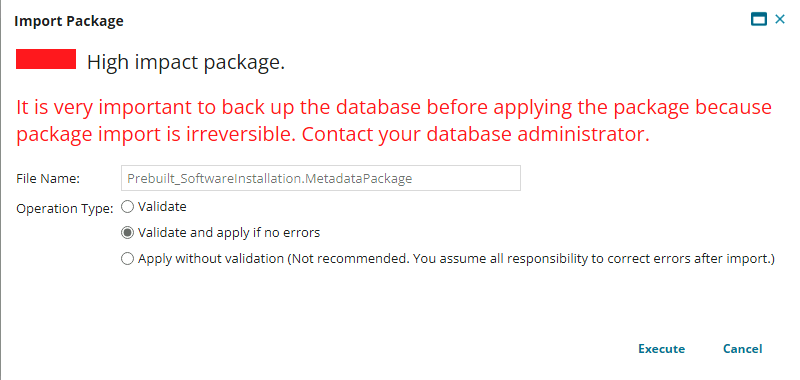
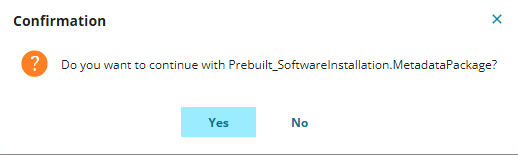
The last step is confirming the import of the MetadataPackage.
Note: If errors are returned, please log a case with Ivanti Service Manager support.
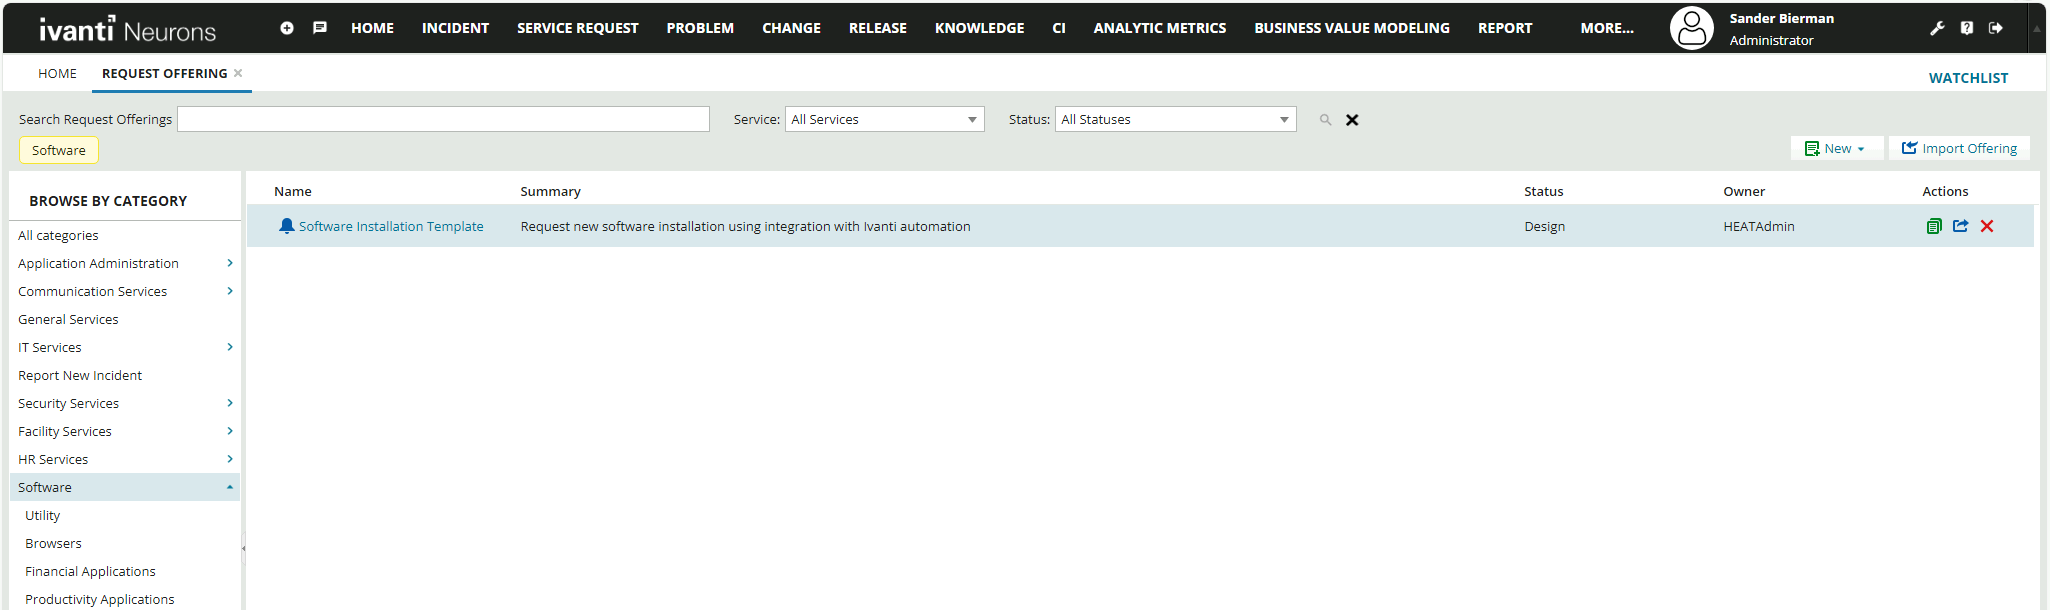
When the import is correctly finished, check if the new BO (ivnt_AutomationSoftwarePackage) is installed. Also, check if the Template is installed in the Request Offering overview under Software.
When the BO and the Template are available after a clean installation, the Software Installation Template will fail to open. The template expects a team IT.
In the Settings page, select Users and Permissions and Teams.
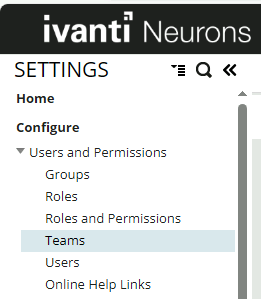
Select New Standard User Team from the top menu.
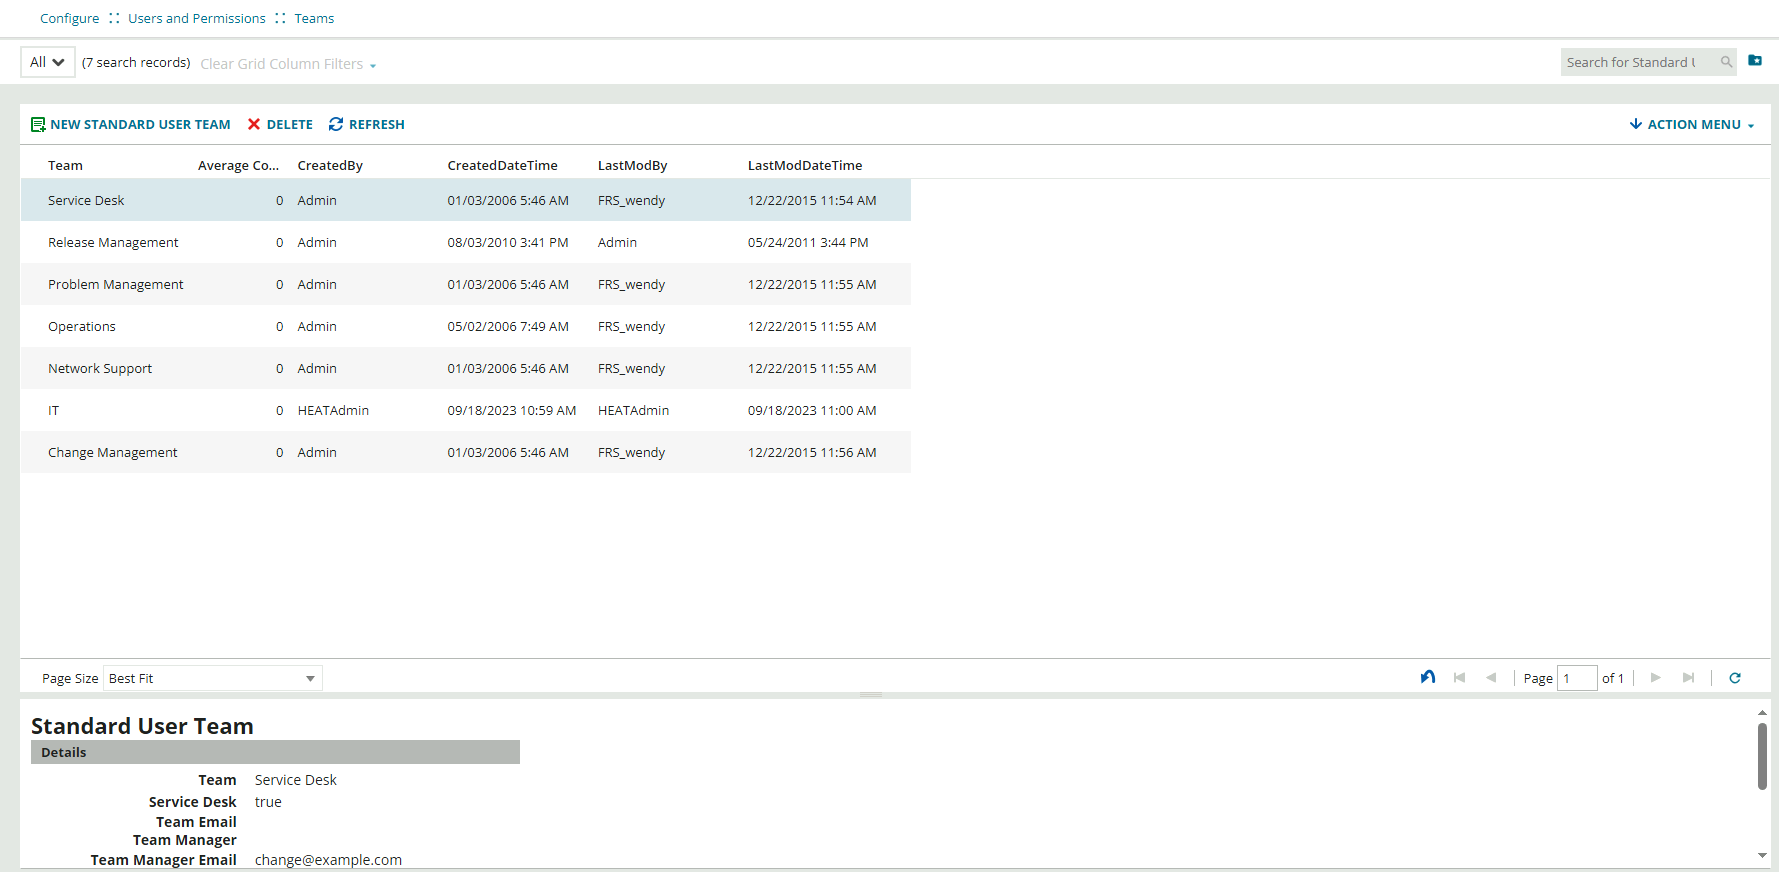
Enter the Team Name IT (mandatory name) and all other required fields. Link all users who need to have access to the template.
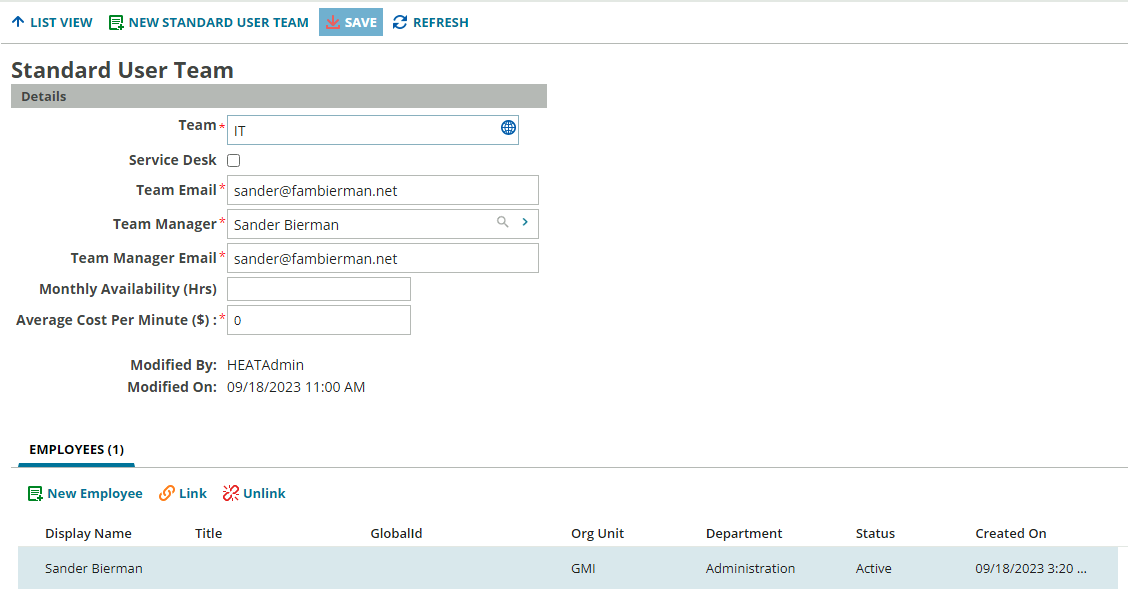
Save the team, and the Template will be available.
If all the above items fail, please create a support ticket for the ISM support team.