Part 4 – Ivanti Automation configuration
Step 1 – Create Ivanti Automation Global Variables
Use this link to import all the required Global Variables. The resource in the Building Block includes a lot of Global Variables. For this project, the variables below are required.
Ivanti Endpoint Manager Client ID;Ivanti Endpoint Manager;Text
Ivanti Endpoint Manager Client Secret;Ivanti Endpoint Manager;Password
Ivanti Endpoint Manager Host;Ivanti Endpoint Manager;Text
Ivanti Endpoint Manager Username;Ivanti Endpoint Manager;Text
Ivanti Endpoint Manager Password;Ivanti Endpoint Manager;Password
Ivanti Endpoint Manager Distribution and Patch Settings ID;Ivanti Endpoint Manager;Text
Ivanti Endpoint Manager Reboot Settings ID;Ivanti Endpoint Manager;Text
Ivanti Endpoint Manager Package Category ID;Ivanti Endpoint Manager;Text
Ivanti Service Manager UserName;Ivanti Neurons for ITSM;Text
Ivanti Service Manager Password;Ivanti Neurons for ITSM;Password
Ivanti Service Manager Tenant;Ivanti Neurons for ITSM;Text
Ivanti Service Manager Tenant URL;Ivanti Neurons for ITSM;Text
Ivanti Service Manager APIKey;Ivanti Neurons for ITSM;Text
The values above can be directly pasted into the CSV in the Ivanti Automation Resource. Of course, manual creation is also an option.
| IA Global Variables |
Explanation |
|
Ivanti Service Manager UserName |
Account which needs to member of the Administrator role |
|
Ivanti Service Manager Password |
Password for the ISM Username |
|
Ivanti Service Manager Tenant |
FQDN of the ISM environment |
|
Ivanti Service Manager Tenant URL | URL of the ISM environment(i.e., https://ism.automatedvision.info/HEAT for Onprem and https://ism.automatedvision.info for Cloud solutions) |
|
Ivanti Service Manager APIKey |
ISM API Key created in part 3 step 2 |
|
Ivanti Endpoint Manager Client ID |
Created in part 2 step 1 |
|
Ivanti Endpoint Manager Client Secret |
Created in part 2 step 1 |
|
Ivanti Endpoint Manager Host |
DNS or IP address of the EPM Core server |
|
Ivanti Endpoint Manager Username |
EPM user account with access to the EPM Core software |
|
Ivanti Endpoint Manager Password |
Password for the EPM user account |
|
Ivanti Endpoint Manager Distribution and Patch Settings ID |
Discussed later |
|
Ivanti Endpoint Manager Reboot Settings ID |
Discussed later |
|
Ivanti Endpoint Manager Package Category ID |
The EPM Distributed Category discussed in part 2 step 2. How to resolve the ID is discussed later in the blog |
Step 2 – Import the connectors with the Ivanti Marketplace Solution Installer
Download the Ivanti Marketplace Solution Installer from the Ivanti Marketplace or from here.
Download the three required connectors as described in the prerequisites.
- Ivanti Endpoint Manager Connector for Ivanti Automation
- Ivanti Service Manager Utility Connector
- Ivanti Service Manager – Ivanti Endpoint Manager Software Distribution Connector for Ivanti Automation
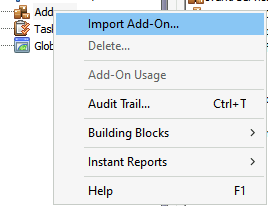
Start the Ivanti Marketplace Solution Installer. It’s not recommended to use the option. Import Add-On in the Add-ons in the Ivanti Automation Console (Setup – Add-ons). Due some certificate issues some of the connectors will not install.
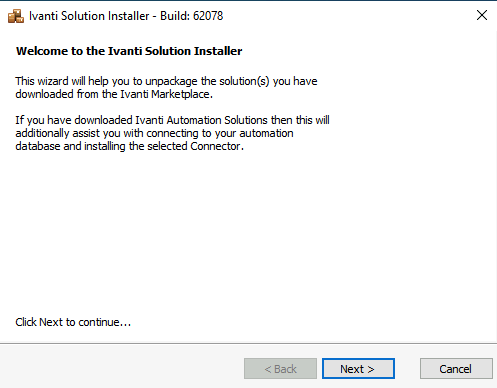
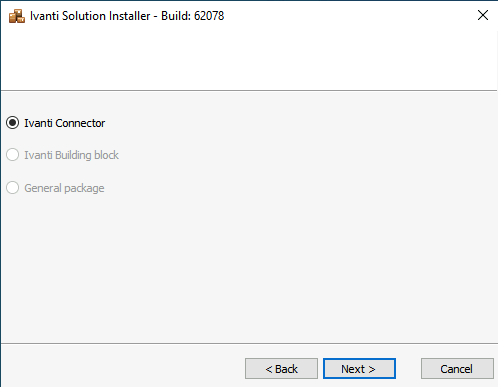
Select Next in the start screen of the Ivanti Marketplace Solution Installer.
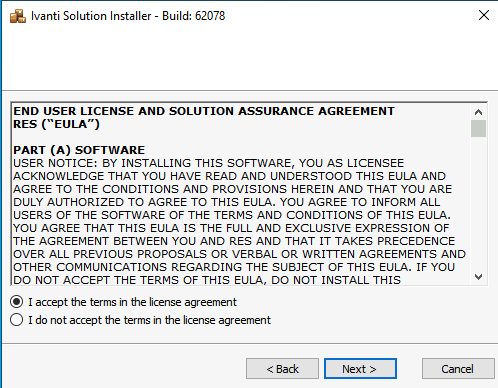
Accept the License Agreement and select Next to continue.
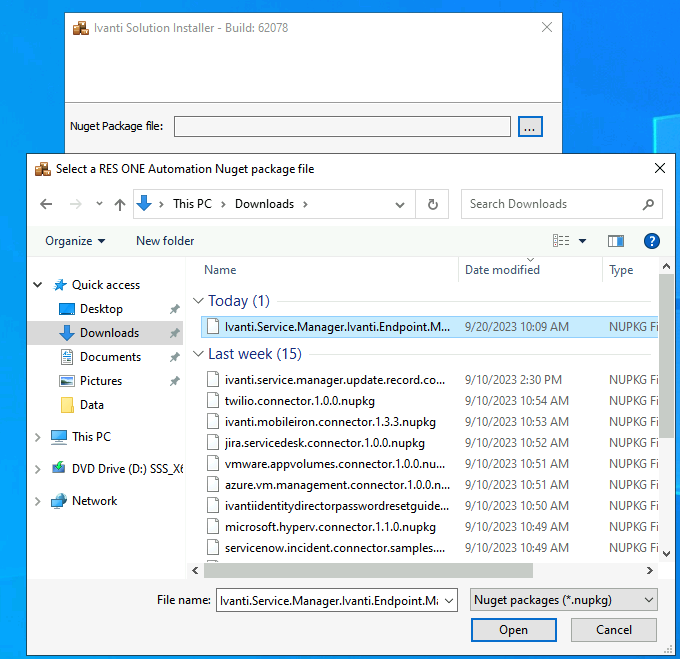
Browse for the connector to install and select Next to continue.
The file is recognized as an Ivanti Connector. Select Next to continue.
The next screen shows the available actions in the connector.
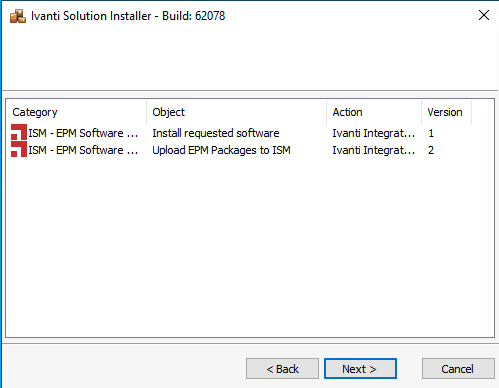
Select Next to continue.
In the next screen, enter the database password when using SQL Authentication. Other option is using Windows Authentication.
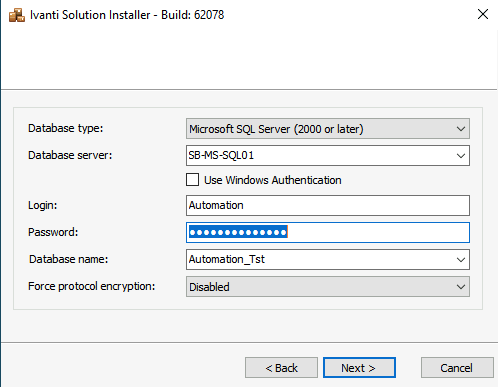
Select Next to continue.
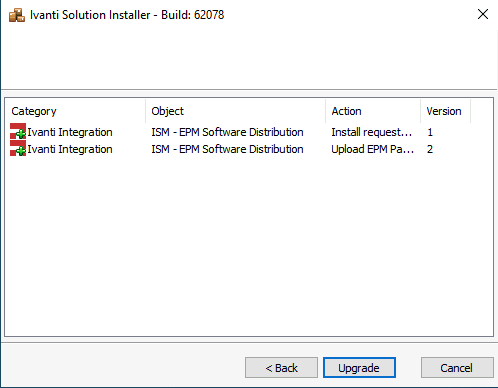
Select Upgrade to import the connector.
When finished, select Next to continue. This closes the application.
Select Setup – Add-ons in the Ivanti Automation Console and press F5 if the new installed connector isn’t shown.
The newly installed connector is available in the overview. The screenshot below shows many more installed connectors.

Execute the above actions for the other two connectors needed for the integration. When all three connectors are installed the list should be like the screenshot below.

Step 3 – Resolve EPM IDs
In this blog, we added the Distributed Software in the EPM Category ISM. When importing the EPM Software Packages in ISM, we need to know the Category ID.
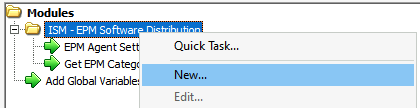
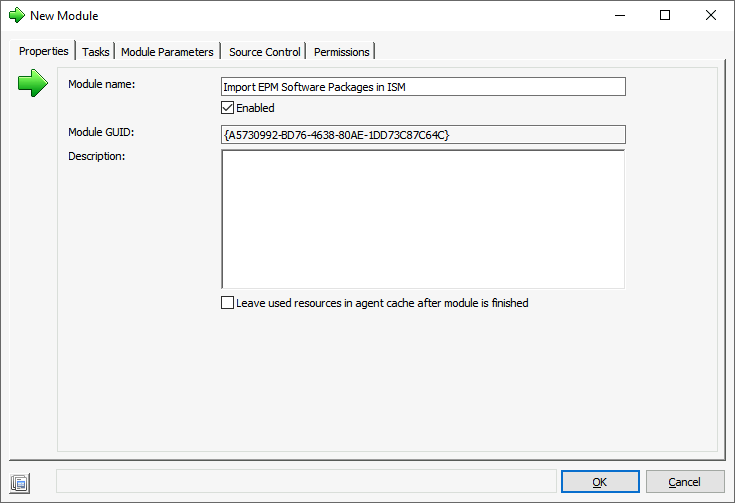
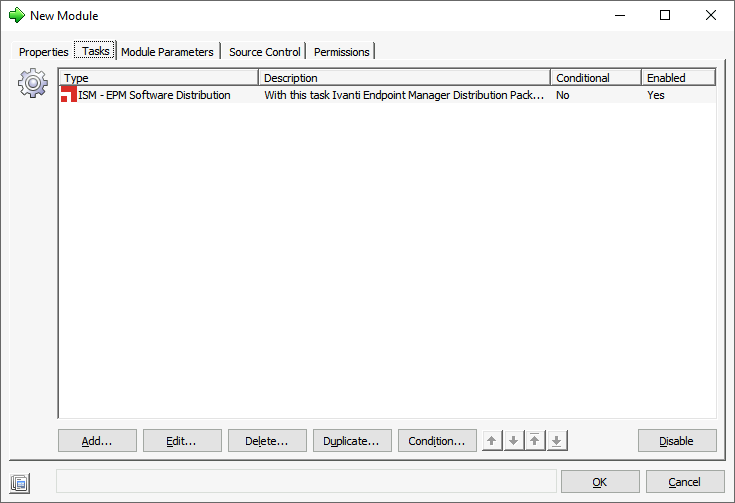
Open the IA Console and select Library – Modules. Create a folder just for the ISM – EPM Software Distribution and create a new Module.
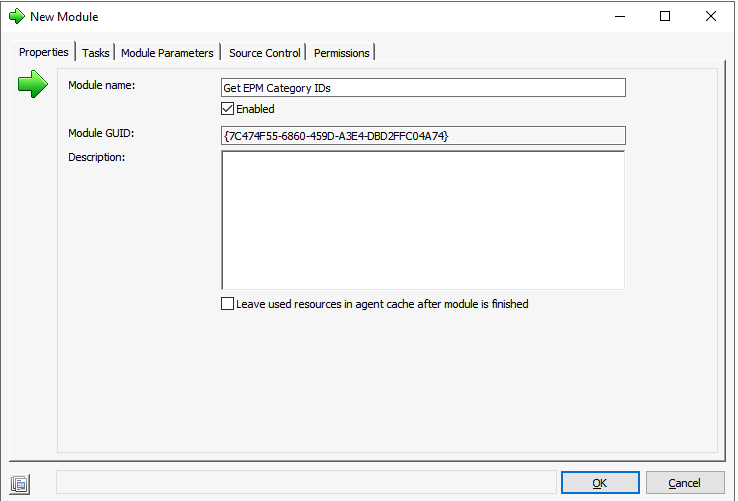
Enter a module name (i.e., Get EPM Category IDs) and select the Tasks tab.
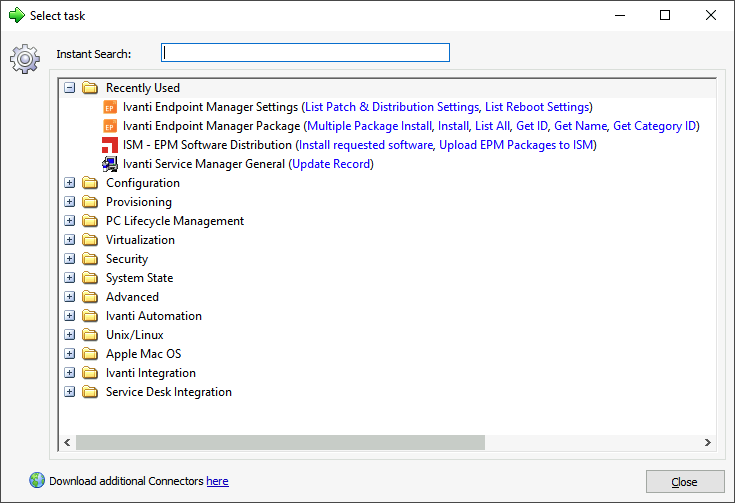
Select Add and select PC Lifecycle Management – Ivanti Endpoint Manager Package. Select the action Get Category ID.
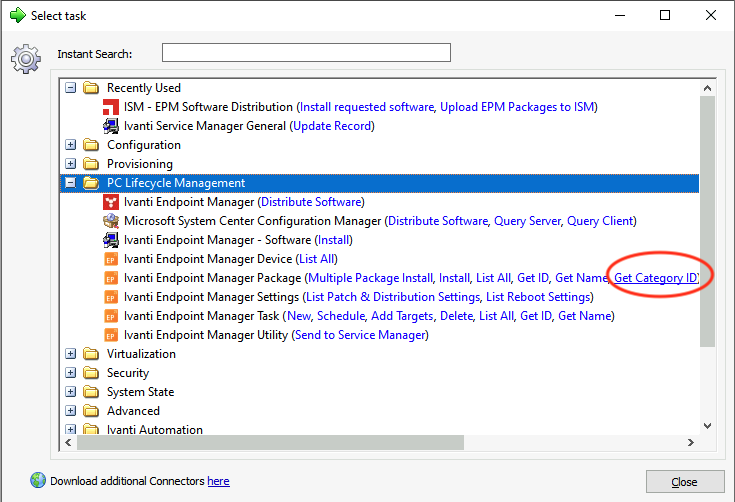
Don’t enter a value in the Ivanti Endpoint Manager Packagename. This can be used when a Category ID is needed for a single EPM Package. But in this example, we need to resolve all EPM Packages.
Select twice OK to continue and save the Module. Assuming agents are installed, schedule the newly created Module.
When the Module is finished, select Jobs – Job History in the IA Console. Double-click the finished module. When the Modules show failed, investigate the error (most of the time, the API is not working correctly).
When the Module finished successfully, select the tab Tasks, double-click the task, double-click the Agent, and select the tab Logs.
In the Logs, all Distributed Packages are shown with the corresponding Category ID.
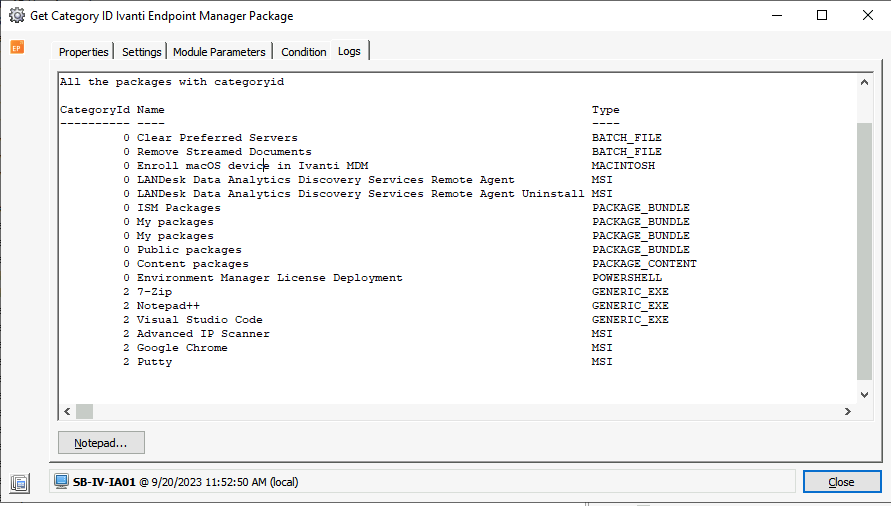
In this blog, all Distributed Packages are added to the ISM Category. In this example, all EPM Packages used for ISM have Category ID 2.

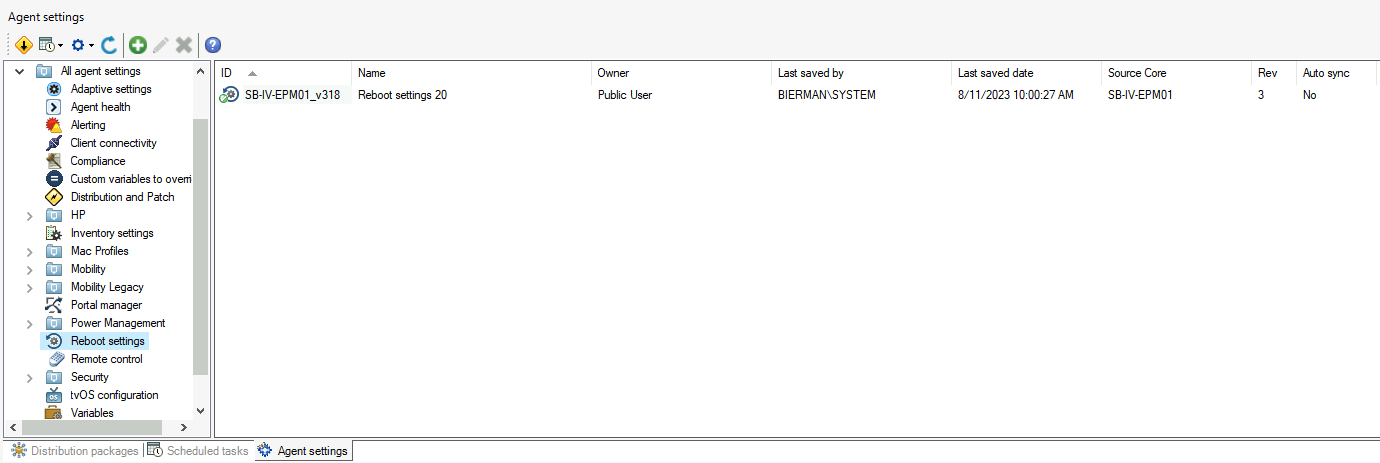
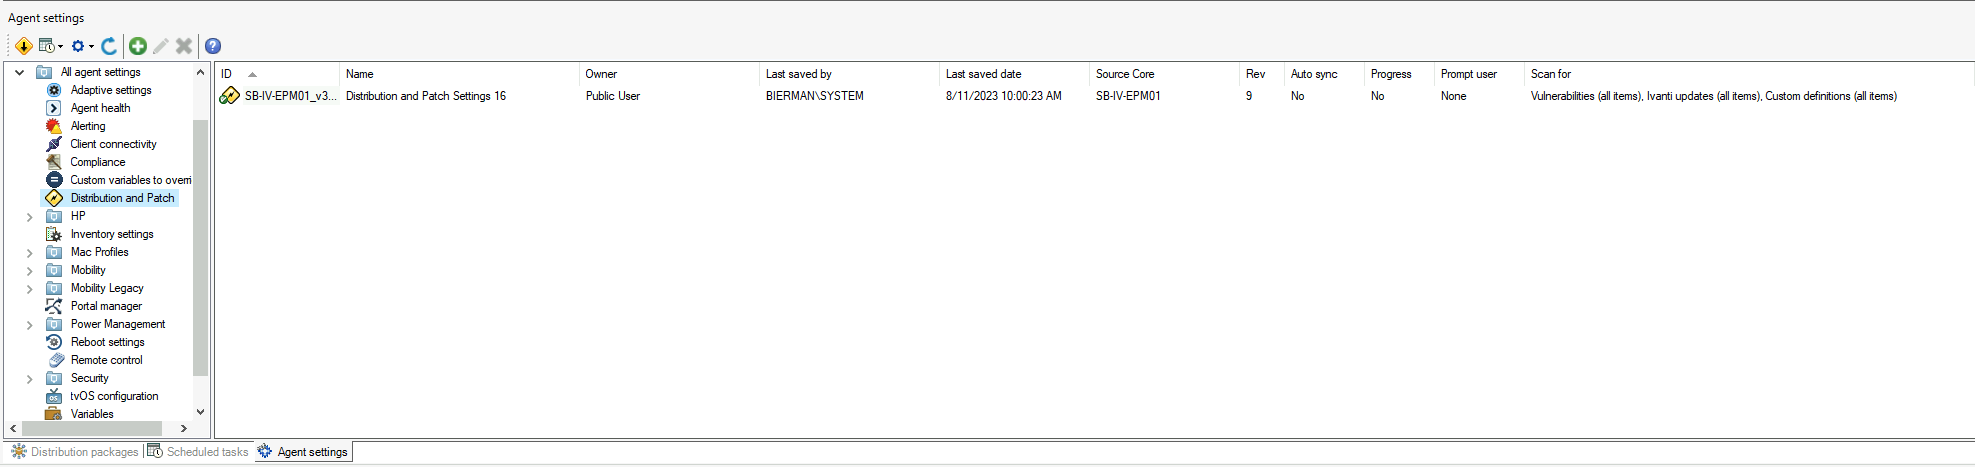
Reboot Settings ID and Distribution and Patch Settings ID are mandatory settings when executing software distribution. The Reboot Settings and Distribution and Patch Settings are Agent Settings in the EPM Management Console.
In the screenshots above, the IDs are in the Name. But when the IDs are not in the name, we can create a Module with Tasks to resolve the IDs.
Note: Currently, all EPM Distributed Packages must use one Reboot Setting ID and one Distribution and Patch Setting ID.
In the IA Console, select Library – Modules and create a new Module. Enter a name and description.
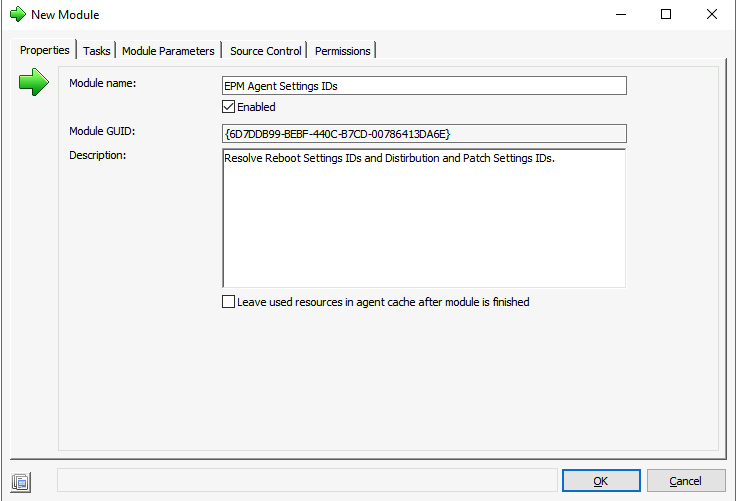
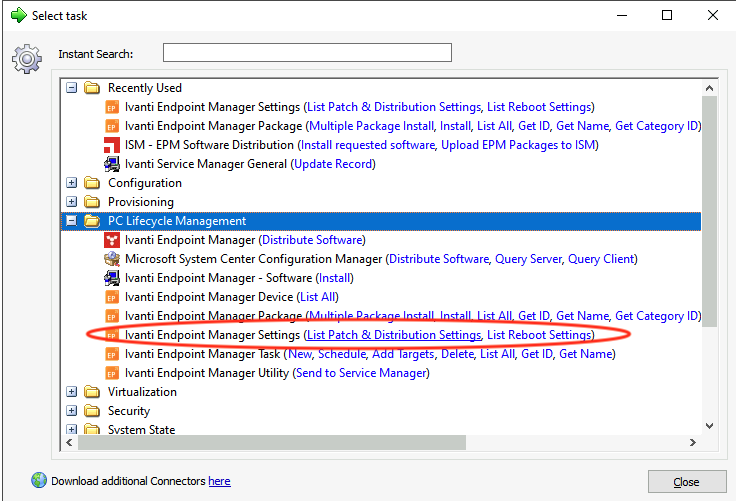
Select the Tasks tab. Select Add and select PC Lifecycle Management – Ivanti Endpoint Manager Settings. Select the List Patch & Distribution Settings.
This task uses 5 IA Global Variables, which are already created in step 1 of part 4.
But this task also creates output, which needs to be added to an IA Parameter.
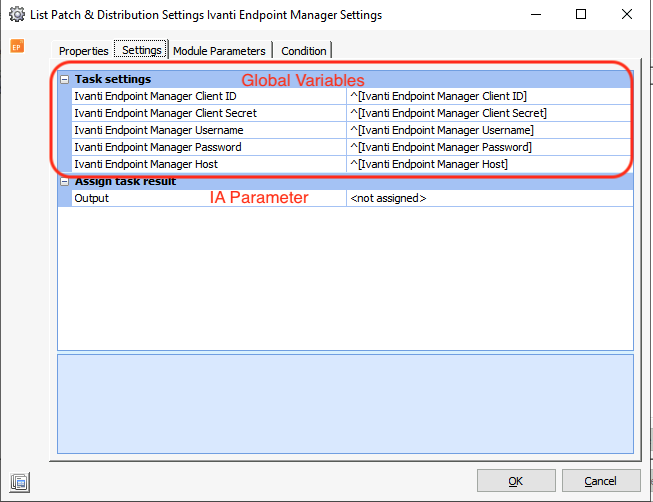
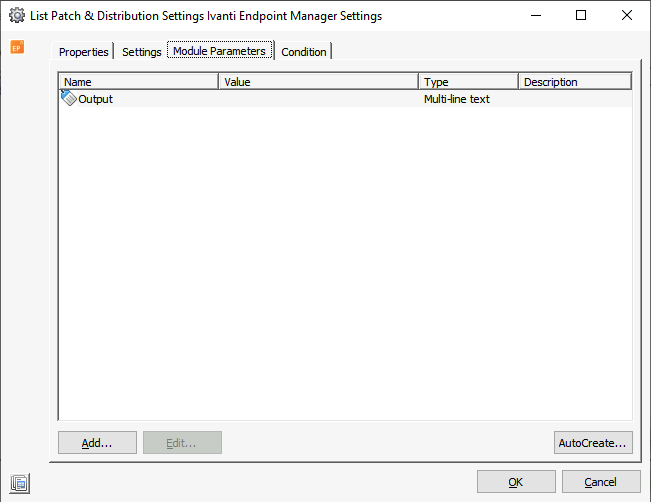
There is currently no parameter created and not assigned. Select the <not assigned>. A dropdown box appears, and select the option AutoCreate parameter [Output].

A new parameter is created. Check the tab Parameters if the parameter is created.
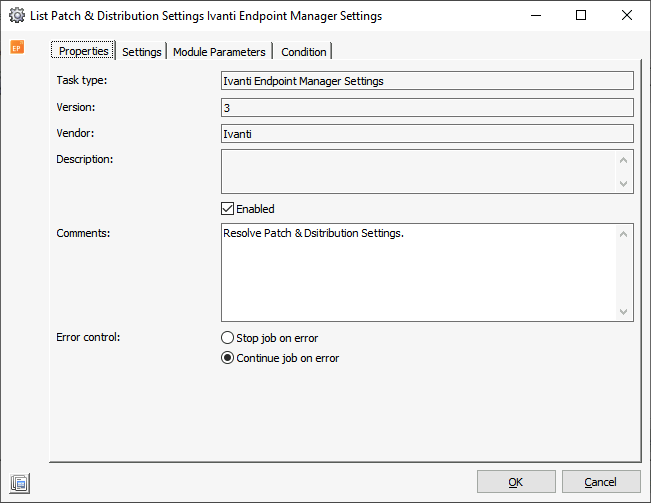
Select the Properties tab and enter a Comment. This makes the tasks in the module more readable and understandable.
Select OK, and the task is created. The next task to create is for the Reboot Settings. Select Add and select PC Lifecycle Management – Ivanti Endpoint Manager Settings. Select the List Reboot Settings.
The actions are now available in the Recently Used.
This task uses 5 IA Global Variables, which are already created in step 1 of part 4.
But this task also creates output, which needs to be added to an IA Parameter.

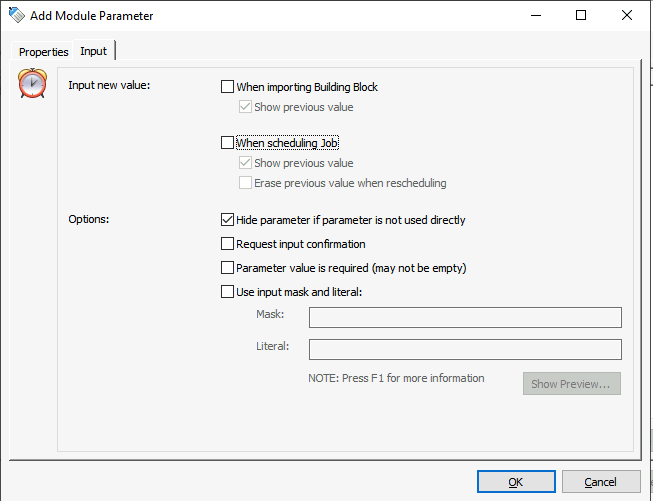
There is currently no parameter created and not assigned. Select the <not assigned>. A dropdown box appears, and select the option Add Parameter. Auto creation is not possible because it will create an Output parameter, which is created in the first Task.
Enter a name like Output1, select the tab Input, and disable the option When scheduling Job.
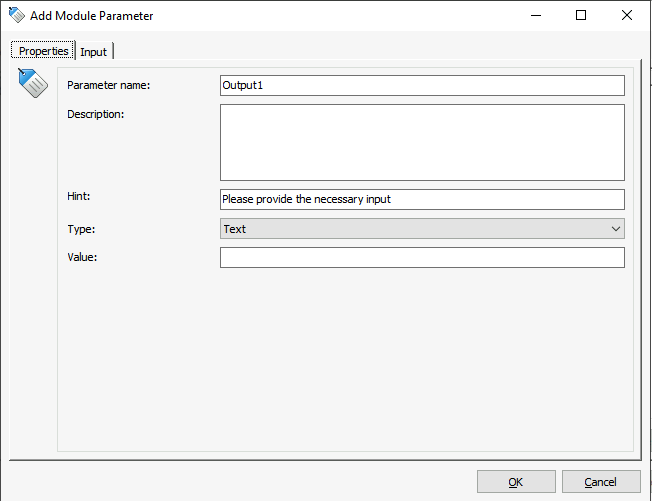
Select OK to store the parameter. The newly created parameter is added to the Output task result. Select the Properties and enter a description.
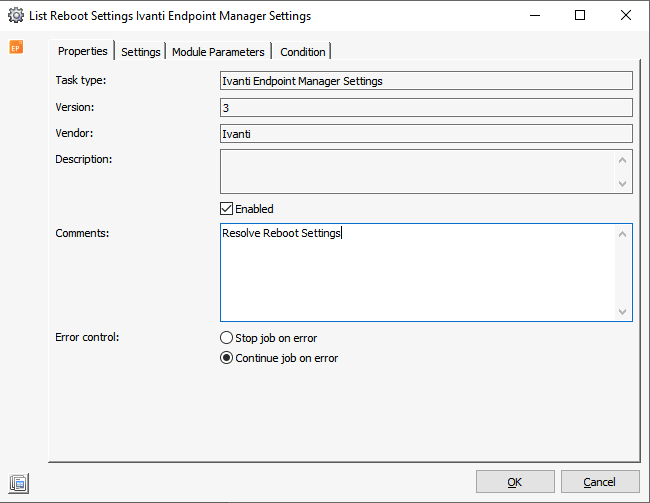
Select OK to store the newly created task.
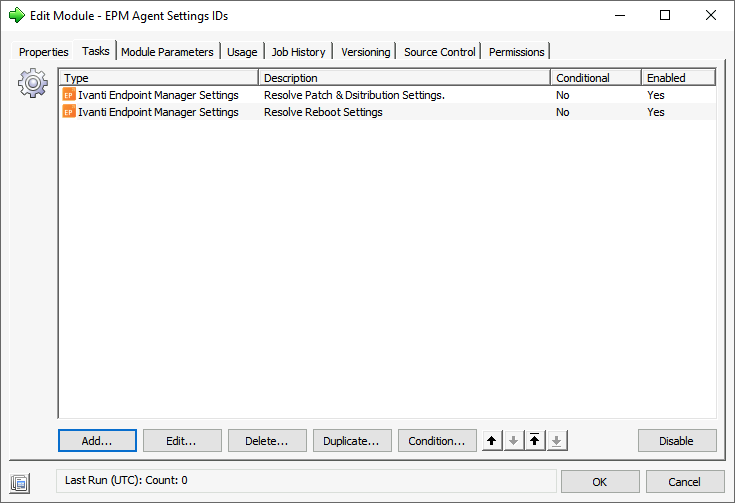
When finished both tasks are shown.
Select OK to store the Module. Schedule the Module to resolve the IDs.
When finished, select Jobs – Job History and select the finished job. Double-click the job, select the tab Agents, double-click the first task, and select the tab Logs.
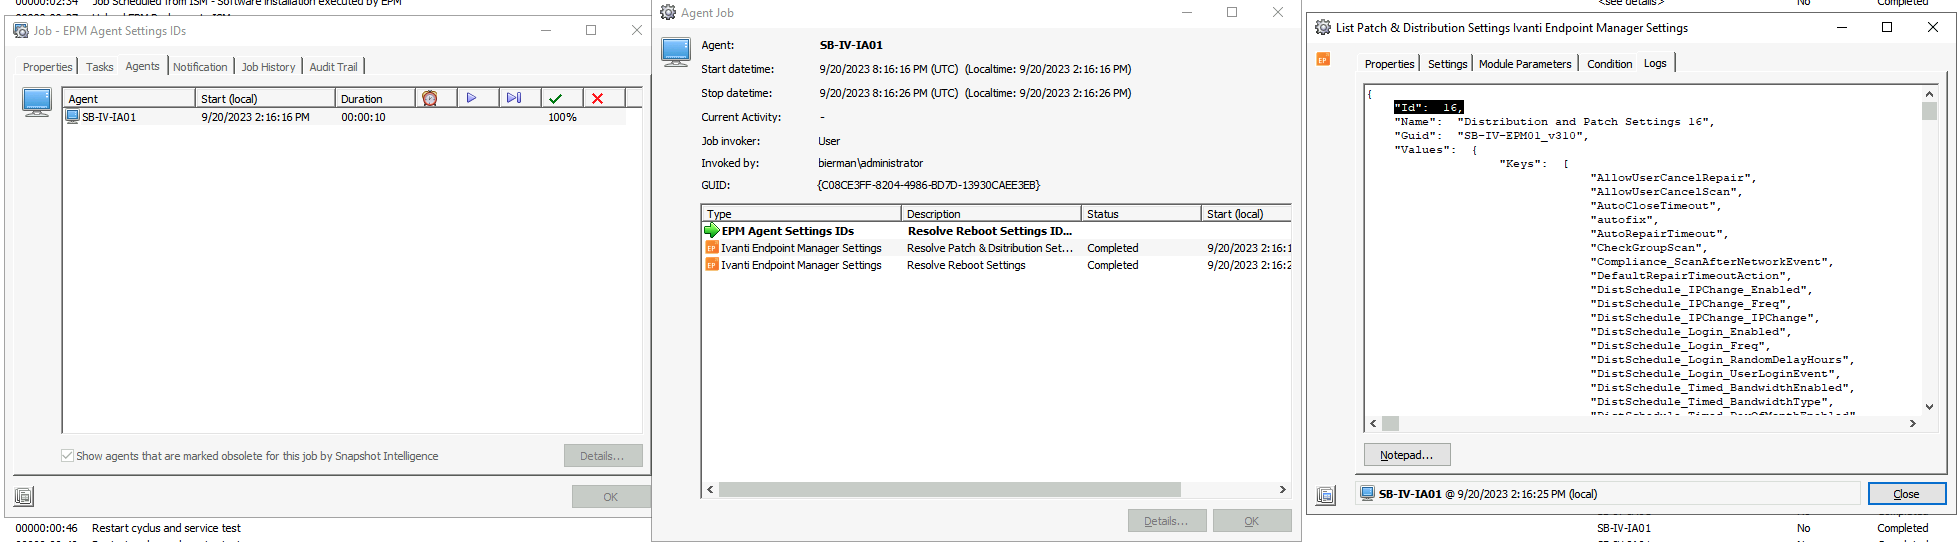
In the Logs tab, all settings are visible. The first line, which mentions id, is the value needed for the Ivanti Endpoint Manager Distribution and Patch Settings ID global variable.
Execute this also for the other task and use the id for the Ivanti Endpoint Manager Reboot Settings ID global variable.
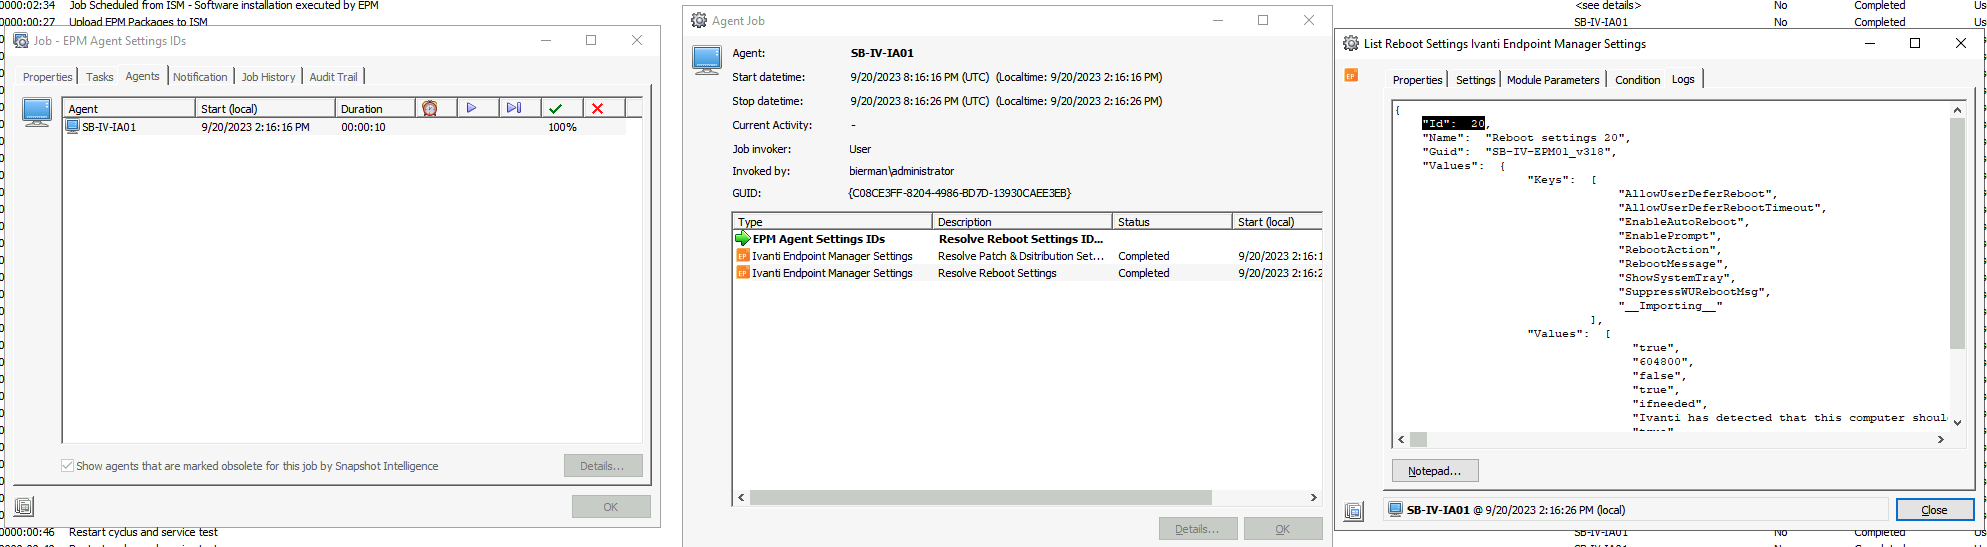
In this example the Ivanti Endpoint Manager Reboot Settings ID = 20 and the Ivanti Endpoint Manager Distribution and Patch Settings ID = 16.
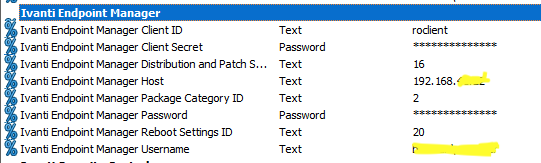
All IA global variables for Ivanti Endpoint Manager should look like the screenshot below.
The IA global variables for Ivanti Service Manager should look like the screenshot below.

Step 4 – Create a Module for importing EPM Distributed Packages in ISM
In the IA Console, select Library – Modules. In the created folder, select New.
Enter a name for the Module (i.e., Import EPM Software Packages in ISM).
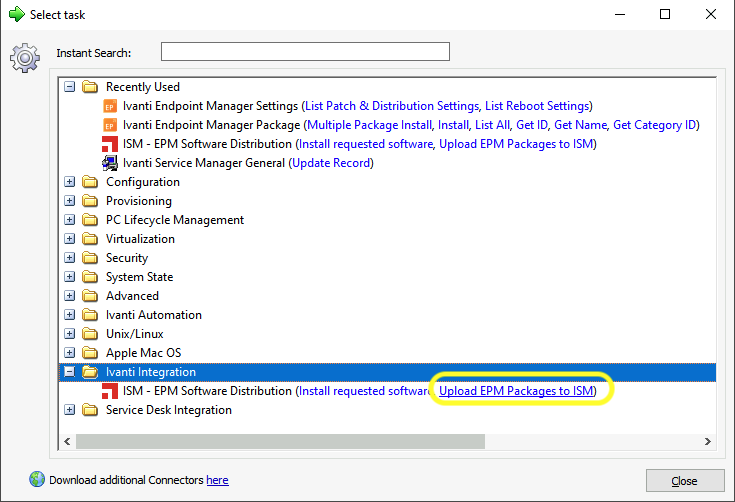
Select the tab Tasks, and select Add to create a new task. Select Ivanti Integration – ISM-EPM Integration – Upload EPM Packages to ISM.
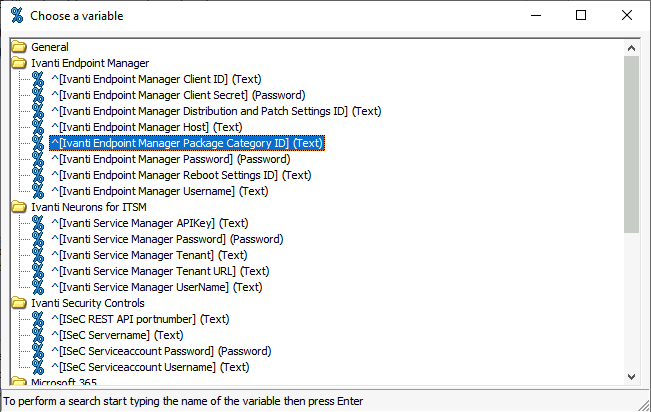
In the following screen, either add the EPM Category ID or the IA Global Variable.
EPM Category ID:
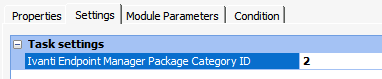
IA Global Value – Ivanti Endpoint Manager Package Category ID


When finished, select OK to create the Module.
EPM Packages in the ISM folder are imported into the EPM Automation Package view. This is the list from the ivnt_AutomationSoftwarePackage BO.
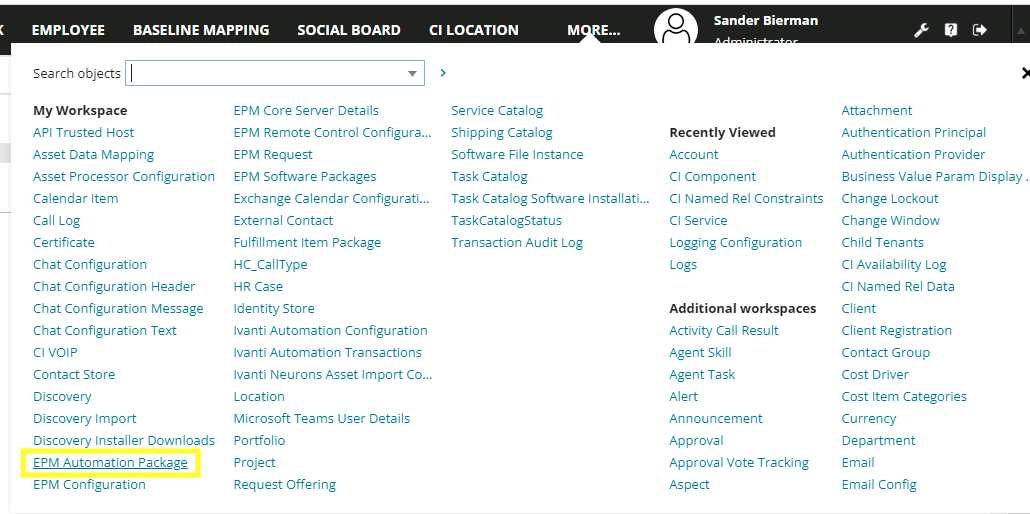
From the More button in the ISM Portal, select EPM Automation Package. In this overview, the packages from EPM are shown.
In this blog, 5 EPM packages are added, but in EPM, 6 packages are available. Let’s schedule the newly created Module to import the new EPM Package (Visual Studio Code).


Schedule the newly created Module from the IA Console, and when successfully finished, select Refresh in the EPM Automation Package list.
The new distributed application is added to the EPM Automation Package view.

When new distributed packages are created with the correct category, this Module needs to be scheduled.
Step 5 – Creating ISM Request Offering and IA Runbook for executing the software distribution through EPM
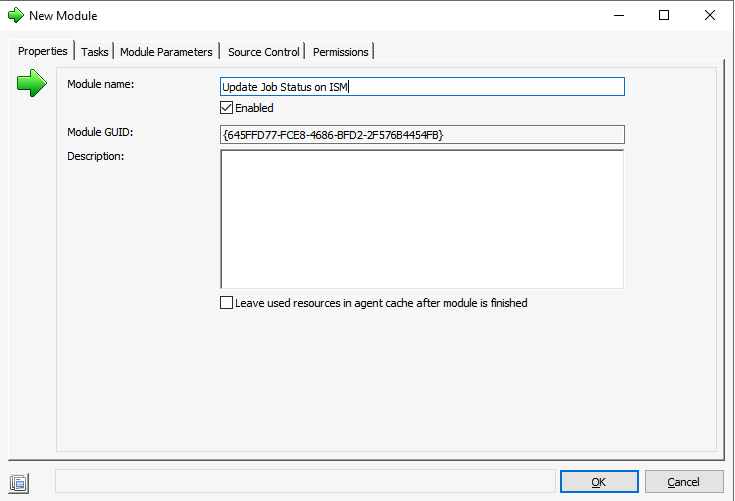
In the IA Console, select Library – Modules and select New in the folder created. Name the Module (i.e., Update Job Status on ISM) select the tab Tasks, and select Add.
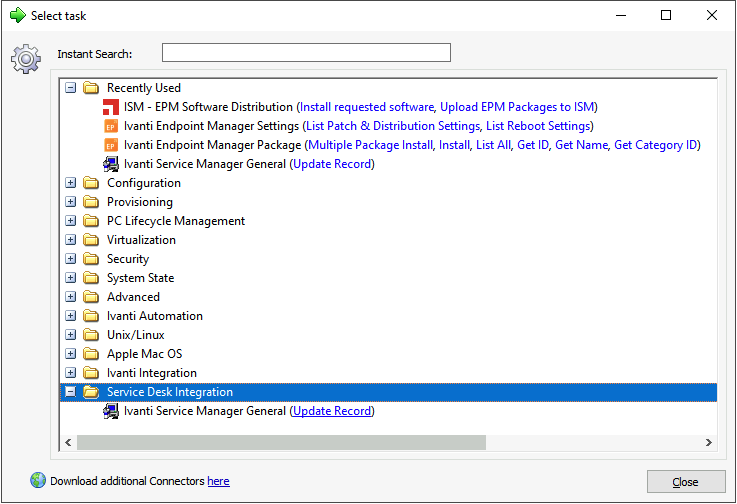
Select Service Desk Integration – Ivanti Service Manager General – Update Record.
For the Task setting parameters (p_status, ISM_TransactionID, and job_results) new parameters need to be created.
Right-click in the field behind the name and select Insert Parameters – AutoCreate parameter [fieldname].

Execute this for all three task settings values.
For the parameter Results, use the AutoCreate option to create a parameter Results.

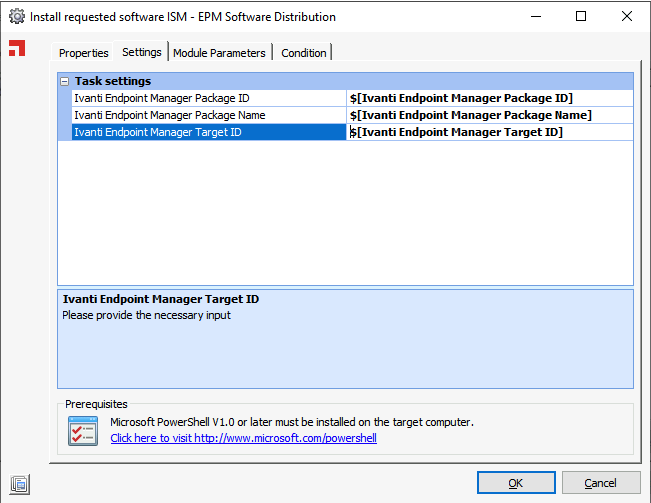
When finished, the setting should be like the screenshot below.
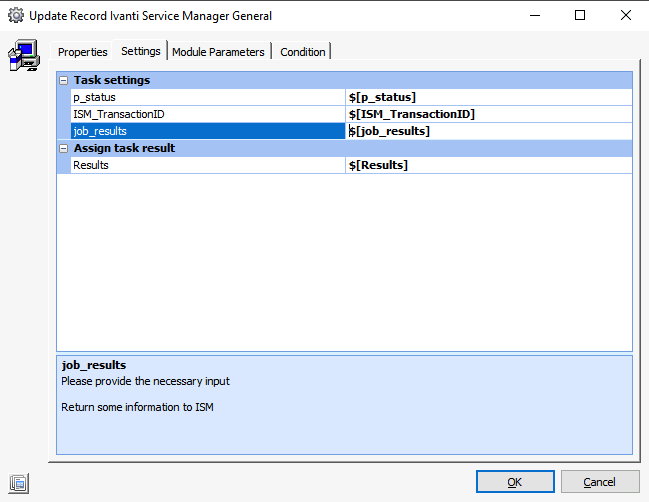
Click twice on OK to create the Module.
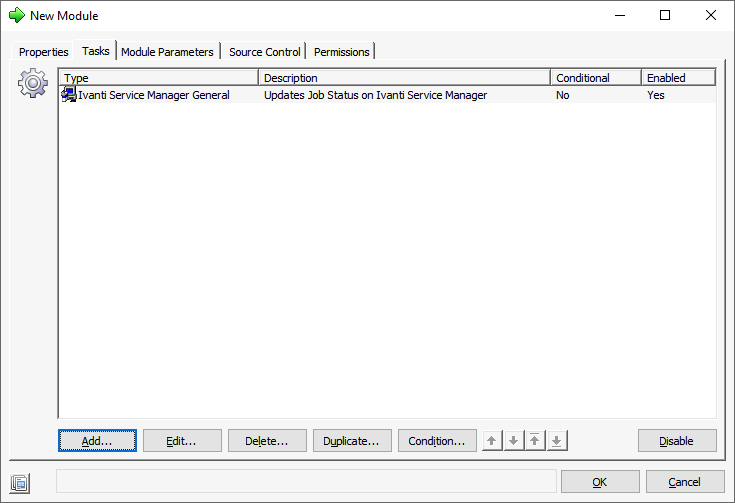
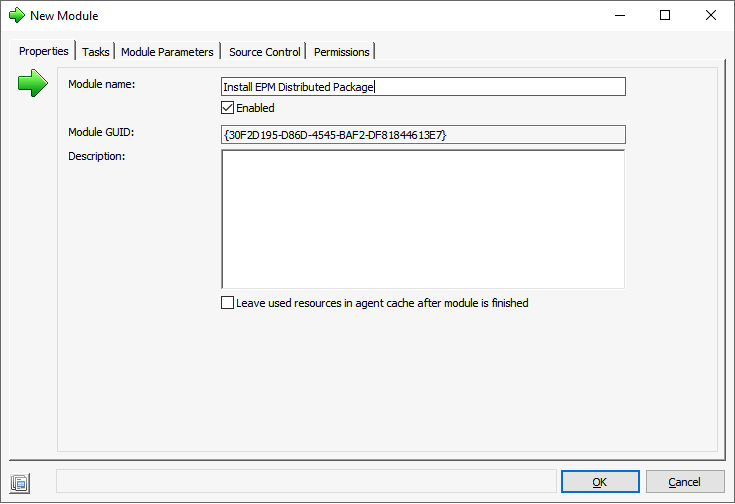
Create a new Module in the same folder as we have done before. Name the Module (i.e., Install EPM Distributed Package).
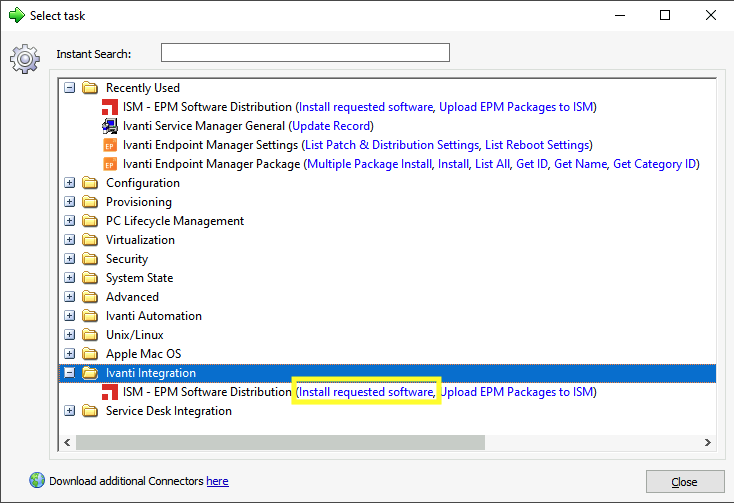
Select Add to create a new task. Select Ivanti Integration – Install requested software from the Task list.
After selecting the Task, three parameters need to be created. Use the AutoCreate Parameter option and execute this for all three Task Settings values.
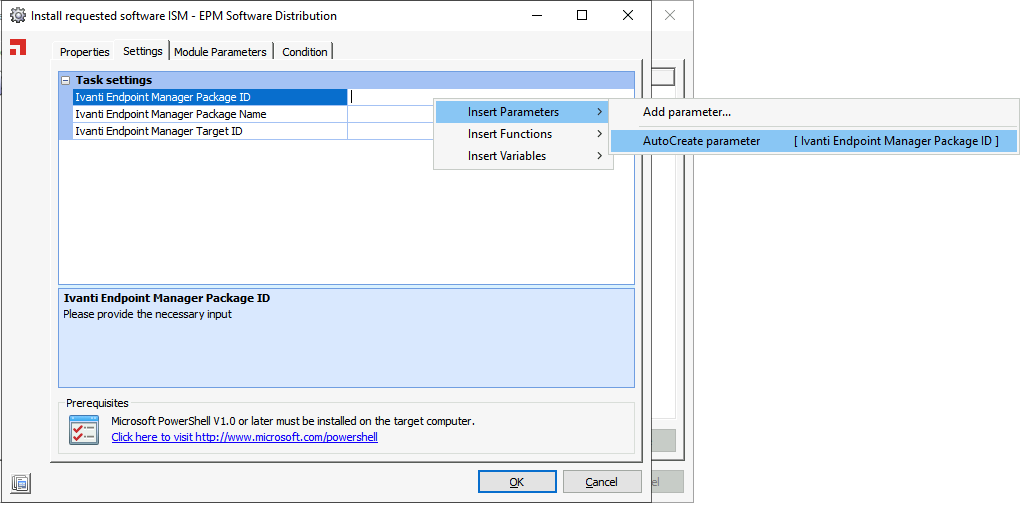
Select twice OK to create the Module.
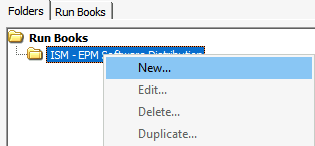
Select Runbooks in the Library and create a folder with the same name as in the Modules (this is to make it clearer). In the folder, create a new Runbook.
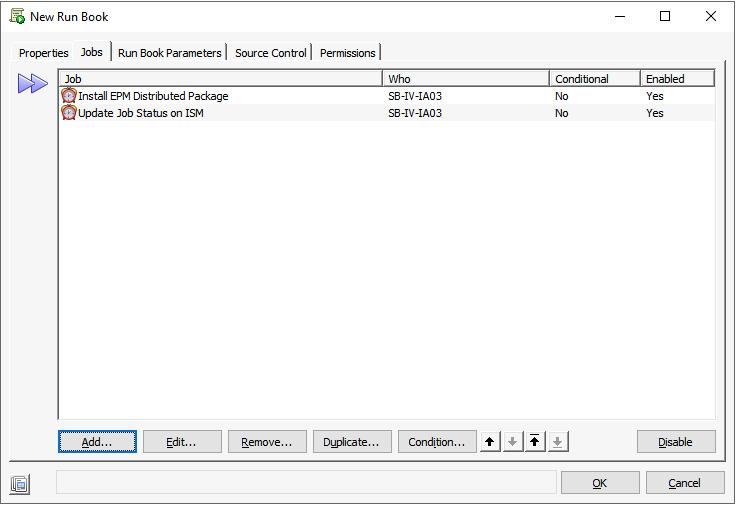
Name the Runbook (i.e., Software Installation performed by EPM requested by ISM), select the tab Jobs, and select Add.
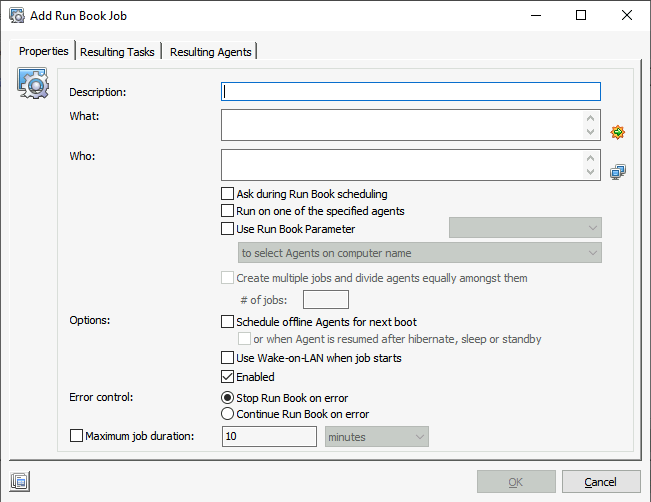
Click in the What field, select the Module that installs the EPM Package, and select OK.
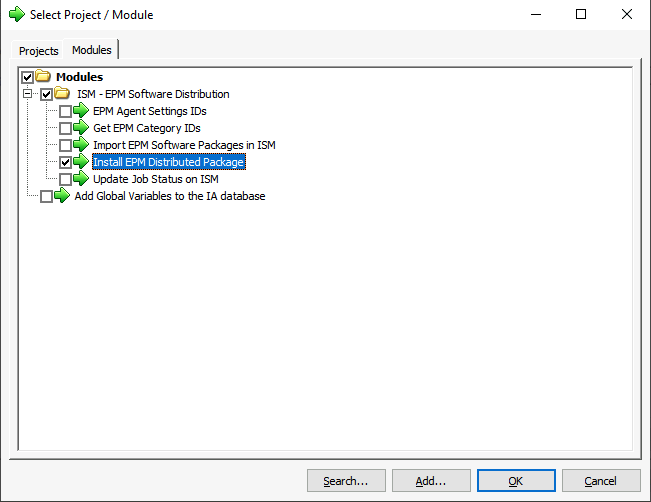
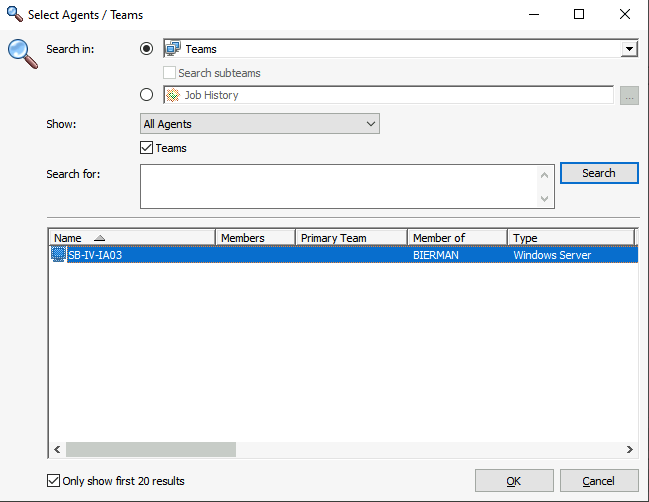
Click in the Who field, select Search, and add the IA Agent that executes the job.
In the Error control, select the option Continue Run Book on error.
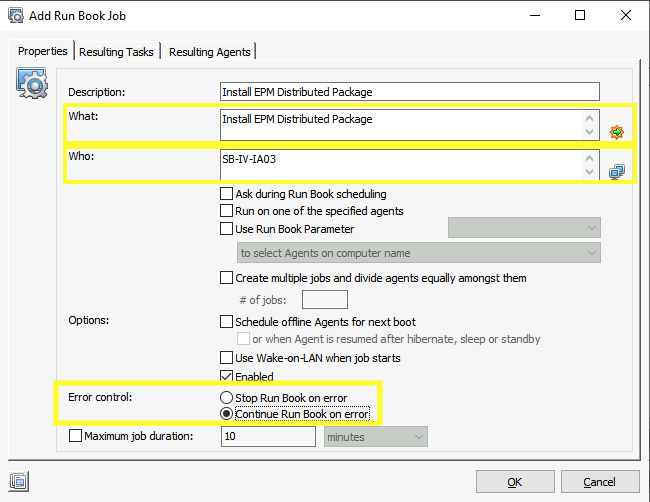
Select OK to store the first Module in the Runbook. Select Add again to add the second Module.
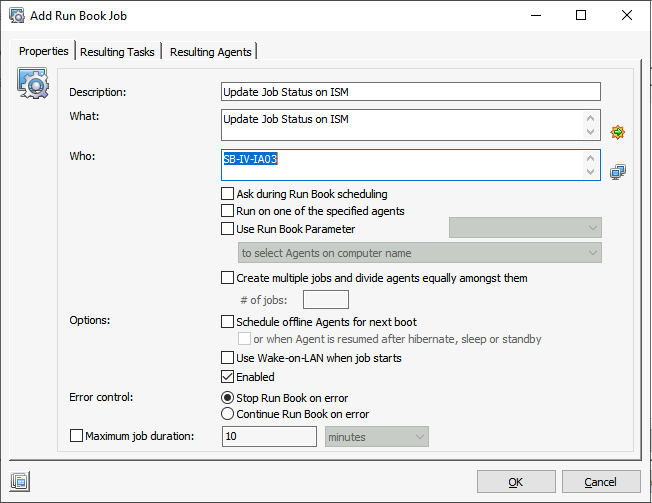
In the What field, select the Update Job Status on ISM Module (or the name given during the creation of the Module).
In the Who field, select the IA Agent. Leave all other settings default.
In the Jobs overview, 2 Modules are now added like shown in the screenshot below.
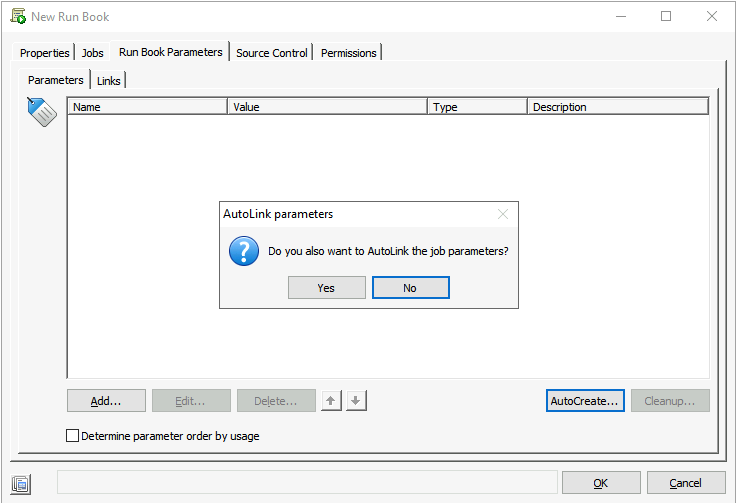
Select the tab Run Book Parameters and select AutoCreate. Select Yes to AutoLink the job parameters. This action will add all the Module Parameters in the RunBook as RunBook Parameters.
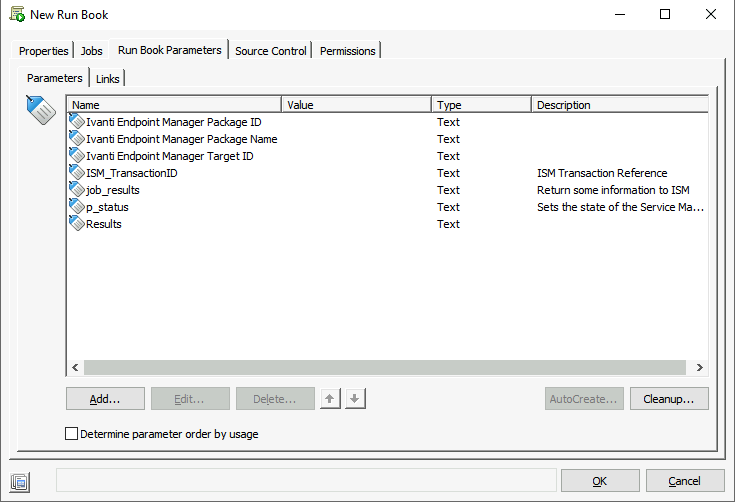
When finished, all parameters are added.
This finalizes all the actions in Ivanti Automation. Next, we need to import the IA Runbook into ISM and create a Request Offering to install software with the template earlier imported.
Open the ISM URL and log in. Select the wrench icon to open the AdminUI.

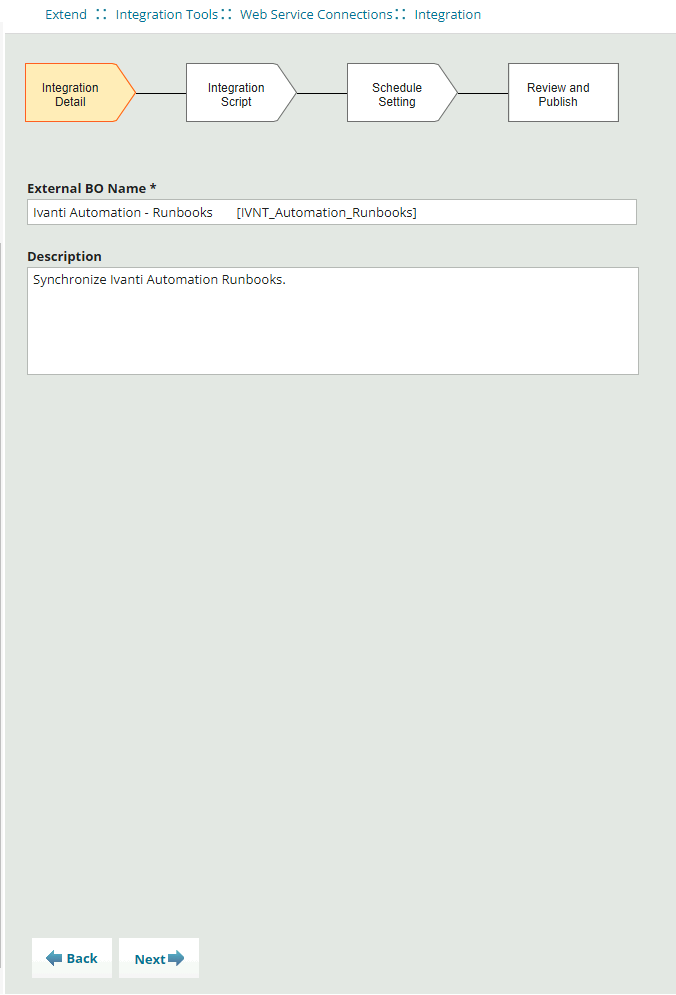
Select Extend – Integration Tools – Web Service Connections, and in the list, scroll down until you find IVNT_Automation_Runbooks.
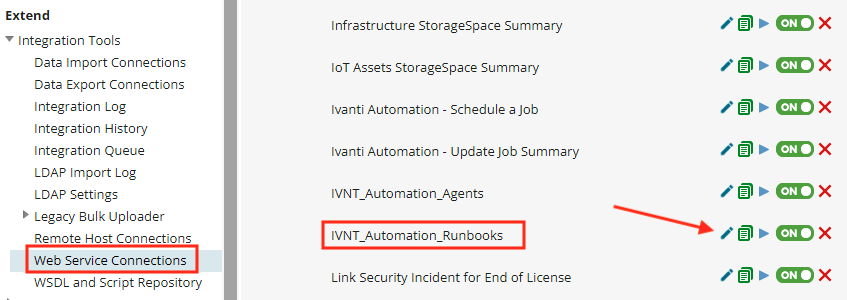
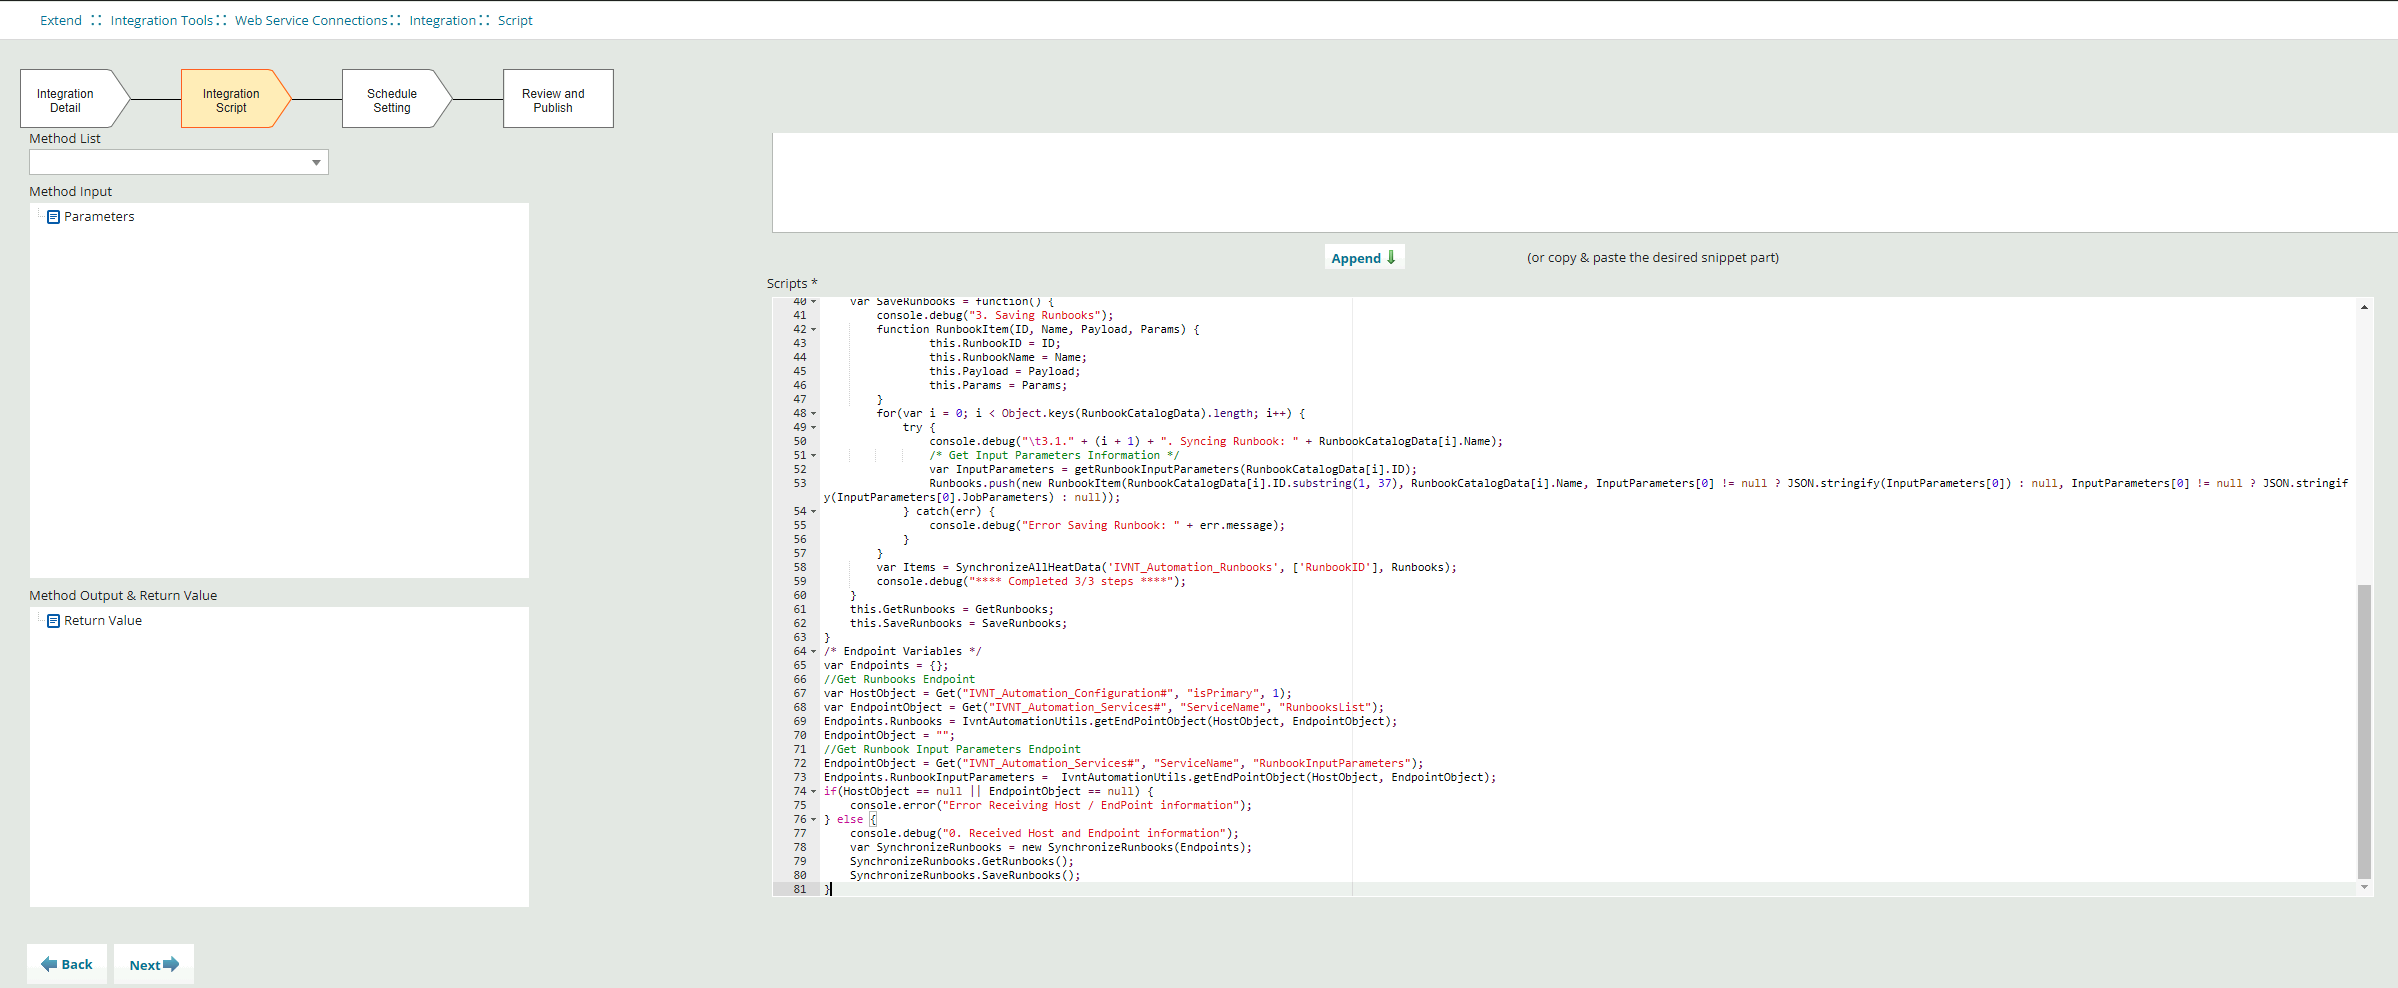
Select the pencil icon top open the integration. This integration will import the IA Runbooks into the BO.
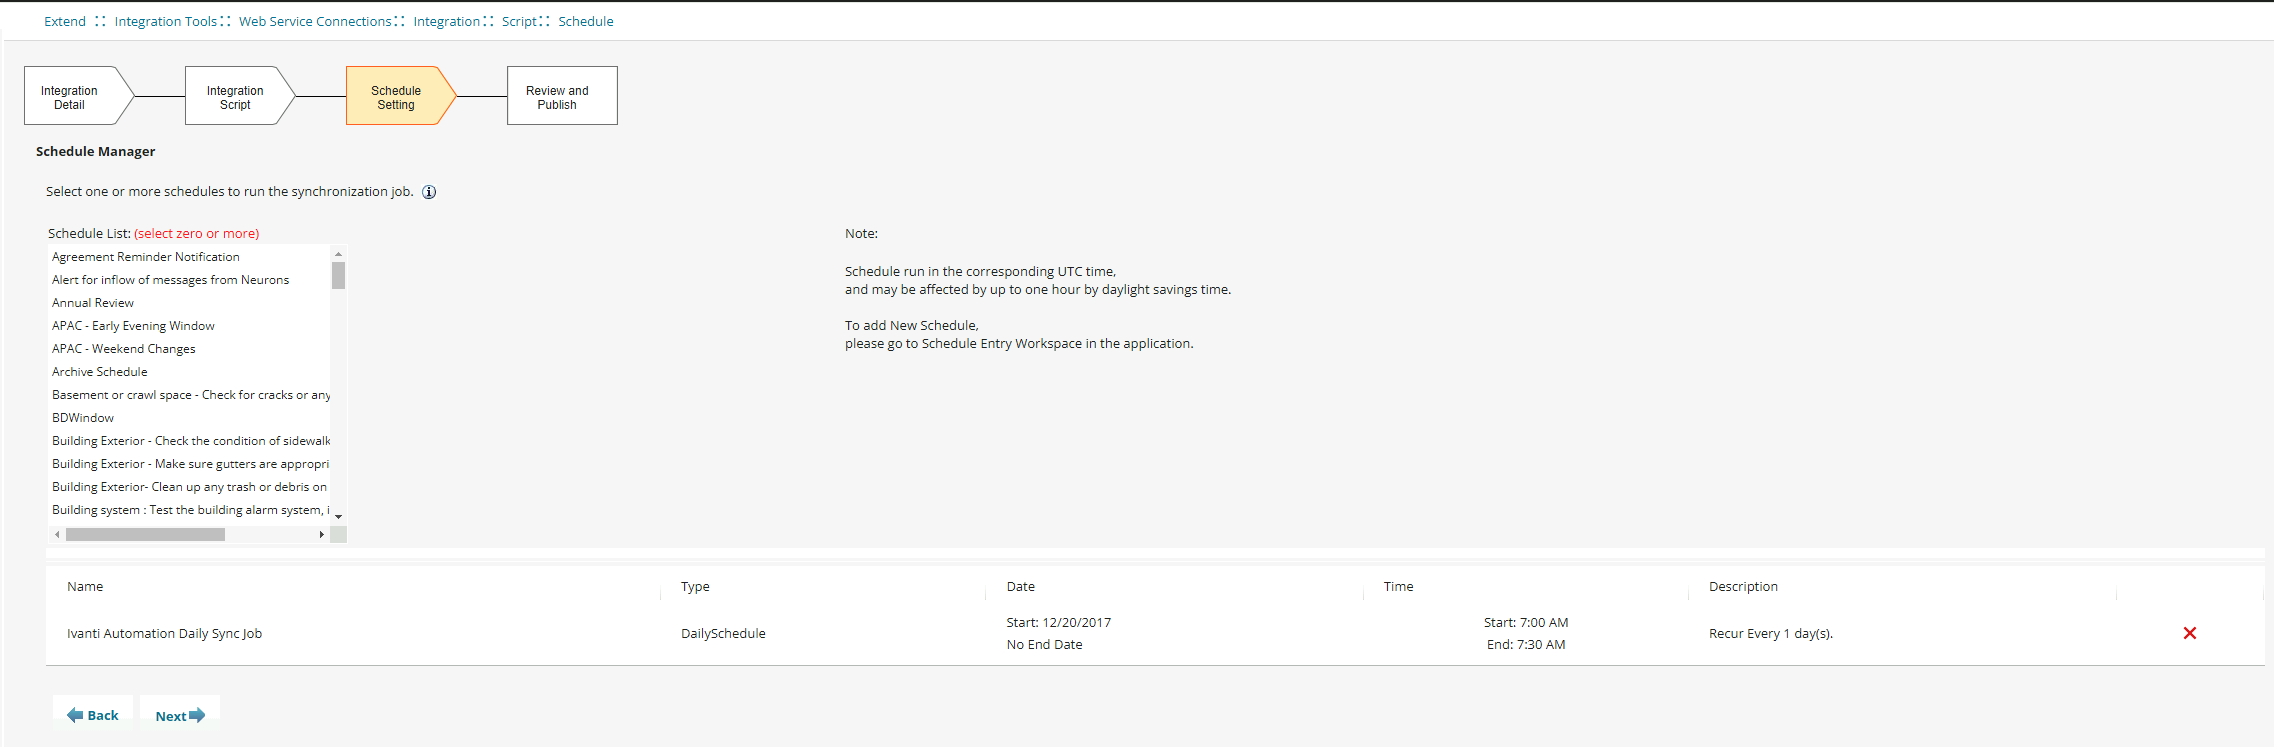
Select three times Next in the screenshots below.
In the screenshot below, select Publish & Run Now.

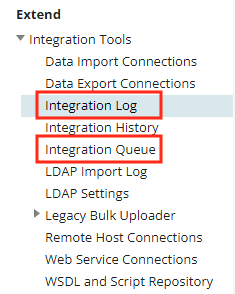
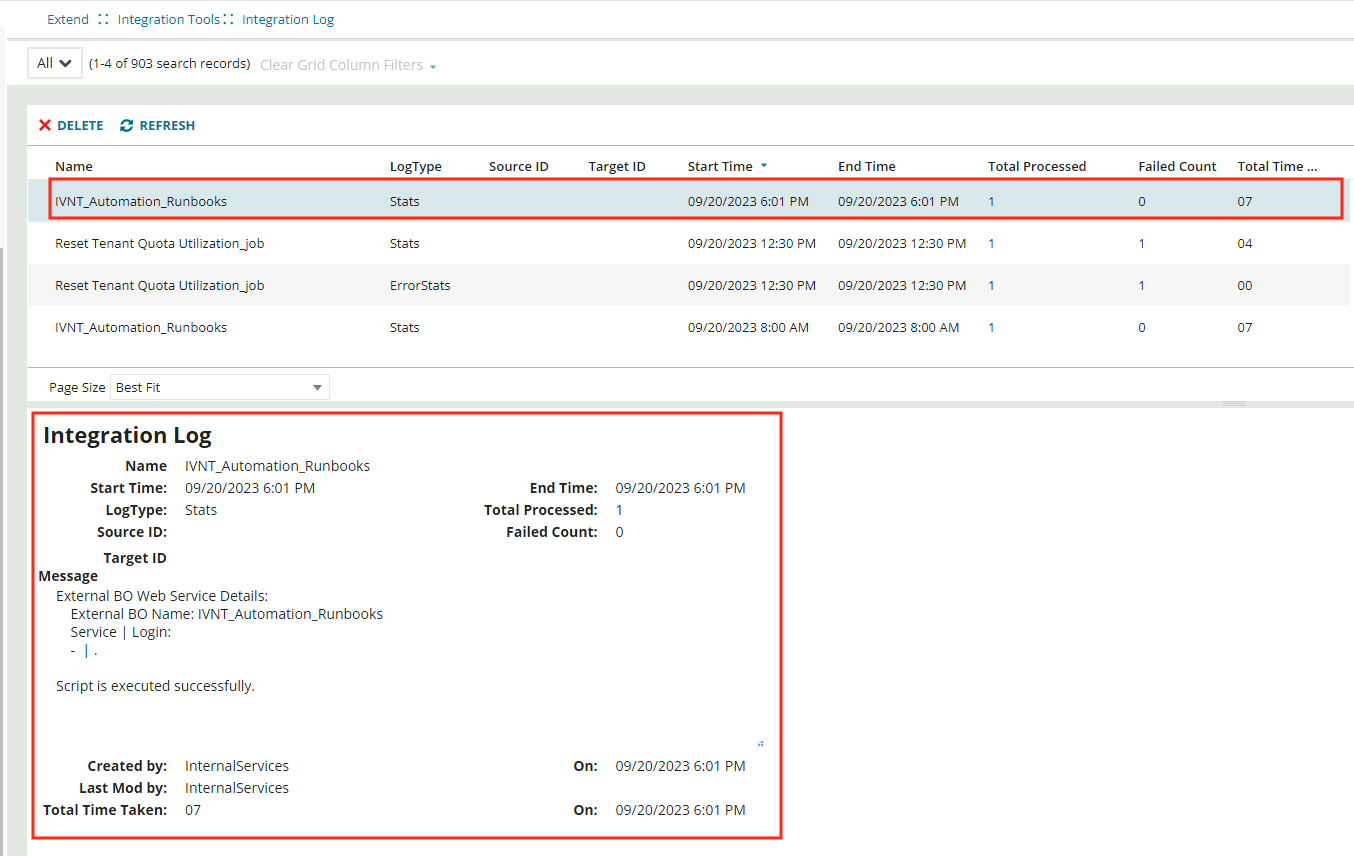
Select OK to continue. The job is moved to the Integration Queue and, when finished, to the Integration Log.
When the import is successfully finished, the column Failed Count shows 0.
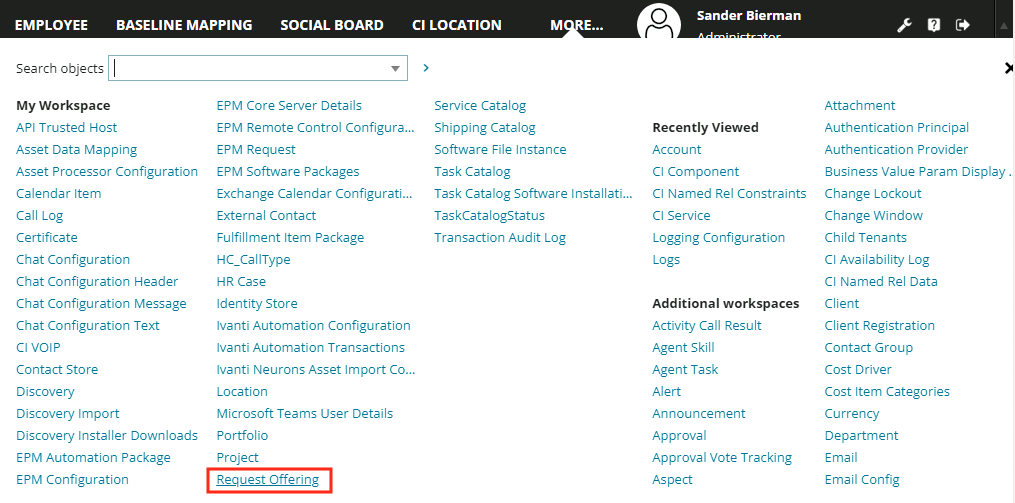
When the Runbooks are imported, we need to create a Request Offering from the Template earlier imported.
Move to the ISM Web Page and search for Request Offering in the More option in the menu.
Select the Software category from the category overview.
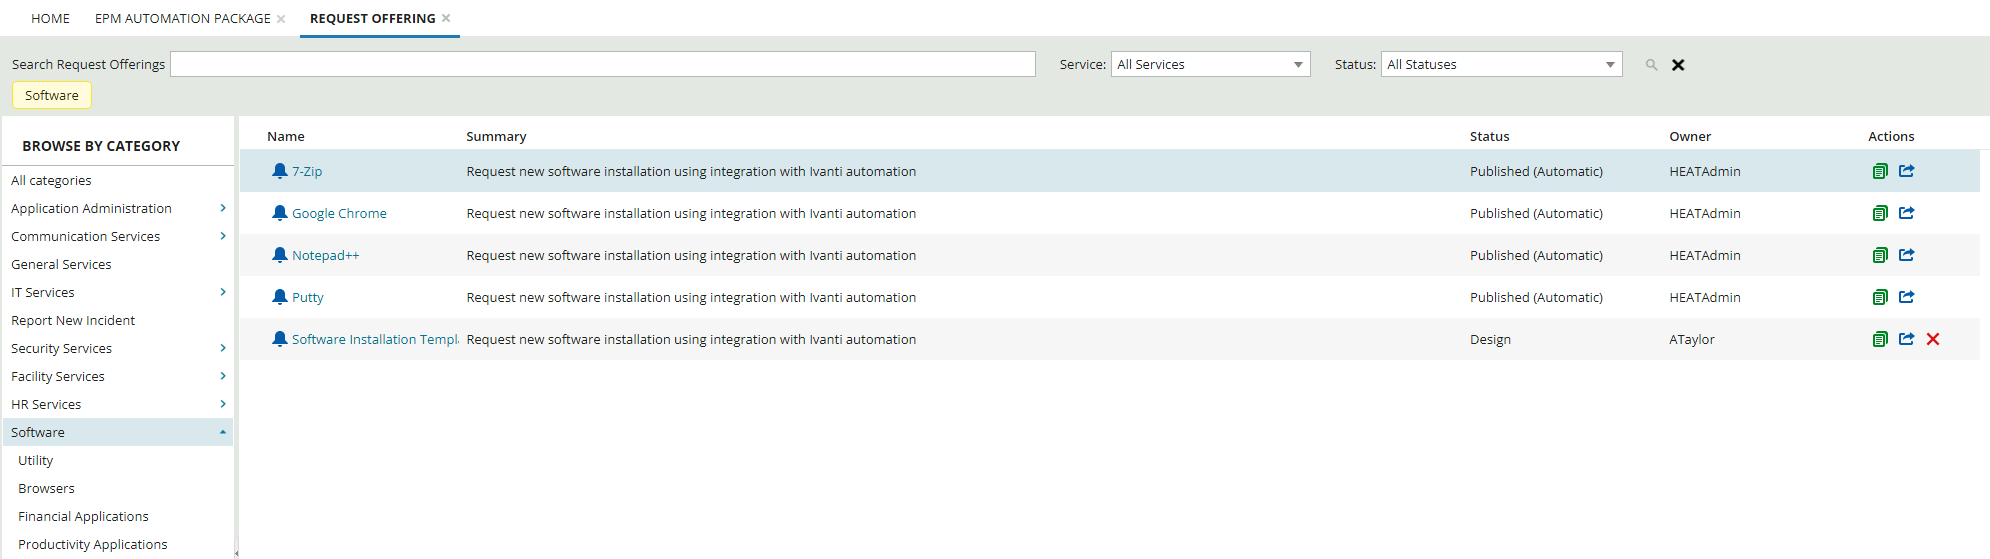
Select the Duplicate button next to Software Installation Template.

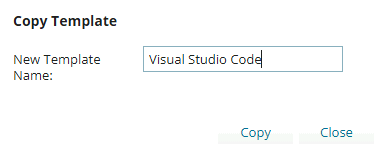
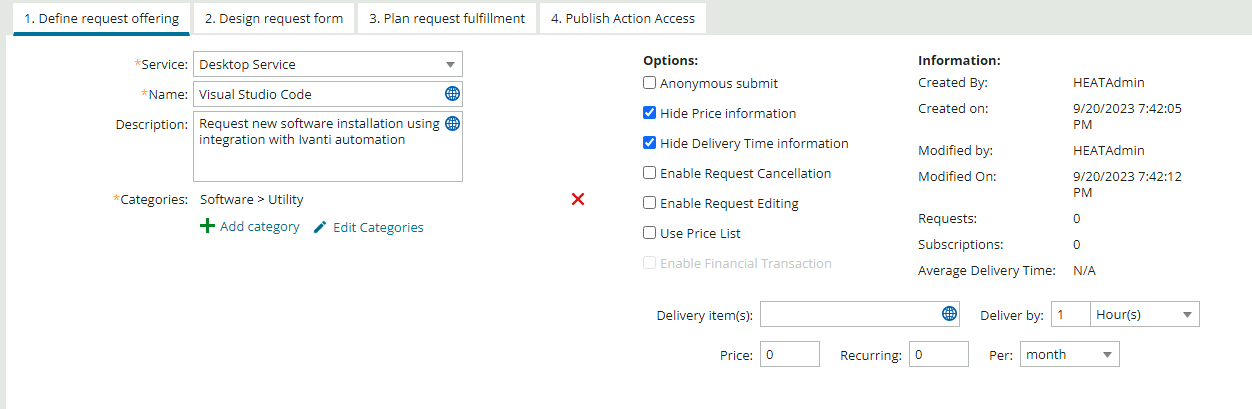
Give the template the name of the application/software to install. In this blog
After duplicating the template, the new Request Offering is opened on the first tab Define request offering. Change the values as needed. The screenshot below show my setting for distributing packages/installing software.
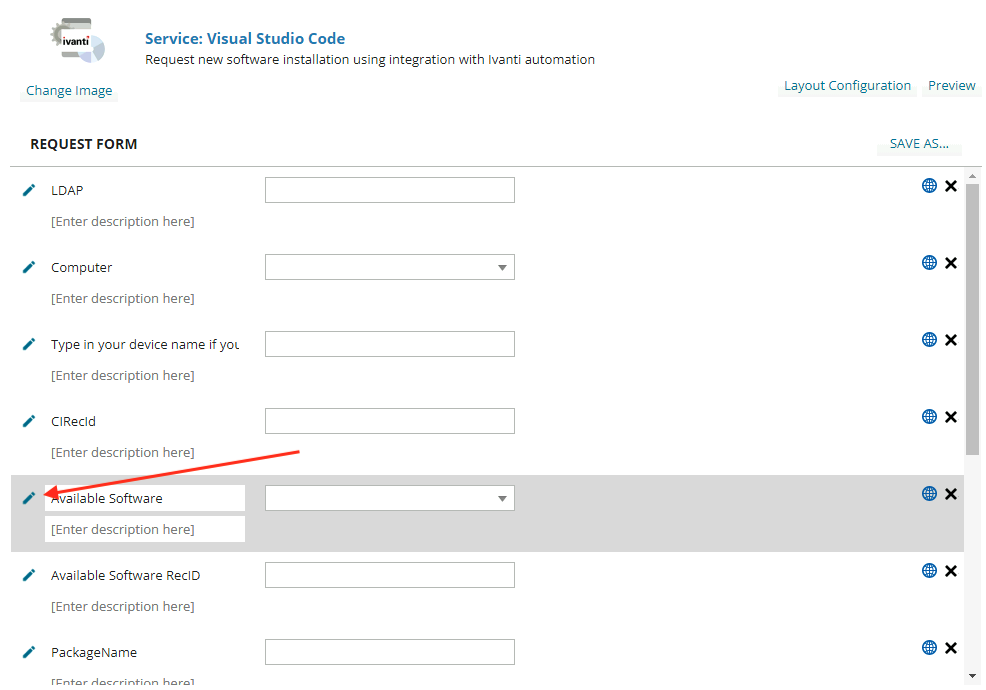
Select Next to move to the next tab, Design request form. Select the pencil icon in front of the value Available Software.
Select the option Default Value: None, change from None to Value, and select the software to be installed from the dropdown list. In this example we choose Visual Studio Code.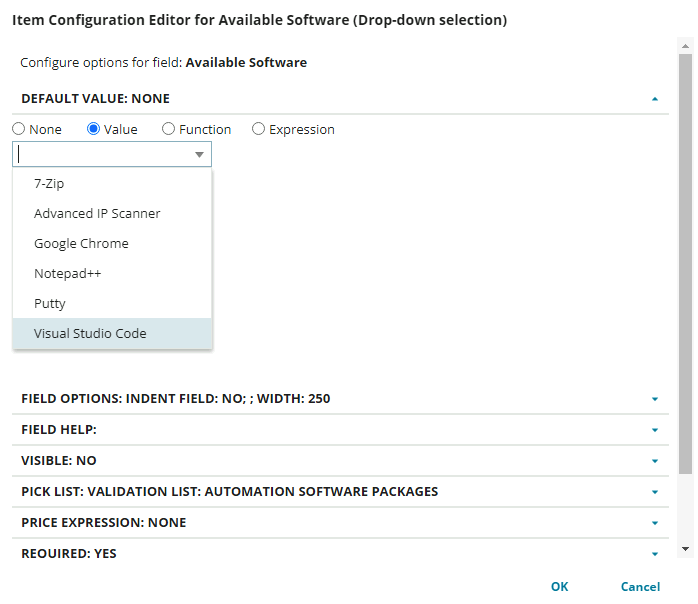
Select OK to save the settings. Select Next to continue to the next tab, Plan request fulfillment.
This tab shows the complete pre-defined workflow and includes an Ivanti Automation workflow action. Scroll down and to the right to find the workflow action Trigger Software Installation.
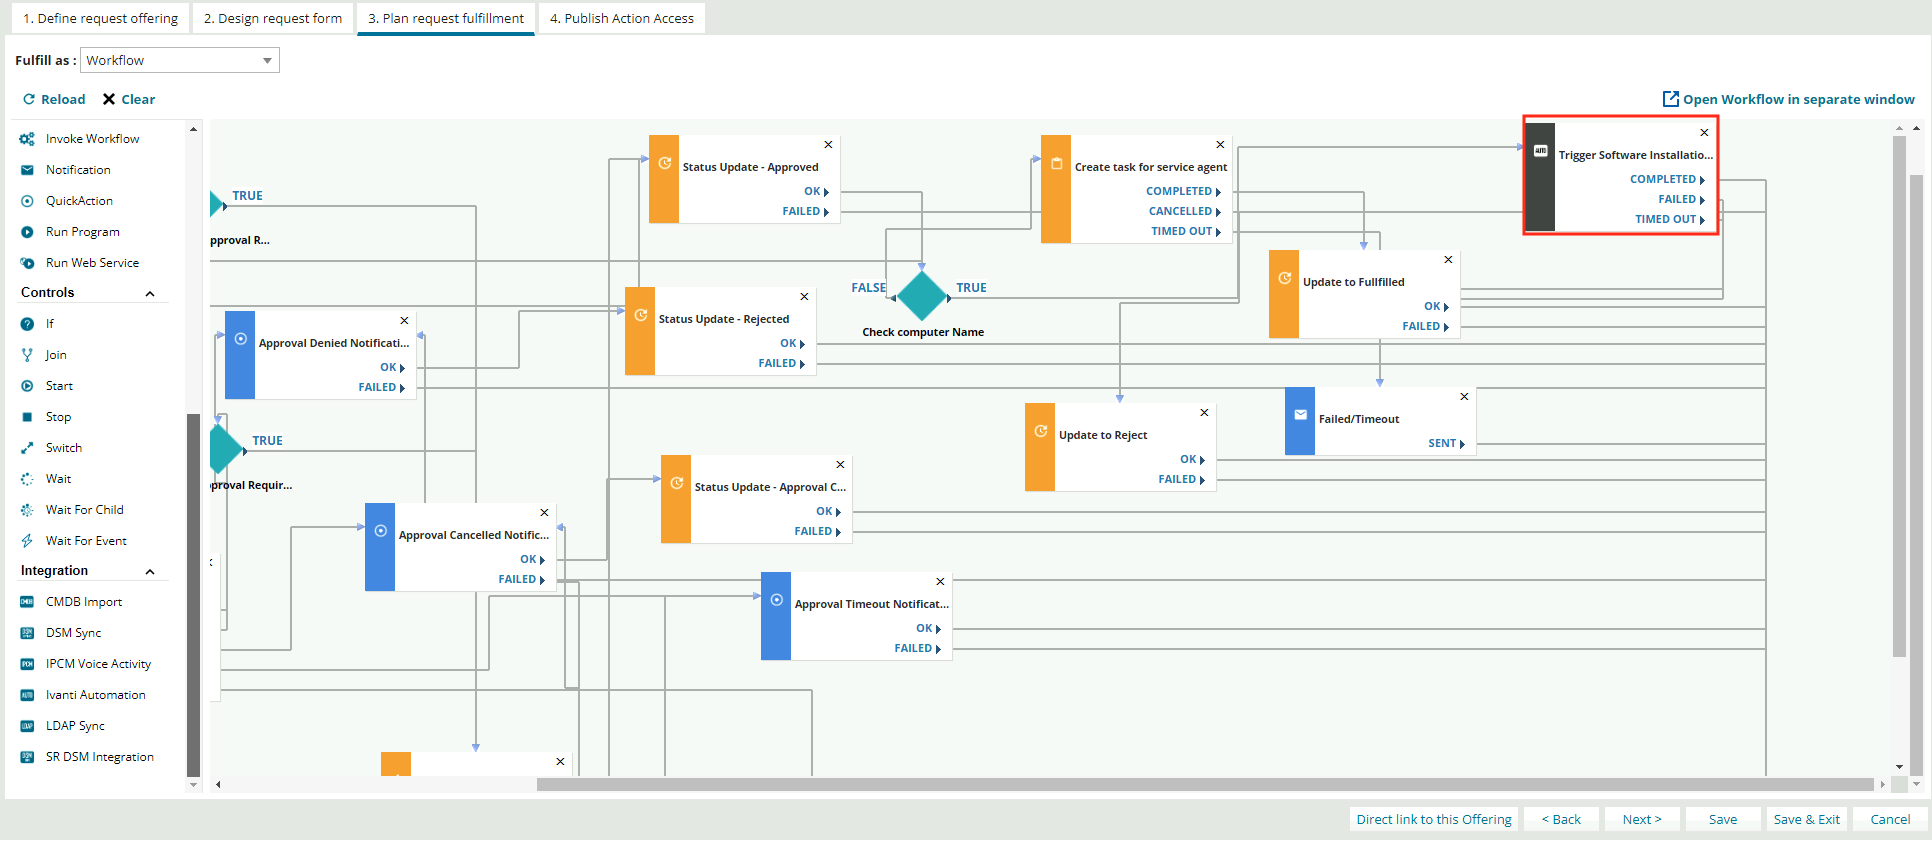
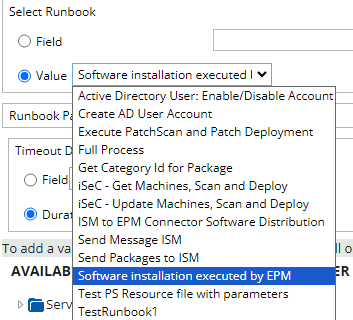
Double-click the workflow action, and a new window opens. In the Select Runbook, select the Runbook created earlier. In this example, the name of the Runbook is Software Installation executed by EPM.
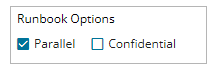
Enable the option Parallel in the Runbook Options.
Expand the Available Fields Service Request Templates – Visual Studio Code. All the form items are available in the list.
Drag and drop the following items to the corresponding Parameter Fields.
- PackageID ? Ivanti Endpoint Manage Package ID
- PackageName ? Ivanti Endpoint Manage Package Name
- Computer ? Ivanti Endpoint Manage Target ID
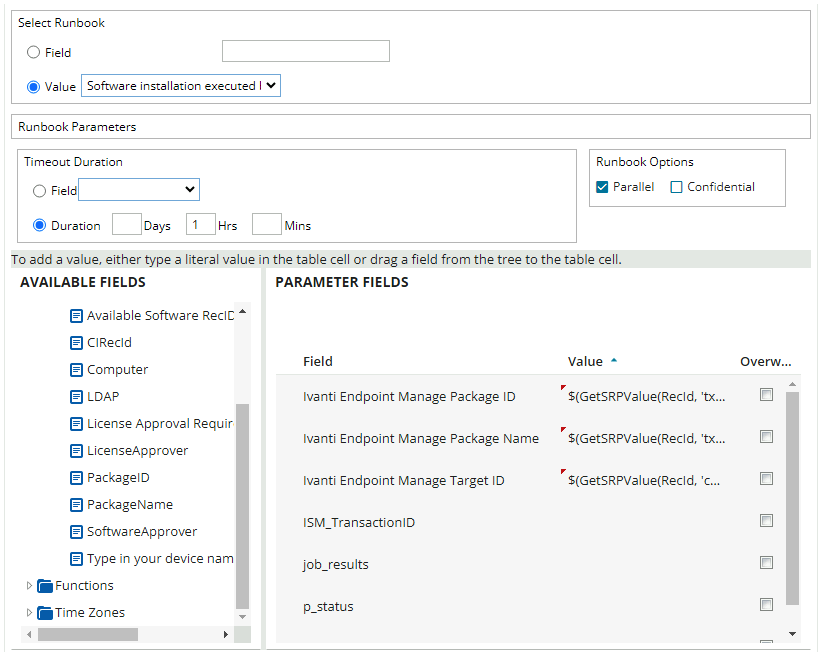
Select Save to store the Ivanti Automation workflow action. Select Next to move to the next tab Publish Action Access.
Change the status from In Design to Published.

Select Save & Exit to finish the Request Offering.
This finalizes the configuration for all the components.